
Have you ever wondered why your drywall installation doesn’t look as polished as a professional’s? You’re likely falling into common traps that many do-it-yourselfers encounter. From skipping the essential step of marking framing locations to forgetting to measure and fit before fastening, these mistakes can lead to less than satisfactory results. But don’t worry, there’s a way to avoid these pitfalls and achieve a seamless finish. By identifying frequent errors and applying simple solutions, you’ll be on the path to a flawless installation. Curious about how to tackle these issues head-on? Stay tuned for important tips that will elevate your drywall game.
Missing Edge Support
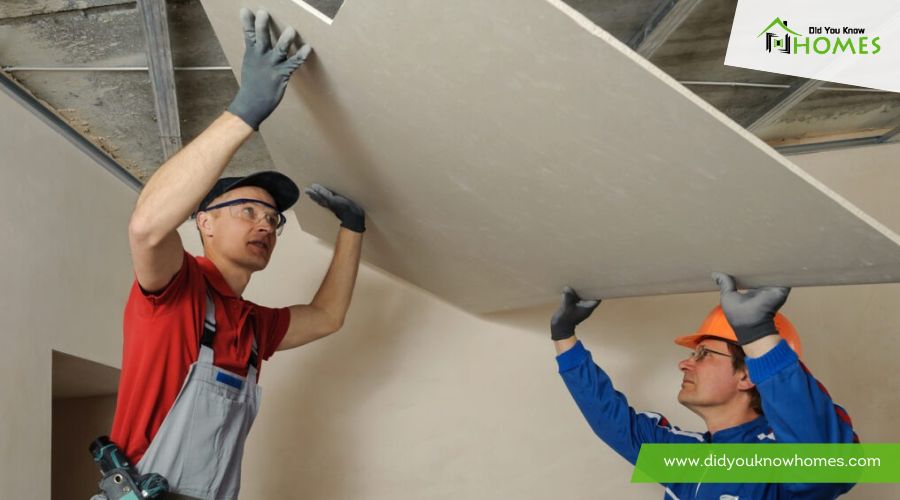
Before you begin your drywall project, inspect the framing to make sure it has proper edge support, checking for alignment with ceiling framing to add necessary stability. It’s vital for you to confirm that every wall or ceiling section is prepped correctly to avoid any issues later on. When you’re looking over the framing, keep an eye out for places where the drywall might not have the edge support it needs. This is a common mistake, but it’s one you can easily prevent.
To remedy any potential problems, consider adding blocking between framing locations. This step is especially important in areas where the drywall edges will be exposed or bear a significant amount of weight. Adding blocking not only provides the necessary edge support but also strengthens the overall structure of the wall or ceiling. Don’t forget to secure the framing properly; this includes making sure there’s at least 1 inch of exposed framing at corners, which is key for a stable installation.
Incorrect Framing Locations

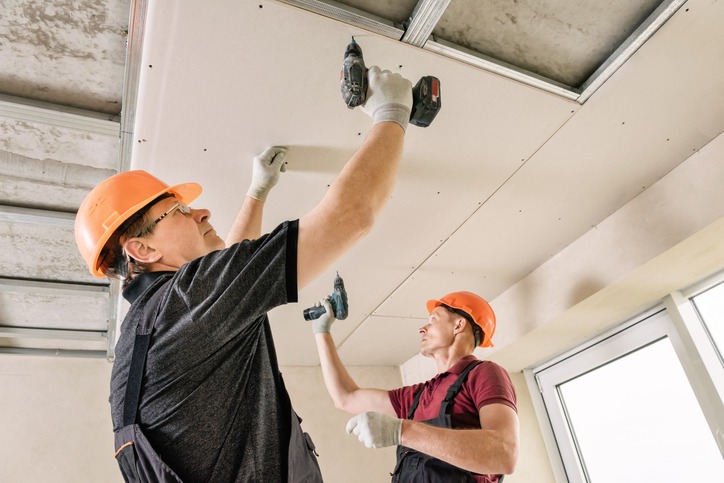
To prevent incorrect framing locations, always mark framing sites before installing drywall, ensuring your screws hit the mark every time. This important step is vital for the integrity and appearance of your finished walls. By using marked locations as your guide, you’ll guarantee each screw is placed accurately, avoiding the common pitfall of guessing where to fasten the drywall.
Here’s how to maintain precision and consistency in your framing and drywall installation:
- Mark ceiling joist locations on top of wall framing to align the drywall properly with the ceiling structure. This prevents any misalignment that can lead to uneven or sagging ceilings.
- Indicate stud centers on the floor below to maintain a consistent framework across the wall. This ensures that when you’re attaching the drywall, each panel is supported adequately by the studs.
- Mark stud locations on the ceiling before proceeding with the installation to avoid any errors. This step is especially important for guaranteeing that the ceiling drywall is securely fastened.
Overlooking Tapered Edges
After making sure your framing locations are accurate, don’t forget that paying attention to the tapered edges in drywall is equally important for a smooth finish. Tapered edges are essential for creating smooth shifts between sheets, allowing for a seamless look once everything is in place. To achieve proper tapering, you should always leave a 1/8 inch gap on all edges during installation. This small space is critical; it prevents common issues like crumbling, chipping, and uneven seams that can detract from the overall appearance of your walls.
Furthermore, properly tapered edges simplify the process of filling gaps. They guarantee that you can easily apply joint compound to achieve a flawless, seamless finish that looks professional. Remember, the key to a successful drywall installation lies in cutting your edges correctly to guarantee they are tapered. This step might seem minor, but it plays a significant role in the final outcome. Skipping it or doing it haphazardly can result in a wall that looks uneven and poorly constructed. So, always make sure to give the necessary attention to your drywall’s tapered edges to avoid these pitfalls.
Fitting Before Fastening
Guarantee you measure and fit your drywall around obstacles first, avoiding the urge to force it into place, which can lead to breaks or cracks. Fitting before fastening is a critical step in drywall installation that can’t be overlooked. By taking the time to properly measure and fit drywall, you make certain a smoother installation process and a cleaner final look.
Here are three essential tips to remember:
- Measure and Fit Drywall Around Obstacles Before Fastening: Make sure you’ve accurately measured the space and any obstacles. This prevents the need to force the drywall into position, which can cause damage.
- Trim Excess Drywall for a Perfect Fit: Utilize a utility knife for precise cuts to trim any excess drywall. This step ensures the drywall fits snugly around obstacles before you fasten it.
- Hold Drywall in Position Before Securing: Before you grab your screws, make sure the drywall is perfectly aligned and held securely in position. This makes certain that when you fasten it, the drywall stays where it’s supposed to, without any unwanted movement or gaps.
Excessive Drywall Joints
Facing too many drywall joints in your project? You’re not alone. This section will guide you on how to cut down on unnecessary joints through proper panel sizing and efficient layout planning, ensuring smoother installation and finishing.
Reducing Joint Overuse
Minimizing the number of joints in your drywall installation can greatly streamline the process, ensuring a smoother finish. By taking a few strategic steps, you can reduce joints and achieve a more seamless look. Here are key actions to contemplate:
- Use Large Drywall Sheets: Opt for the largest and longest sheets available. This reduces the number of horizontal joints and aids in achieving a more seamless finish.
- Choose Extra-Wide or Custom Sheets: Extra-wide or custom drywall sheets can notably minimize joints, especially in larger areas.
- Purchase Additional Materials: Having additional materials on hand guarantees you can effectively cover any space with minimal joints, supporting a smoother installation process.
Proper Panel Sizing
To effectively tackle the issue of excessive drywall joints, it’s important to focus on proper panel sizing from the outset. Opting for the largest and longest drywall sheets you can manage minimizes unnecessary joints, leading to a more seamless installation. Consider custom or extra-wide drywall sheets to cover larger areas with fewer cuts. This approach not only saves time and effort in taping and finishing but also reduces the need for additional materials.
| Strategy | Benefit |
|---|---|
| Using largest and longest sheets | Minimize joints for a seamless finish |
| Opting for custom sheets | Reduce multiple joints |
| Choosing extra-wide sheets | Cover larger areas with fewer joints |
Efficient Layout Planning
After mastering proper panel sizing, it’s time to focus on efficient layout planning to further reduce excessive drywall joints. Efficient layout planning in drywall installation is important to achieving a seamless finish while minimizing material waste. Here’s how you can guarantee fewer joints and a professional look:
- Use the Largest Drywall Sheets: Opt for the largest and longest drywall sheets possible to minimize joints. Larger sheets mean fewer seams and a smoother finish.
- Consider Extra-Wide or Custom Sheets: Extra-wide or custom drywall sheets can greatly reduce the number of joints, leading to a more seamless look and less taping and finishing work.
- Plan for Material Efficiency: Purchasing additional materials might seem important, but ensuring you have enough to use the largest sheets will save you time and money in the long run by reducing effort in taping and finishing.
Embedded Screws Too Deep
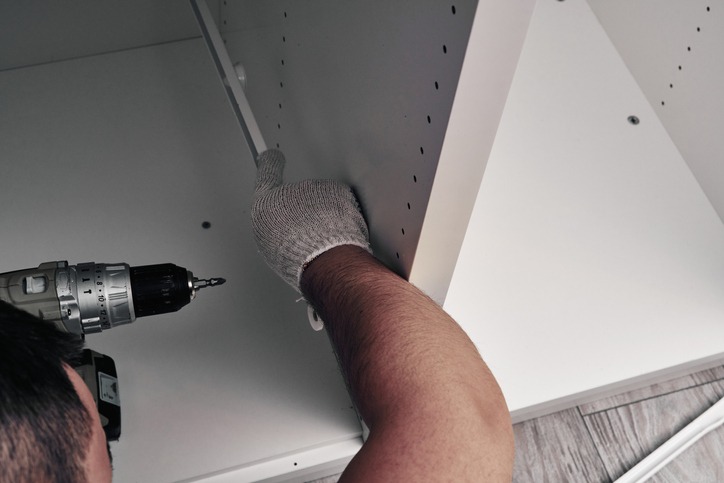
When installing drywall, it’s imperative to avoid embedding screws too deep, as this can compromise the wall’s stability and appearance. Screws embedded too deep can weaken the hold and damage the surface, leading to challenges in finishing and mudding. Achieving the proper screw depth is critical for ensuring the stability and strength of your drywall installation. It’s a fine balance; overscrewing can have a major impact on the overall integrity of the wall.
To steer clear of these issues, pay close attention to maintaining the correct screw depth. This doesn’t only prevent damage but also guarantees a smooth and professional finish. Remember, the goal is to have the screw slightly dimple the drywall surface without breaking the paper. This precise depth provides enough grip for the screw while preventing any unnecessary damage to the drywall itself.
Avoiding screws embedded too deep is more than a detail; it’s a fundamental aspect of a successful drywall installation. By focusing on the correct screw depth, you fortify the wall’s stability and strength, setting a solid foundation for the finishing touches. Keep these tips in mind, and you’ll achieve a flawless installation that stands the test of time.
Over-Sanding Surfaces
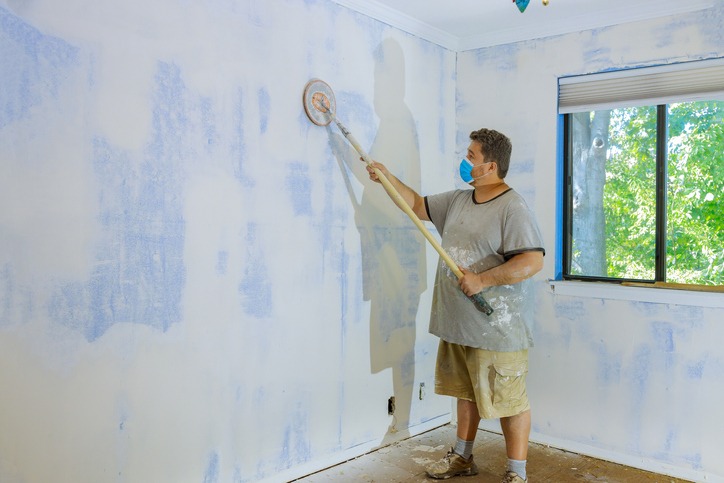
Just as paying attention to screw depth is important, so is making sure you don’t over-sand drywall surfaces. Over-sanding can greatly damage the material and compromise its integrity, making it difficult to achieve a flawless finish. It’s vital to understand that a gentle approach can prevent a lot of headaches down the line.
Here are three critical points to remember to avoid over-sanding:
- Use Proper Techniques: Gentle and cautious sanding techniques are your best bet. Avoid aggressive sanding, as it’s a surefire way to damage the drywall surface. Instead, opt for a light touch and sand in a circular motion to maintain an even surface.
- Ensure Adequate Lighting: Good lighting is important when sanding. It helps you see the progress and makes sure you don’t miss any spots, reducing the risk of creating uneven surfaces. Always work in a well-lit area to achieve a smooth and consistent finish.
- Avoid Aggressive Practices: Steer clear of the temptation to rush the job by sanding too aggressively. This can lead to uneven surfaces that are challenging to repair and finish properly. Patience and a gentle approach are key.
Ignoring Manufacturer Instructions
Ignoring manufacturer instructions during drywall installation isn’t just a minor oversight; it can greatly impact the project’s success and safety. Following these guidelines guarantees proper drywall installation, which is vital for avoiding structural issues and compromised integrity. Manufacturer instructions provide specific details, such as correct screw placement, framing support, and joint finishing techniques, that are essential for a durable installation.
Neglecting these recommendations can lead to a variety of problems. Incorrect screw placement may weaken the drywall’s hold, while inadequate framing support increases the risk of sagging or cracking. Improper joint finishing can result in unsightly seams that compromise the wall’s appearance and structural integrity. Additionally, ignoring the manufacturer’s guidelines can void warranties, leaving you without recourse in the event of failure or safety hazards.
Always refer to the manufacturer’s recommendations to ensure ideal drywall installation results. This adherence not only upholds the integrity of your work but also safeguards against potential safety hazards. By following the provided instructions, you’ll avoid common pitfalls and achieve a professional finish that stands the test of time.
Conclusion
To sum up, you’ve got this. By paying close attention to edge support, marking framing locations accurately, utilizing tapered edges, fitting before fastening, minimizing joints, setting screws just right, avoiding over-sanding, and following manufacturer instructions, you’ll sidestep the common pitfalls of drywall installation. Remember, it’s all about the details. Taking these steps guarantees a smoother finish and a more professional look. So go ahead, apply these solutions, and watch as your drywall project turns out nearly flawless.