
There are reasons you are wondering about painting your ceiling. It may be because your ceiling painting does not go well with the interior design of your home, or it is already fading. Painting a ceiling can be a challenging task, especially if it is your first time doing it. But with the use of the right tools and following the best tips, it does not have to be a frustrating experience. Proper preparation is needed to achieve a smooth and flawless finish for your ceiling.
If you are thinking of painting your ceiling soon but don’t know how to start and what tools to use, we are here to help you. In this article, we are going to give you ideas on the essential tools you will need for painting a ceiling, along with some tips to help you make the process easier and more efficient.
Tools Needed for Painting a Ceiling

A new color, texture, or finish can help make your ceiling look amazing. Painting a ceiling is similar to painting a wall. In order to repair existing issues and protect your furniture, floors, fixtures, and the like, planning is very important to achieve a successful painting session.
One of the key steps is to know the important tools needed. If you know and use the right tools, you’ll be able to paint your ceiling a lot faster and with less fatigue. Below are the tools needed to paint a ceiling:
Paint Roller
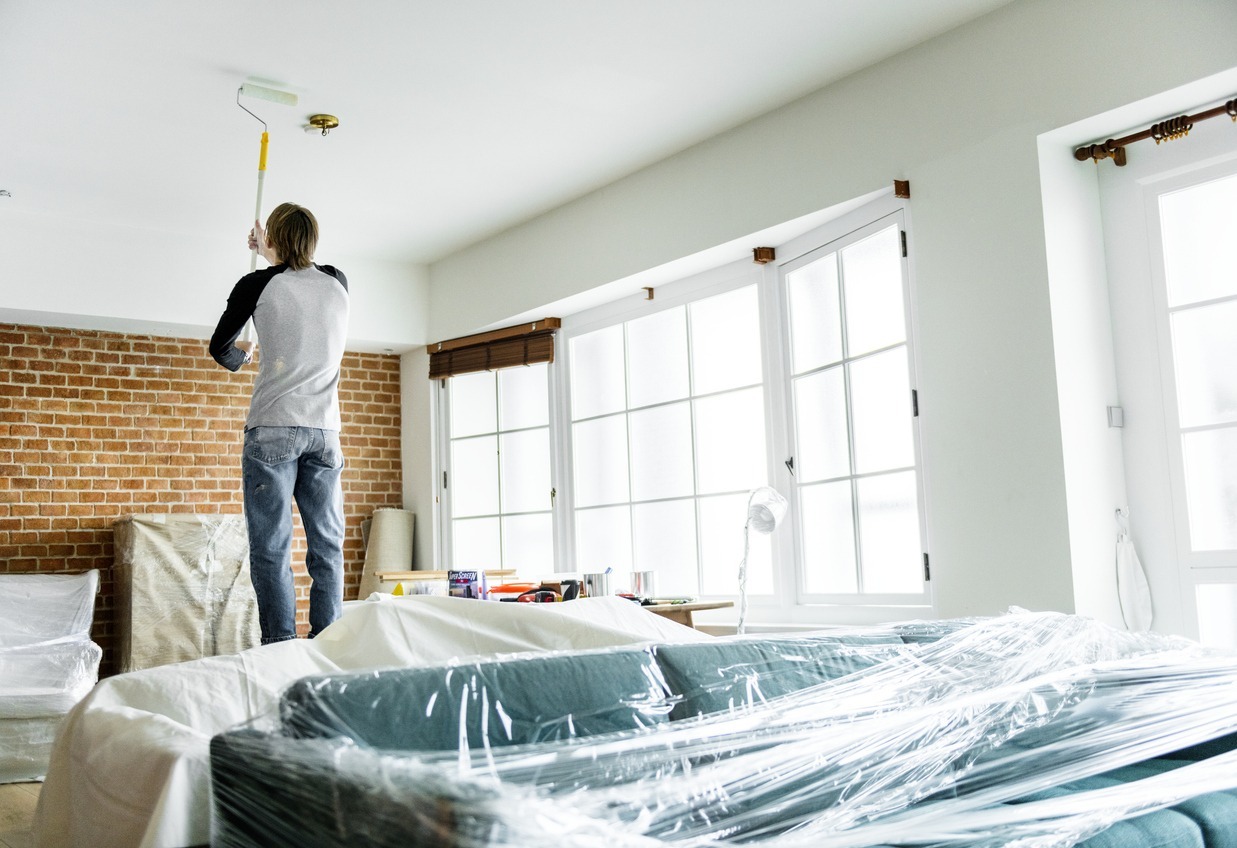
One of the fastest ways to roll out a large ceiling is by using an 18-inch paint roller instead of a standard 9-inch roller. It can cover more surface area faster, and it reduces overlapping. They are large paint rollers that get a little heavy from paint saturation, but you will be able to roll out your ceiling a lot faster.
However, note that an 18-inch roller is best for a larger ceiling and not a small ceiling, like one in a bathroom. The best roller nap size for painting a ceiling is ¾-inch. It can hold more paint to cover the ceiling faster compared to using a ½-inch nap or 3/8-inch nap.
Extension Pole
Using an extension pole can make your work a lot easier. It can help you roll paint on walls and ceilings with less strain on your back and arms. Therefore, if you are thinking of painting your ceilings at home, make sure that you are using an extension pole. For a standard 8-foot ceiling, you can use a pole that extends a maximum of 8 feet. If you are going to paint high ceilings, a 16-foot pole works great. There are also painting poles equipped with a ceiling roller and an extendable paint brush. They can make it possible to paint a whole ceiling without even using a ladder.
Extendable Paint Brush
It is also great if you can have an extendable paint brush as it can help you paint hard-to-reach corners of your ceiling. There are also brush adapters that are used to hold paint brushes or extendable paint brushes. It can be attached to an extension pole, and the neck of the brush bends to any angle that you need. This will allow you to paint any ceiling without the need to climb up and down the ladder.
Ladder or Scaffold
If you do not have an extendable paint brush, you can also use a ladder or scaffold, depending on the height of your ceiling. If you have a high ceiling, you need a sturdy ladder or scaffold in order for you to reach the ceiling safely.
Drop Cloth or Plastic Sheeting
You also need to cover the floor and any furniture or fixtures inside the room if you are going to paint the ceiling. You can do this by using a drop cloth or plastic sheeting to protect these items from paint drips and spills.
Paint Tray and Liners
Paint trays and liners can help make it easier for you to load your paint roller with paint and keep your workspace clean from any paint spills and drops.
Paintbrushes
It is also great if you have a variety of paintbrushes, including a wide brush for cutting in around the edges and smaller brushes for touch-ups.
Painter’s Tape
A painter’s tape is also handy as you can use it to protect the walls and other surfaces that you do not want to get paint on.
Sandpaper or Sanding Sponge
You may also need to have some sandpaper or sanding sponge to sand the ceiling to create a smooth surface before you start painting.
Cleaning Supplies
It is also handy to have cleaning supplies on hand to clean up any paint drips or spills as you work. Aside from these tools, you may also want to use safety tools, such as safety glasses, cleaning gloves, a hat, drop clothes, and an apron when painting your ceiling. Keep in mind that it is a messy task, so wear clothes that are fine for you to be splattered with paint, and put as many drop cloths as possible to prevent paint from getting all over the room.
Ceiling Painting Preparation Tips
Preparing the surface of the ceiling is one of the most important steps before painting it. This way, you can ensure that your painting process will be smooth and hassle-free. Below are some preparation tips that you can follow before painting your ceiling:
Clear Out the Room and Cover Everything to Protect from Splashes
In an ideal world, you will be able to move everything out of the room or space to protect it from paint drips. This will also give you full access to the room to paint the ceiling without getting in the way. However, this is not always possible. In case there are furniture pieces that are hard to move, you can just cover them with drop cloth or plastic sheeting. The same goes for protecting your floorboards, carpets, and tiles from paint.
Clean and Sand the Ceiling Surface
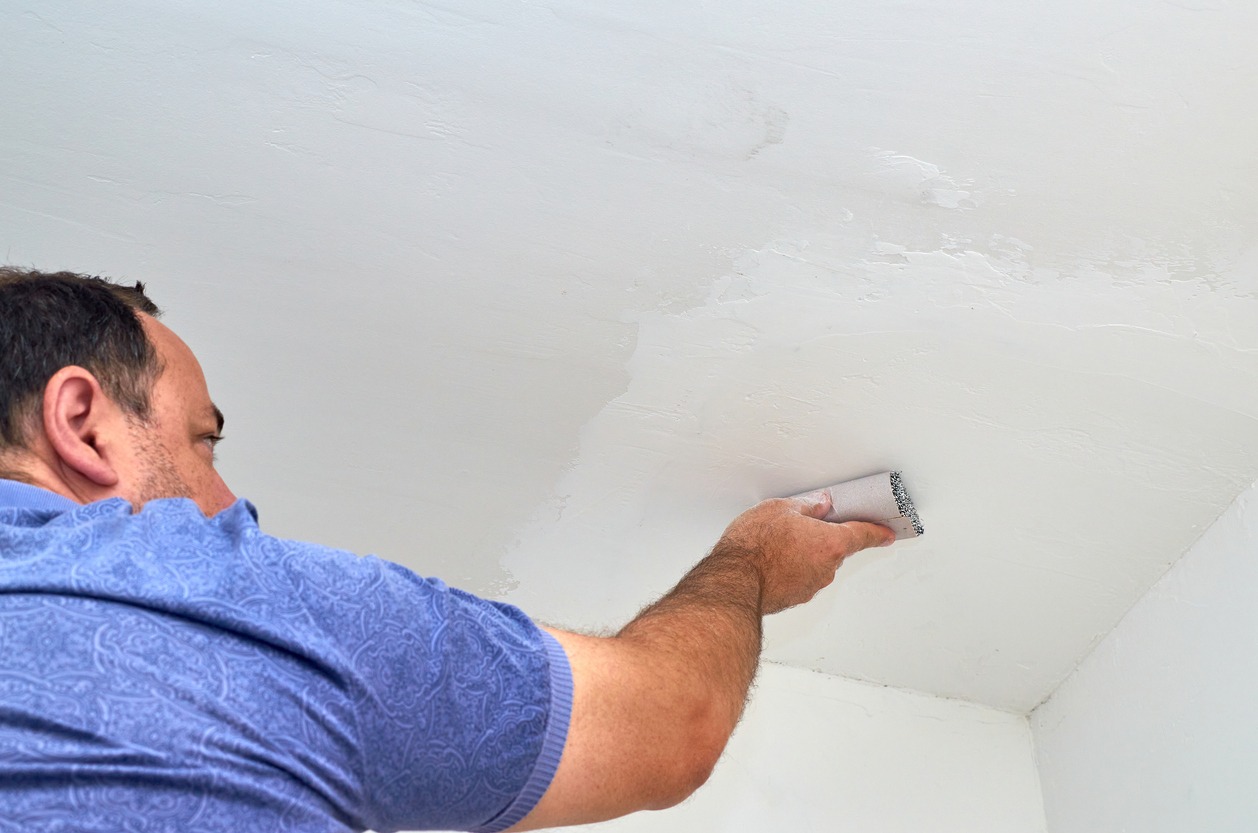
If your ceiling is flat and only has a few coats of paint, you only need a brush to remove any dust, debris, and cobwebs. However, if your ceiling is dirty, particularly kitchen ceilings, you need to wash it first using sugar soap to clean and degrease it. If the paint on your ceiling is peeling or uneven, you can give it a rub down using sandpaper. You may also choose to use a sanding pole to make it faster.
If you notice any hole or hairline cracks on your ceiling, filling it with a suitable product and rubbing it down after it dries is essential. This way, the surface will be smoother and more adhesive for the paint. After sanding the ceiling, you may use a moist cloth or sponge to wash the ceiling and remove any dust.
Remove Stains
If there are stains on your ceiling, note that water-based emulsion paint will not cover them properly. Therefore, you need to use a specialized stain blocker to cover these. If you are using an oil-based undercoat or gloss, you can use it instead. This will help create a barrier to stop any watermarks or stains from seeping through and spoiling your ceiling finish.
Keep Your Lights Clean
If you have a plain ceiling rose pendant, you can unscrew the fitting, slide it down, and cover it. Alternatively, you can use painter’s tape or masking tape around the sides of the light fitting nearest to the ceiling. You can repeat the procedure and double the width of the tape in order to cover more of the fitting. To be safe, it is also better to turn off the electricity supply while painting, if possible.
Preparing a Textured Ceiling
If the ceiling you are painting is textured, you can use a stiff brush to get rid of any dirt or debris. You can also use a clean broom, so you don’t have to use a ladder. It is also challenging to paint the edges of a textured ceiling, and tape will not help. What you can use is a scraper that is 1 to 2 inches in size. Hold it at a 45-degree angle on the edge of the ceiling and go through the distance of the ceiling. This way, there will be a smoother surface, making it easier to paint straight lines.
Tips for Painting the Ceiling
After you have properly prepared the ceiling for painting, it is time to begin the painting. But the question is how do you start, and what are the steps that will follow? Below are some of the best tips that we can give to help you paint the ceiling like a pro:
The Best Way to Paint a Ceiling
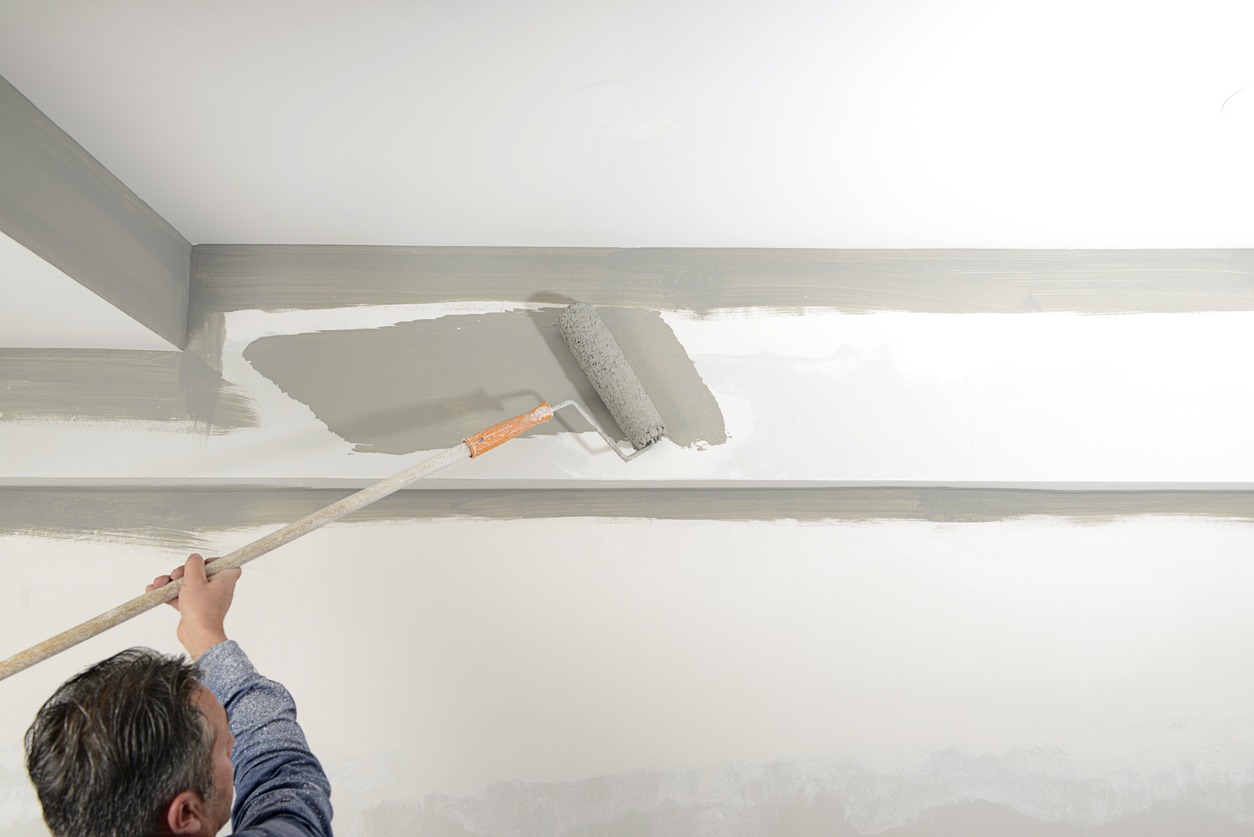
Different ceilings need different application methods. If your previously painted ceiling is smooth, then the process is pretty straightforward. You can use a 2 to 4-inch brush to cut in and then utilize a 9-inch roller to apply the paint.
If you have a simple textured or artexed ceiling, a specialist segmented foam roller is your best choice. It is usually a multi-slit foam roller that gives complete coverage. Alternatively, you can use a block brush or a 4-inch emulsion brush to reach all the ceiling crevices.
Freshly plastered ceilings are also different. If you want to paint them, they should first be left for 4 to 6 weeks to allow them to dry completely before you can start painting them. What you can do first is a mist coast, which is an effectively watered-down emulsion. A white emulsion is a great base for all colors. You can mix three parts to one part of water and apply it with a roller. Watch out for runs as you apply it.
Where Do You Start When Painting a Ceiling?
The best place to start painting the ceiling is in one of the corners. This may not be essential, but it can make an ideal focal point. First, cut in the ceiling edges and around any light fittings. If the room is empty, you can do all four edges first before you start painting the ceiling. Create a border around the ceiling edge about the width of the brush or 3 to 4 inches. However, if you are also painting the walls, you do not need to cut in. But ensure that you overlay ceiling paint a couple of inches onto the wall to make a base for cutting in the wall color.
Use a Roller for the Rest of the Ceiling: To paint the rest of the ceiling in sections, you can use a paint roller with an extension pole. Start in one corner and work your way across the ceiling in a zigzag pattern. Make sure that you overlap each section slightly to avoid leaving lines.
Apply Paint in Thin and Even Coats: In order to avoid drips and achieve a smooth finish, you need to apply paint in thin and even coats. Do not overload the roller with paint, as this will only lead to drips and a thicker coat of paint in some areas.
Allow Each Coat to Dry Before Applying the Next: If you are going to do multiple coats of paint, you need to make sure that you let each coat dry completely before you apply the next. Doing this will help prevent smudging or streaking and ensure a smooth finish.
Consider Using a Paint with Built-In Primer: If you are going to paint a previously unpainted ceiling or a ceiling that has discoloration or stains, you can consider using paint with a built-in primer. This will help you save time and effort by not needing to apply a separate primer coat.
Work in a Well-Ventilated Area: When painting a ceiling, it is very important that the area you are working in is well-ventilated. It’s because painting can produce fumes that can be harmful when inhaled. Therefore, it is best to open the windows and doors of a room when painting to avoid inhaling paint fumes.
Consider Hiring a Professional Painter: If your ceiling is very large or if it has a complex design and details, maybe it is best to consider hiring a professional painter. This way, you can ensure that your ceiling will be painted smoothly and beautifully and avoid any issues or further damage.
Conclusion
At first, painting a ceiling may seem like a challenging task, but when you have the right tools and know the right techniques, it can be easier and can become an even more enjoyable experience. Proper preparation is needed in order to achieve a smooth and flawless finish. We hope that the tips we shared in this post help you in achieving a professional-looking paint job on your ceiling.