
First, verify the weather and plan for a clear day. Grab your ladder, garden hose, gutter scoop, gloves, and set a tarp below. Confirm your ladder’s on solid ground and always maintain three points of contact. Start by removing leaves and twigs with your scoop, moving towards the downspout. Then, flush the gutters with your hose from the opposite end, pushing debris out. Wear gloves and goggles for safety. Finally, check your downspouts are clear. If they’re clogged, a plumber’s snake can do the trick. Regular maintenance prevents damage, so keep an eye on your gutters’ condition to save on repairs. There’s more to learn on keeping them in top shape.
Key Takeaways
- Inspect gutters for damage and ensure a clear, calm day for cleaning.
- Use a ladder safely, with stabilizers if available, to reach gutters.
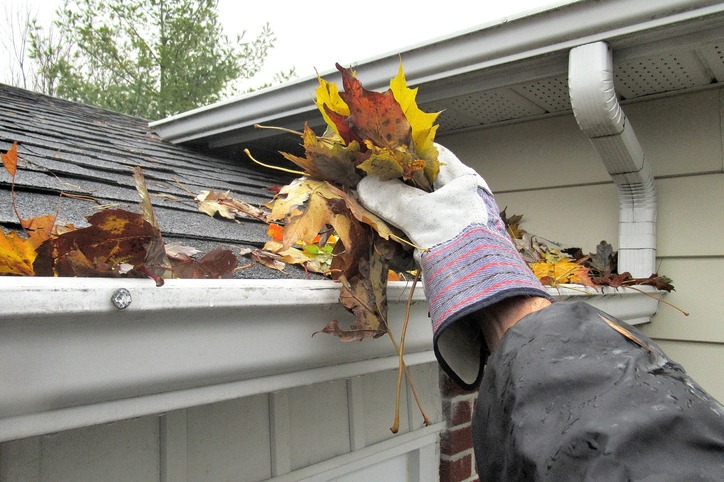
- Remove debris with a gutter scoop, wearing gloves for protection.
- Flush gutters with a garden hose from the end opposite the downspout.
- Check and unclog downspouts, ensuring water flows freely away from your home.
Importance of Gutter Cleaning

Clearing your home’s gutters is vital to preventing costly damage and maintaining its structural integrity. Without regular gutter maintenance, you’re inviting a host of problems that could greatly impact your home’s health and your wallet. Keeping gutters clean guarantees proper water flow, steering clear of the roof and foundation, which are essential to your home’s longevity.
Clogged gutters are more than just an eyesore; they’re a direct threat to your home. Debris buildup restricts water flow, leading to overflow that can weaken your home’s foundation and cause unsightly water stains on your exterior walls. Additionally, the damp, debris-filled gutters make a perfect breeding ground for pests like termites and mosquitoes, heightening the risk of infestations and further structural damage.
Committing to clean your gutters at least twice a year can save you from these headaches. This simple act of gutter maintenance not only prevents water damage but also extends the lifespan of your gutters and maintains the overall aesthetics of your home. Don’t overlook this essential aspect of home care; a little effort goes a long way in protecting your sanctuary.
Pre-Cleaning Considerations
Before delving into the task of gutter cleaning, it’s crucial to consider several factors that impact both the necessity and the process of cleaning. Depending on where you live and the trees surrounding your home, you might need to clean your gutters more or less frequently.
First off, always inspect your gutters for any signs of damage such as cracks, rust, or sagging. Identifying these issues beforehand can save you a lot of trouble in the long run. It’s pointless to start cleaning without making sure your gutters are in good shape to begin with.
Moreover, don’t jump into gutter cleaning without checking the weather forecast. You’re looking for a clear, calm day. Rain or strong winds can complicate the task, making your efforts less effective and potentially dangerous.
You’ll also want to plan a safe cleaning strategy. Kick things off at the downspout, then methodically work your way towards the open end of the gutter. This approach helps ensure you’re not just moving the debris around but actually clearing it out. Remember, safety and efficiency are paramount when it comes to gutter cleaning.
Required Cleaning Tools
Having considered the necessary precautions, let’s now focus on the tools you’ll need to effectively clean your gutters. First off, an essential extension ladder is vital. It’s your gateway to reaching those high gutters, ensuring you can clean them thoroughly from a safe height. Don’t worry about the next steps just yet; that’s a bridge we’ll tackle later.
Next on your list should be a garden hose, equipped with a spray nozzle. This isn’t just any hose; it’s your best friend in flushing out the debris that’s clogging up your gutters. A quick spray and you’ll see the magic happen, with blockages washing away.
You can’t plunge into this task without a gutter scoop. This handy tool is your ally in scooping out leaves, twigs, and whatever else has made a home in your gutters. It’s all about getting the gunk out efficiently.
Don’t forget your rubber gloves. They’re not just for show; they protect your hands from all the muck and sharp edges you might encounter. To wrap up, spread a tarp below your work area. It makes debris disposal a breeze, keeping your yard tidy.
Armed with these tools, you’re set to tackle gutter cleaning head-on, ensuring your gutter system remains in tip-top shape.
Ladder Safety Practices

Before you start cleaning your gutters, selecting the appropriate ladder and ensuring it’s stable are vital steps. You’ll need a step ladder for firm ground or an extension ladder for two-story homes. Make sure it’s securely placed to prevent any wobbles that could lead to falls.
Choosing the Right Ladder
Selecting the appropriate ladder is essential for your safety and the effectiveness of your gutter cleaning task. For single-story homes, an A-frame ladder guarantees stability, making it a secure choice. If you have a two-story house, extension ladders are the ideal option for safely reaching those high gutters. It’s important to choose a ladder that not only matches the required height but also supports your weight and any tools you may be carrying. Always place your ladder on stable, level ground to avoid instability, and remember, leaning it against your gutters can cause damage. Maintaining three points of contact on the ladder at all times enhances your stability, keeping you secure while you work. Adhere to these safety suggestions to confidently tackle gutter cleaning.
Securing Ladder Stability
After selecting the correct ladder, it’s vital to make sure it’s securely positioned to prevent accidents during gutter cleaning. First, place the ladder on a level, sturdy surface to avoid any tipping or slipping. It’s important to confirm the ladder height is sufficient for safely reaching the gutters without the need to overreach, which can lead to instability. Incorporate ladder stabilizers or standoff arms for extra support and to maintain a safe distance from the gutters, protecting both you and the structure. Always maintain three points of contact while climbing for best stability and balance. Furthermore, having someone with you adds an additional layer of ladder safety, ready to assist in case of emergencies. Keep these ladder tips in mind for a safe cleaning experience.
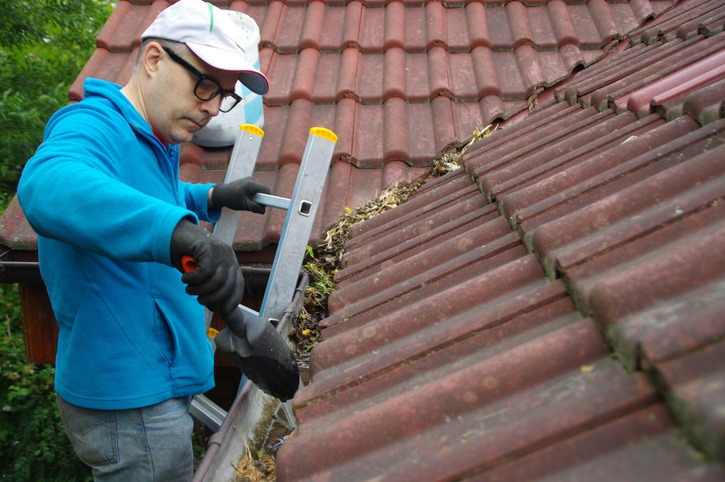
Debris Removal Techniques

How can you effectively remove debris from hard-to-reach areas on your roof? Gutter cleaning is important, but it’s the prep work—removing debris—that really sets the stage for success. Start by targeting those hard-to-reach areas. You’ll want to grab extension poles or powerful air blowers. These tools are your best friends when it comes to telescopic gutter cleaning. They allow you to clear out leaves, acorns, sticks, and whatever else has found its way onto your roof without having to climb up and down a ladder repeatedly.
Focus particularly on cleaning the valleys of your roof and the spaces behind chimneys. These spots are notorious for accumulating debris, leading to clogs if left unchecked. By thoroughly removing debris, you’re helping to prevent these clogs and ensuring that water can flow smoothly through your gutters.
Flushing the Gutters
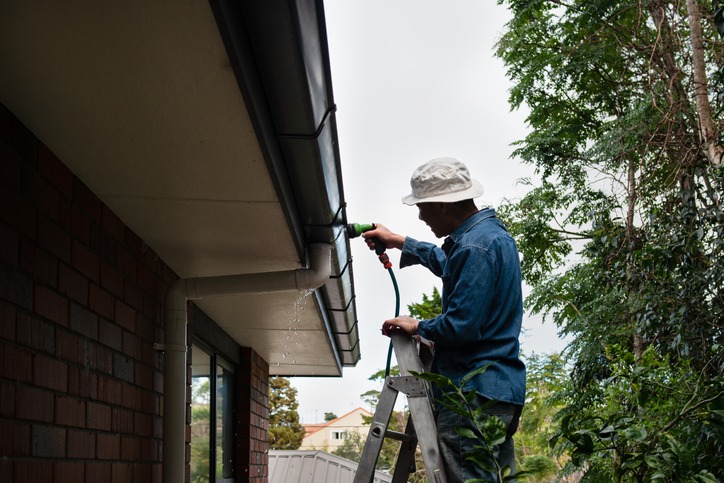
After you’ve cleared the debris, it’s time to flush your gutters. You’ll grab your garden hose, attach a spray nozzle, and start at the downspout, ensuring every bit of buildup washes away. This process isn’t just about cleaning; it’s about maintaining your home’s defense against water damage.
Preparing for Gutter Flushing
Before flushing your gutters, it’s essential to set up a safe working area and don the appropriate protective gear. Place your sturdy ladder on solid ground to avoid any mishaps. Safety first—you’ll need work gloves and goggles to protect against flying debris from the gutters. Lay a tarp beneath your work area. This will catch any gunk and keep your property clean. Now, grab your garden hose. You’re almost ready to flush the gutters. The goal here is to remove all the muck that’s accumulated, ensuring your gutters are ready for a thorough cleaning. By starting from the end nearest the downspout and ensuring a steady water flow, you’re setting the stage for effective gutter maintenance. This preparation makes the actual flushing smoother and more efficient.
Executing the Flush
Now that you’ve prepared, it’s time to flush the gutters using a garden hose equipped with a high-pressure spray nozzle. Start at the end opposite the downspout, allowing the water to push all the debris towards and down the downspout. The force of the water will dislodge smaller particles and dirt that hand cleaning might miss. Make sure you’re directing the water steadily, ensuring it flows freely through the gutters and into the downspouts. This step is essential for preventing clogs and ensuring proper water flow. Regular flushing keeps your gutters functioning at their best, so don’t skip it. It’s a straightforward process but makes a big difference in maintaining your home’s gutter system.
Post-Flush Cleanup
Once you’ve finished clearing the gutters, it’s vital to eliminate any remaining debris to guarantee your gutter system stays free of clogs. Attach a high-pressure nozzle to your hose for a thorough flush. This step ensures you wash away even the smallest particles that might cause future blockages. Don’t forget to give the downspouts another check. Confirm water flows freely, indicating a clean path from roof to ground. This post-flush cleanup isn’t just busywork; it’s critical for maintaining the effectiveness of your entire gutter cleaning effort. Removing every last bit of dirt not only optimizes performance but also extends the lifespan of your gutters. So, take this final clean-up seriously to make sure your gutters are in excellent condition.
Downspout Unclogging
To maintain the safety of your home from water damage, it’s important to routinely inspect and clear your downspouts. Downspout unclogging is a crucial task that guarantees proper water flow away from your home, preventing potential flooding and property damage.
For minor clogs, grab a plumber’s snake. This tool is highly effective for downspout unclogging, reaching blockages that your hands can’t. Insert the snake into the downspout’s top end and gently push it down. You’ll likely encounter resistance when you hit the clog. Rotate the snake against the obstruction until you feel it give way. This action breaks up the blockage, allowing water to flow freely.
Always remember, maintaining clear downspouts isn’t just about removing visible debris. After you’ve cleared the gutters, flush them out with water, then check the downspouts for any signs of blockage. This step is vital; even after gutter cleaning, downspouts can still harbor clogs that impede water flow.
Proper downspout maintenance is the cornerstone of an efficient gutter system. It’s not just about preventing water damage; it’s about safeguarding your home’s foundation and ensuring peace of mind during heavy rains.
Checking Gutter Slope
After unclogging your downspouts, it’s essential to check your gutter’s slope. If the angle’s off, you’ll encounter water pooling instead of flowing. Grab a level, spot any slope issues, and adjust the gutters as needed to keep water moving right.
Identifying Slope Issues
Identifying slope issues in your gutters is crucial to prevent water from pooling and causing damage to your home’s foundation and roof. Checking gutter slope guarantees proper water flow, avoiding potential water accumulation and structural damage. The optimal tilt is ¼ inch for every 10 feet. You’ll need a level to verify this effectively.
| Problem | Tool | Solution |
|---|---|---|
| Water pooling | Level | Adjust slope |
| Overflow | Eyes | Inspect visually |
| Structural damage | Knowledge | Confirm proper slope |
Don’t let incorrect slope lead to costly repairs. Regularly check your gutters for slope issues to preserve your home’s integrity. It’s a simple step that goes a long way in safeguarding your property.
Adjusting Gutter Angle
Having grasped the importance of the accurate gutter slope, let’s now focus on how you can adjust the gutter angle for ideal water flow. Here’s how:
- Measure the Slope: Make sure your gutter has at least a ¼ inch drop for every 10 feet to promote efficient water drainage.
- Check the Angle: Use a level to confirm the gutter is at the right angle, preventing water accumulation.
- Adjust the Hangers: Loosen the gutter hangers or brackets slightly and adjust them to modify the slope. This action ensures peak performance for water flow.
- Regular Checks: Frequently inspect and adjust the gutter angle as needed to maintain effective water drainage and prevent gutter system issues.
Maintenance and Repairs
To keep your gutters in top condition, regular maintenance and timely repairs are crucial. Home maintenance is essential to avoid issues such as cracks, paint damage, water damage, and sagging gutters. These are indications that your gutters may need repair or replacement. Cracks and splits can result in water seepage, potentially causing extensive damage to your property. Paint damage often indicates the continuous presence of water, which can worsen the problem. Pools of water in your gutters suggest clogs or defects, while sagging gutters indicate a failure in the system, necessitating immediate attention.
Here’s a quick guide to understanding these issues:
| Sign of Damage | What It Indicates | Recommended Action |
|---|---|---|
| Cracks/Splits | Water seepage | Seal or replace |
| Paint Damage | Continuous water | Inspect for leaks |
| Pools of Water | Clogs/Defects | Clean or repair |
| Water Damage | Leaks into home | Fix leaks, assess damage |
| Sagging Gutters | System failure | Replace gutters |
Address these signs promptly to prevent further damage. Regular checks and immediate action can save you from costly repairs in the long run. Don’t let your home suffer from neglect; prioritize gutter maintenance today.
Professional Vs DIY Cleaning
When deciding how to clean your gutters, you’re faced with a choice: hiring a professional or doing it yourself. Here’s a straightforward comparison:
- Importance: Professional gutter cleaning may set you back $100 to $300, while DIY cleaning, with tools costing around $50 to $100, emerges as the more cost-effective option.
- Gear: Professional cleaners bring in high-pressure washers and gutter vacuums, tools not typically found in your garage, ensuring a deeper clean.
- Significant Observation: Trained eyes of professional cleaners can spot gutter problems like leaks or damage, potentially saving you from future headaches. Whereas, DIY cleaning lets you inspect your gutters more frequently, catching issues early.
- Convenience vs. Exertion: Hiring professionals means you can skip the ladder and leave the dirty work to others. However, DIY cleaning keeps you in tune with your home’s condition, offering satisfaction from personal effort.
Gutter cleaning, be it DIY or through professional cleaners, is important for your home’s upkeep. While professionals offer thoroughness and expertise, DIY cleaning can be more frequent and budget-friendly. Choose based on your comfort, budget, and the urgency of potential gutter problems.
Frequently Asked Questions
Is There a Tool to Clean Gutters Without a Ladder?
Yes, you’ve got options like gutter vacuum systems, robotic gutter cleaners, telescopic gutter tools, high-pressure hose attachments, and gutter cleaning drones to clean your gutters without a ladder. They make the job safer and easier.
How Do You Clean Gutters You Can’t Reach?
If you can’t access your gutters, prioritize safety measures. Consider gutter guards, hire professionals, and guarantee seasonal maintenance. Proper debris disposal’s vital. Don’t risk your safety; let experts handle those hard-to-reach spots efficiently.
Where Do You Put the Ladder When Cleaning Gutters?
When cleaning gutters, place your ladder on solid ground, ensuring it’s not leaning against the gutter to avoid roof damage. Follow ladder safety tips, like proper placement and securing the base, to keep yourself safe.
Conclusion
Now you’ve got the lowdown on keeping your home gutters in tip-top shape. Remember, cleaning them isn’t just a necessity—it’s vital for preventing water damage. Don’t skimp on safety; always make sure your ladder’s secure and you’re geared up properly. Whether you’re scooping out leaves or unclogging downspouts, regular maintenance saves you a heap of trouble down the line. And if DIY’s not your thing, no sweat—hiring a pro’s always an option. Stay vigilant and keep those gutters flowing!