
Household leaks, whether from a dripping faucet or a compromised pipe, can lead to significant water waste and costly damage if not addressed promptly. This guide is crafted for homeowners who are experiencing the common, yet frustrating issue of household leaks. Our aim is to provide you with comprehensive repair solutions that are both practical and effective. By equipping you with the knowledge to identify the source of a leak, take necessary safety precautions, and utilize the correct tools and materials, we’ll guide you through step-by-step instructions to tackle various types of leaks. Whether you’re facing a minor faucet drip or a more serious pipe leak, this article will serve as your go-to resource for making repairs with confidence. And, should the task be beyond your comfort zone, we’ll help you understand when it’s time to call in a professional. Let’s begin by pinpointing the origin of the leak, setting the stage for a successful repair.
Identifying the Leak Source
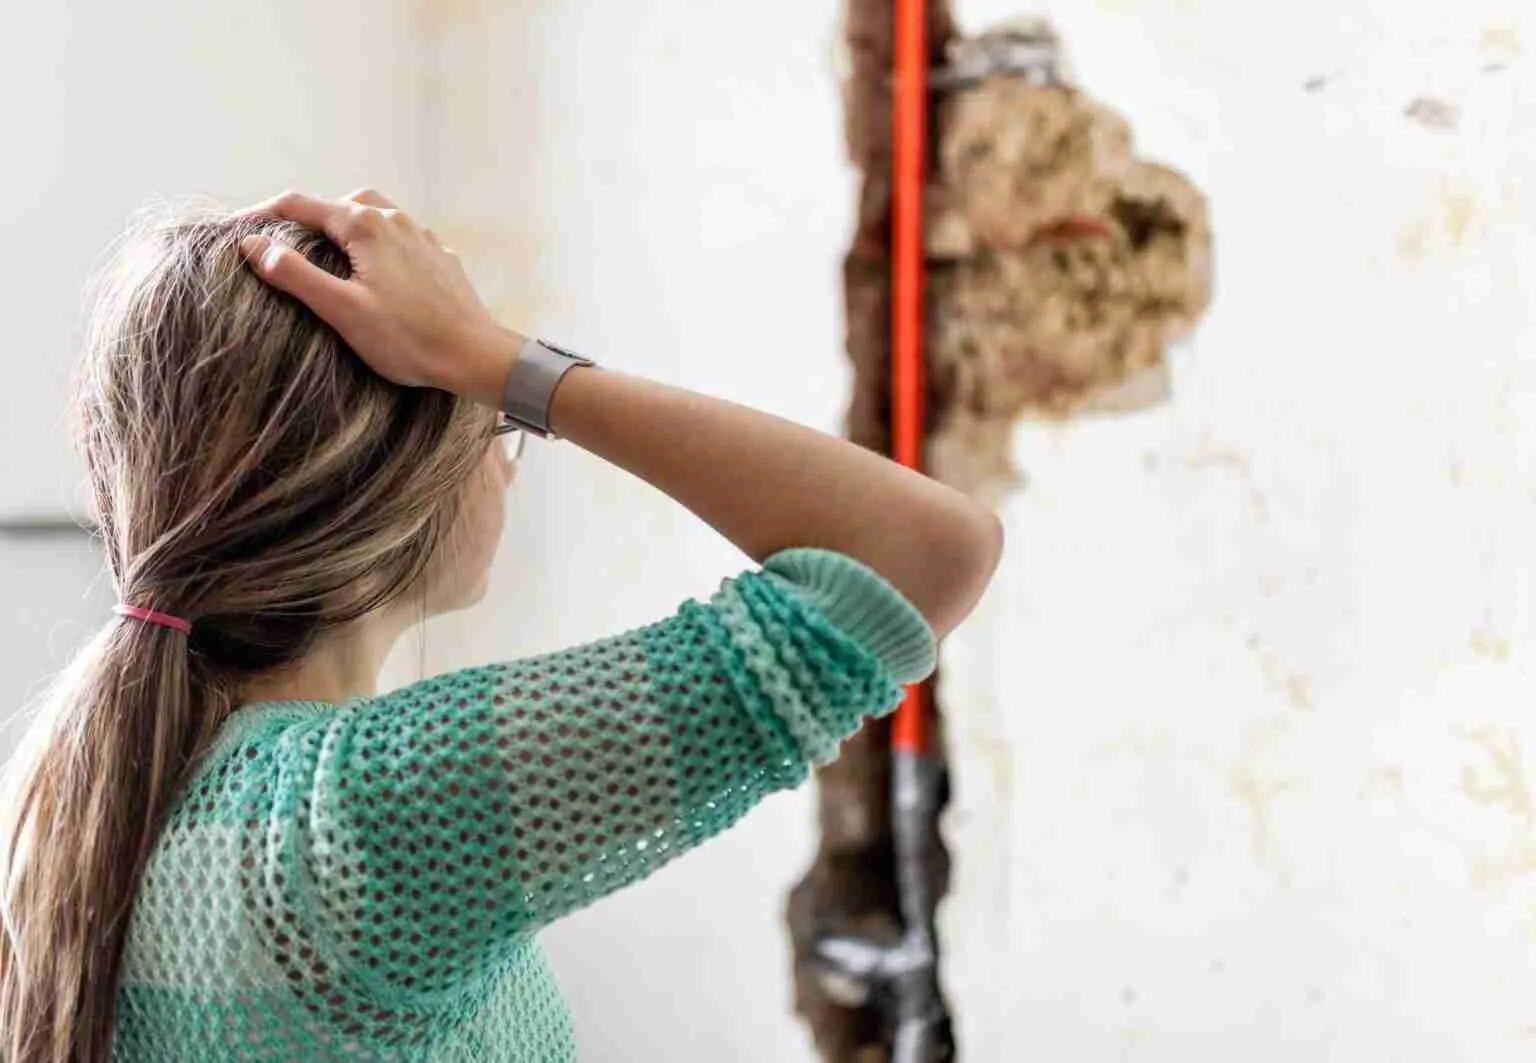
Pinpointing the precise origin of a leak is paramount in the journey to a successful plumbing fix. Leaks can spring up from a myriad of locations, including but not limited to, dripping faucets, malfunctioning valves, fissured piping, or deteriorating seals. Commence your investigative work by examining the vicinity where moisture has made its unwelcome appearance. Be on the lookout for telltale signs such as corrosion, discoloration from water, or the presence of mold. Engage your senses by listening for the telltale sounds of water trickling or gushing when the house is silent of running water.
Gently probe around pipes and fixtures with your hands to detect any unusual dampness, and keep an eye under sinks for signs of water accumulation or a moist environment within cabinetry. In instances where the leak is playing a game of hide-and-seek, drying the area and strategically placing paper towels or tissue along the piping can act as a revealing indicator, marking the leak’s location upon contact with water. For those elusive pipes concealed within the confines of walls or overhead in ceilings, an infrared thermometer might be your ally in detecting cooler areas indicative of a leak. Alternatively, enlisting the expertise of a professional equipped with advanced leak detection tools might be the best course of action. Identifying the leak with precision is the cornerstone of selecting the correct repair strategy.
Safety Precautions
Embarking on any plumbing repair requires a mindful approach to safety to prevent personal injury and additional property damage.
Initiate by severing the water’s path to the repair site. Cutting off the local water supply valve will halt the flow and provide a safer, drier environment to work in. If the local valve eludes you, you may need to resort to shutting off the main water supply for the entire residence.
Donning protective gear is a non-negotiable step; arm your hands with gloves to fend off any sharp objects or caustic substances you may encounter. Equally important are safety glasses, which serve as a barrier for your eyes against unexpected sprays or debris during your plumbing endeavors.
Ensure that your workspace is adequately aired, particularly when your repair involves chemical agents such as drain cleaners or sealants that could release noxious vapors.
In scenarios where your plumbing repair is in proximity to electrical devices or outlets, like when addressing a water heater issue, it’s critical to disconnect power at the circuit breaker to eliminate the risk of electrocution.
Having a first aid kit within arm’s reach is advisable for addressing any minor scrapes or cuts that may occur, and thoroughly acquaint yourself with the operating instructions for any tools or materials you plan to employ.
Adhering to these safety measures is a fundamental aspect of achieving a successful and incident-free plumbing repair.
Tools and Materials Required
Embarking on a leak repair journey necessitates a well-stocked toolkit and an assortment of materials. Arm yourself with the following essentials to tackle any drips or trickles in your home:
For your toolkit, gather:
- A set of adjustable wrenches to suit various nut and bolt sizes
- Channel-lock plumbing pliers, indispensable for gripping and turning
- A diverse array of screwdrivers, including both Phillips and flathead types
- A sturdy pipe wrench, vital for heavy-duty pipe work
- A plumbing snake or auger, your go-to for dislodging stubborn clogs
- A hacksaw, ready to cut through metal with precision
- A pipe cutter, which offers a neater alternative to the hacksaw
- Teflon tape, also known as PTFE tape, for creating watertight thread connections
- A caulk gun paired with silicone sealant to fill and seal any unwanted gaps
Materials to have on hand:
- A selection of washers and O-rings, crucial for stopping faucet drips
- Replacement parts such as a flush valve or flapper for toilet overhauls
- Various pipe fittings and joint compounds to secure and seal connections
- Epoxy putty or a specialized pipe sealant for minor leak patch-ups
- Caulk specifically designed for showers and tubs, ensuring a moisture-proof barrier
- Check valves to maintain proper sump pump function
- Hose clamps, a quick fix for pipe leaks awaiting a permanent solution
Remember, matching the correct sizes of washers, O-rings, and pipe fittings to your repair project is key. Always cross-reference the specific needs of your repair task with the instructions provided to ensure a successful fix.
Step-by-Step Repair Instructions
Tackling household leaks requires a methodical approach. Here’s a universal guide to mending leaks, with detailed steps for specific issues found in the subsequent sections of this guide.
- Diagnosis: Start with a meticulous inspection of the leak’s origin. Look for clear indicators of deterioration, breakage, or misalignment.
- Preparation: After pinpointing the leak, shut off the water supply to halt the flow during repairs. Ensure you’re equipped with the necessary safety gear as previously outlined.
- Dismantling: Proceed to disassemble the affected fixture or pipe segment with care. This step may involve loosening nuts, detaching handles, or severing compromised pipe.
- Replacement or Repair: Swap out any components showing signs of wear or damage, such as washers, O-rings, or valve seals. If a fixture is irreparable, consider a full replacement.
- Reassembly: With new parts installed, put the fixture or piping back together. Remember to wrap threads with Teflon tape to secure a leak-proof connection.
- Testing: Reactivate the water supply and watch the repaired area for leaks. Allow time for the system to pressurize and water to circulate before making any judgments.
- Final Verification: Confirm the absence of leaks, tidy up your workspace, and restore any displaced items to their original spots.
- Documentation: While optional, recording the repair details and parts used can be invaluable for future maintenance or repairs.
For nuanced guidance on specific leak types, such as fixing a leaky faucet or mending a burst pipe, please consult the detailed walkthroughs in the following sections of this resource.
Faucet Leak Repair
Addressing a dripping faucet can be a straightforward task with the right approach. Here’s a methodical process to tackle this common issue:
- Water Supply Shutdown: Locate the valves under the sink and rotate them clockwise to halt the water flow. If these valves are absent, you’ll need to cut off the main water supply.
- Secure the Drain: Prevent small components from disappearing down the drain by plugging it with a stopper or a cloth.
- Handle Disassembly: Begin by prying off any decorative elements on the handle knobs. A flathead screwdriver may come in handy here. You’ll then uncover a screw securing the handle to the stem—unscrew this and carefully lift off the handle.
- Examine Internal Components: Once the handle is off, a packing nut will be visible. Loosen this nut with a wrench and take a look at the O-ring and washer located in the valve seat, as these parts often contribute to leaks.
- O-ring or Washer Replacement: Extract the old O-ring or washer and find a matching replacement, ensuring it’s the correct fit for your specific faucet model.
- Reassemble with Care: After swapping out the faulty part, put everything back together in the reverse sequence of disassembly. Apply Teflon tape to the threads to secure a watertight connection.
- Leak Test: Restore the water supply and observe the faucet for any signs of leakage, verifying the success of your repair work.
- Further Troubleshooting: Persistent leaking suggests additional problems, such as a fractured valve seat or deteriorated seals. If this is the case, replacing the entire faucet or seeking professional assistance might be necessary.
Keep in mind that faucets come in various types—compression, cartridge, ball, and ceramic disk—and each may require specific parts or additional steps not outlined in this general guide.
Toilet Leak Repair
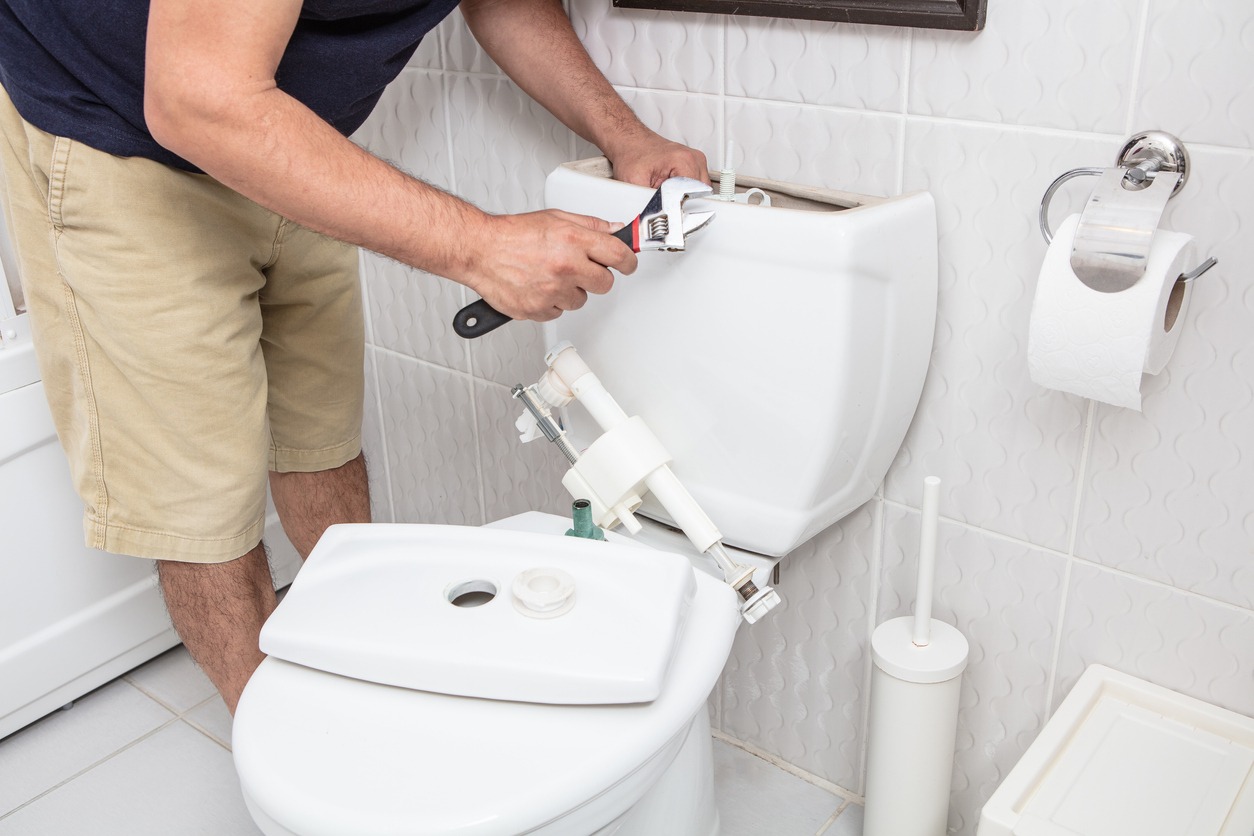
Toilet leaks can be a nuisance, but with these instructions, you can address them efficiently:
- Water Supply and Tank Draining: Turn off the water at the valve behind the toilet and flush to empty the tank. Mop up any residual water with a sponge.
- Flapper Assessment: Inspect the flapper at the tank’s base for deterioration. If it appears damaged, it’s time for a replacement.
- Flapper Replacement: Unhook the old flapper from the flush valve and acquire a matching substitute from a hardware store. Install it according to the provided guidelines.
- Fill Valve Examination: Should the flapper be intact, the next suspect is the fill valve. A dysfunctional valve will necessitate a replacement.
- Fill Valve Replacement: Remove the old valve by turning the locknut beneath the tank. Position the new valve and fasten it securely with the locknut.
- Tank Bolts Inspection: Leaks where the tank meets the bowl often stem from loose or corroded bolts. Tighten them with caution, or replace them if they’re beyond salvage.
- Wax Ring Replacement: A leak at the toilet’s base typically indicates a failed wax ring. After detaching the toilet, swap out the old ring for a new one and reinstall the toilet securely.
- Final Testing: With the repairs complete, turn the water back on and let the tank fill. Watch for any leakage around the newly serviced components. A dry area signifies a successful fix.
If the toilet continues to leak despite these efforts, it may be indicative of a more complex problem, and consulting a professional would be advisable.
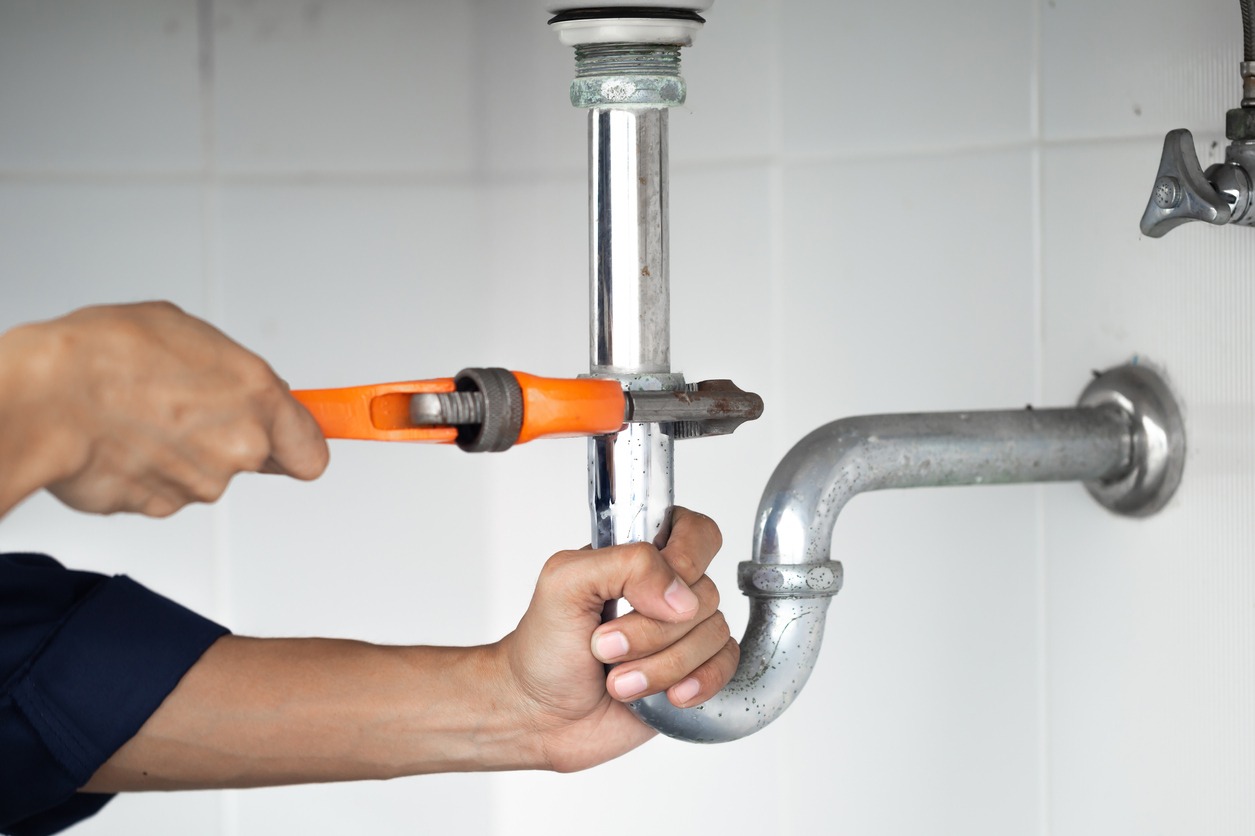
Pipe Leak Repair
Addressing a pipe leak swiftly is crucial to prevent water damage. Follow this detailed process to mend a leaky pipe effectively:
- Isolate the Water Supply: Begin by pinpointing the leak and turning off the water supply to the compromised pipe. If the specific valve is elusive, you may need to halt the water flow to your entire residence by shutting off the main valve.
- Empty the Pipe: To clear out any residual water, activate the taps linked to the problematic pipe. Begin with the hot water tap if the issue is within a hot water line.
- Prepare the Pipe Surface: Ensure the pipe’s surface around the leak is spotless and bone-dry. Lightly sanding the area will create a better surface for repair materials to bond.
- Seal with Epoxy: For minor leaks, an epoxy putty is a quick fix. Mold the putty until it’s flexible and press it over the leak, adhering to the instructions provided. Let the epoxy set as directed before restoring the water flow.
- Employ a Pipe Repair Clamp: A pipe repair clamp may be the solution for a more pronounced leak. Position the accompanying rubber pad over the leak, then fasten the clamp around the pipe, tightening the bolts to create a seal.
- Replace the Affected Section: For a substantial leak, excising the damaged pipe segment is advisable. Utilize a pipe cutter for precision removal. Afterward, smooth the cut edges, attach a repair sleeve or coupling, and secure it with appropriate adhesive or soldering, contingent on the pipe material.
- Reinitiate Water Supply and Inspect: Once the repair has set, turn the water back on and scrutinize the area for any signs of leakage. If the repair remains intact, your efforts have been successful.
Keep in mind that solutions like epoxy and clamps are typically temporary fixes. A long-term solution often involves replacing the affected section of the pipe. Additionally, take all necessary safety precautions, particularly when soldering is involved.
Showerhead and Bathtub Leak Repair
Mitigating leaks in showerheads and bathtubs not only conserves water but also averts extensive damage. Tackle these common issues with the following steps:
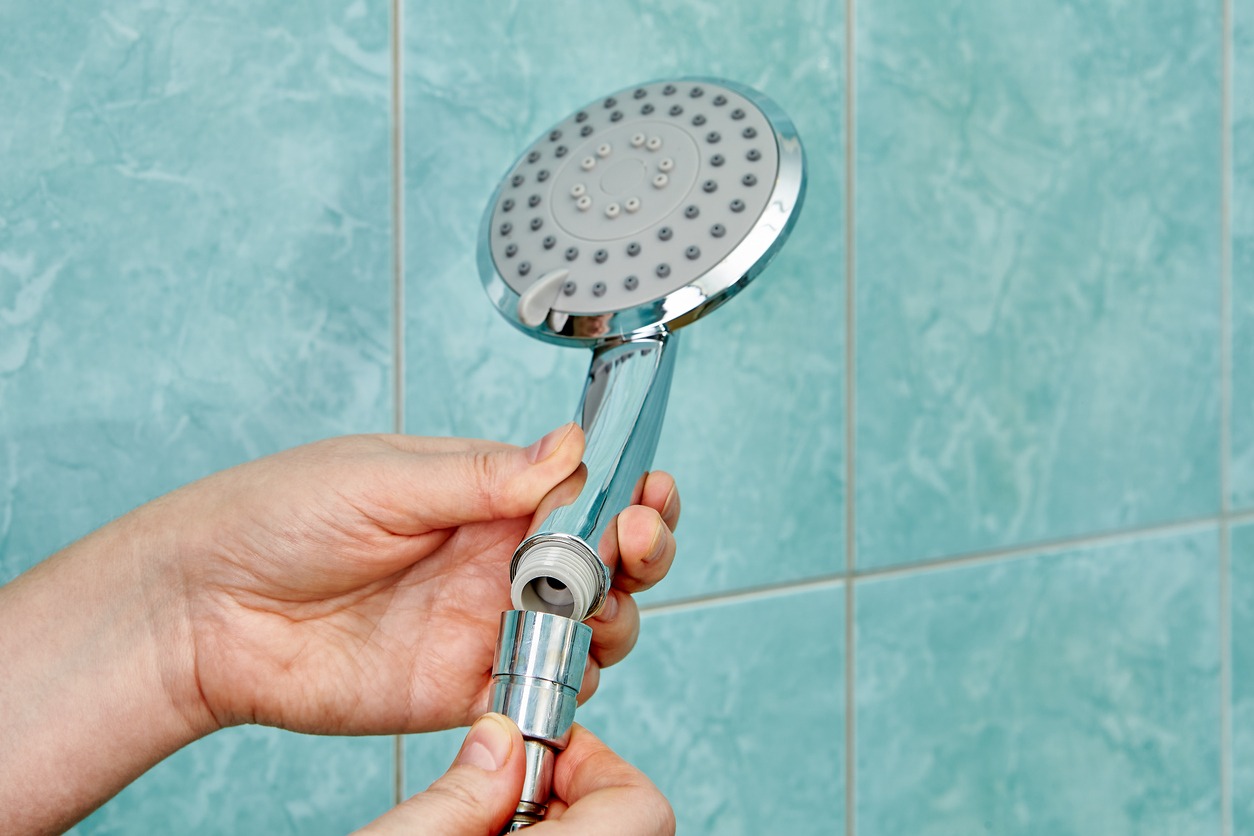
Showerhead Leaks:
- Connection to the Arm: Confirm that the showerhead is securely fastened to the arm. Persistent leaking may necessitate detaching the showerhead, cleaning the threads, and wrapping them with fresh Teflon tape before reassembling.
- Clogged Nozzles: Mineral buildup can obstruct nozzles, leading to leaks. Detach the showerhead and immerse it in a vinegar solution to dissolve these deposits. A gentle brush can aid in removing stubborn buildup. Vinegar can also be used for cleaning different kinds of surfaces, although it is important to note that sensitive surfaces like chrome can get damaged by vinegar. Read our article, Does Vinegar Damage Chrome Bathroom Fixtures?, to know more.
Bathtub Faucet Leaks:
- Dripping Spout: A dripping spout often signals the need for a washer or valve seat replacement within the faucet. This procedure is similar to the one outlined in the ‘Faucet Leak Repair’ section.
- Faulty Diverter: A leak occurring when the diverter is activated suggests a malfunctioning diverter valve. Dismantle the handle, unscrew the diverter, swap out any worn washers, and reassemble.
Bathtub Drain Leaks:
- Gasket Inspection: A leak at the drain may indicate a compromised gasket. Remove the drain flange, extract the old gasket, and install a new one, ensuring it’s properly positioned.
- Reinforce with Putty: Apply a bead of plumber’s putty beneath the drain flange’s lip for an enhanced seal before reinstallation.
- Leaks Behind Walls:
- With Access Panel: Utilize an existing access panel to inspect for leaks at connections or in the pipes. Tighten any loose joints or, if the pipe is damaged, refer to the ‘Pipe Leak Repair’ instructions.
- Without Access Panel: If there’s no access panel, detecting leaks behind walls may necessitate drywall removal, a task typically reserved for professionals.
Post-Repair Testing:
- Restore the water supply.
- Observe the repaired site for any signs of moisture or dripping.
Bear in mind that shower valves and bathtub diverters are diverse in design, and some may require specific instructions for repair. For intricate fixtures, consult the manufacturer’s manual or seek professional advice.
Sump Pump Leak Repair
A well-functioning sump pump is your first line of defense against basement inundation. When a leak arises, it’s essential to address it promptly. Here’s a streamlined approach to diagnosing and remedying sump pump leaks:
- Unclog the System: Begin by inspecting the sump pump for obstructions. Remove any debris from both the pump and the pit to prevent water from circumventing the system, which can create the illusion of leaks.
- Discharge Pipe Integrity: Confirm that the discharge pipe is securely fastened to the pump and free from damage. Should you discover any fractures or holes, replace the pipe with one of identical diameter to maintain efficient water expulsion.
- Seal and Joint Assessment: Examine the seals at all connecting joints and the point where the pipe exits your home. If you detect leakage here, reapplying a premium caulk or swapping out compromised sealing materials may resolve the issue.
- Check Valve Replacement: Should water retreat back into the pit post-pump cycle, a defective check valve could be to blame. Install a new valve, ensuring it’s properly oriented to avert backflow.
Pump Unit Leaks:
- Inspect the sump pump unit for any water escape, paying close attention to gaskets and seals. Consult the pump’s manual to identify and replace the correct components.
- For submersible pumps, renew any deteriorated seals and verify that the housing is securely sealed.
Float Switch Functionality: A faulty float switch might cause the pump to operate non-stop or not at all, which can be mistaken for a leak. Ensure the float switch is free from obstruction and in good working order, replacing it if it’s found to be defective.
Operational Test: Once you’ve tackled the potential issues, conduct a test by filling the pit with water until the pump is triggered. Observe the repaired areas for any leakage, confirming that all seals are intact and no water is seeping through.
Remember, persistent sump pump leaks may signal more significant concerns, such as an elevated water table or inadequate drainage surrounding your home’s foundation. If such complications persist, seeking advice from a waterproofing or plumbing specialist is advisable.
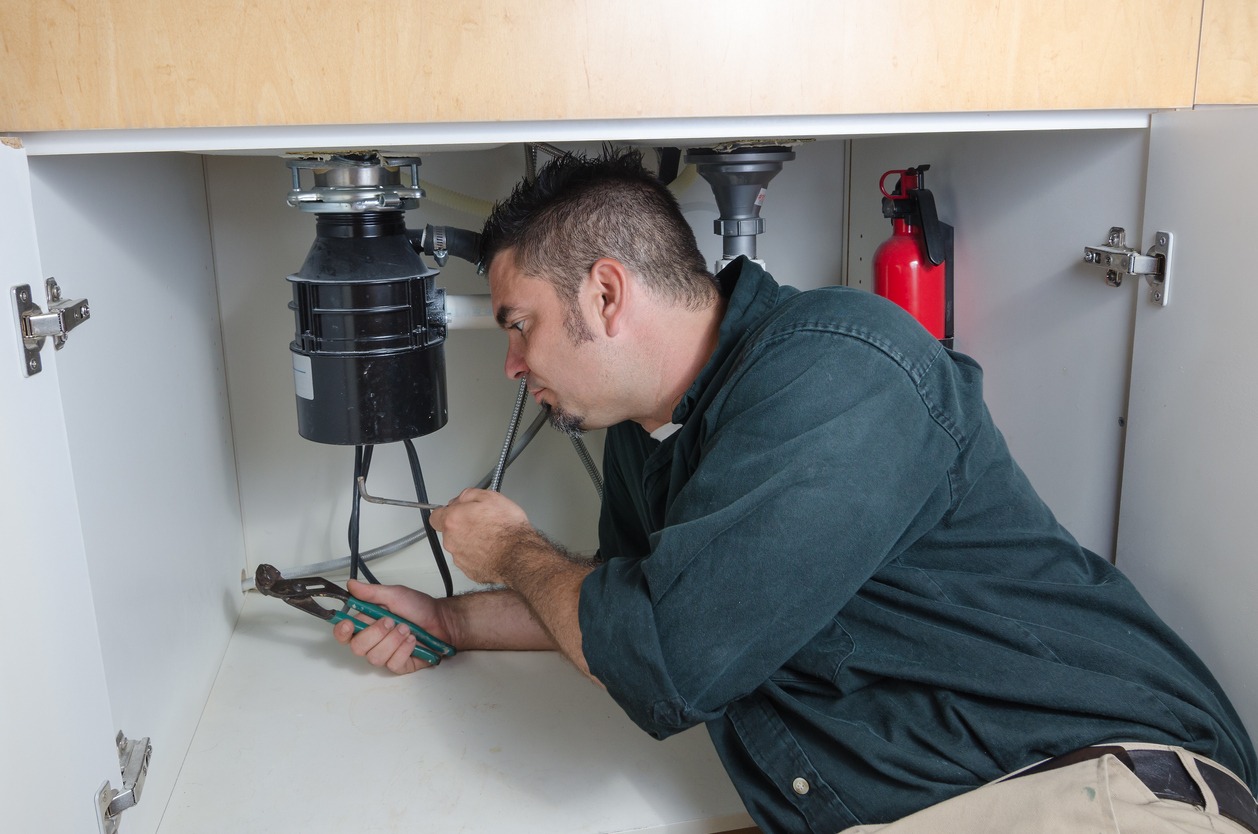
Garbage Disposal Leak Repair
Addressing leaks in a garbage disposal requires pinpointing the origin and applying the correct fix. Follow this guide to address typical leak scenarios:
Locating the Leak:
- Sink Flange: Frequently, leaks start at the sink flange where the disposal meets the sink bottom. Begin by tightening the mounting bolts. If leakage continues, disassemble the unit, replace the plumber’s putty or gasket, and reinstall.
- Hose Connections: Inspect the dishwasher hose and drain line connections for dampness. Secure any loose clamps or consider hose replacement if needed.
- Disposal Bottom: Leakage from the disposal’s base often suggests internal seal failure, which typically necessitates replacing the disposal.
Workspace Preparation:
- For safety, disconnect the power supply to the disposal.
- Position a bucket beneath the unit to collect any water that may spill if you’re detaching the disposal.
Repair or Replace the Disposal:
- Use a wrench to secure any slack bolts or connections.
- To replace a faulty flange, slacken the mounting bolts, elevate the flange, and clear away the old putty or gasket. Apply fresh plumber’s putty or install a new gasket before reassembling, ensuring a snug fit for all components.
- Should the disposal unit exhibit cracks or internal seal degradation, opt for a full unit replacement.
Reconnection and Functional Test:
- After completing repairs or installing a new disposal, reconnect the power.
- Run water through the sink to check for leaks at each juncture.
- Activate the disposal to verify its operation and to ensure no leaks occur while it’s in use.
Tackling leaks in garbage disposals can be intricate due to the electrical components involved. Always prioritize safety, and if uncertainty arises, enlisting the expertise of a professional plumber is a prudent step to guarantee a secure and effective repair.
Water Heater Leak Repair
Addressing leaks in your water heater promptly is crucial to prevent water damage and mitigate safety risks. Follow these steps to troubleshoot and repair common issues:
Power and Water Supply Shutdown: Prioritize safety by disconnecting the power supply—electricity or gas—to your water heater and closing the water valve to halt water flow to the appliance.
Pinpointing the Leak Origin:
- Connections: Inspect the cold water inlet and hot water outlet for any looseness. A pipe wrench can help tighten these connections, but be cautious not to apply excessive force.
- T&P Valve: Leakage from the Temperature & Pressure Relief Valve may signal a malfunction, overpressure, or overheating. Conduct a test by lifting and releasing the lever. Should the leak persist, consider valve replacement.
- Drain Valve: Verify that the drain valve is completely closed. A persistent drip may necessitate either tightening or valve replacement.
- Tank Corrosion: Leakage at the tank’s base often indicates corrosion, which typically requires replacing the water heater.
Executing Repairs:
- Address leaks at connections by wrapping Teflon tape around the threads before re-tightening to ensure a watertight seal.
- For a faulty T&P valve, remove the old valve and fit a new one, matching the specifications and threading, and secure it in place.
- Drain valve replacements involve draining the tank, removing the defective valve, and installing a new one with Teflon tape to seal the connection.
Verifying Repairs:
- After completing repairs, reopen the water supply to the heater and monitor for any signs of leakage.
- Restore power to electric heaters only after confirming the absence of leaks. For gas heaters, reignite the pilot light as per the manufacturer’s guidelines.
If handling any aspect of water heater repair, especially those involving gas connections or internal tank issues, feels daunting, do not hesitate to seek professional assistance.
When to Consult a Professional
While many household leaks are manageable with a DIY approach, certain situations necessitate the expertise of a licensed plumber:
- Intricate Repairs: Jobs that require advanced skills or tools, such as soldering or intricate component replacement in appliances like water heaters, are best left to professionals.
- Recurring Complications: Should an issue persist after a well-executed repair, a professional can uncover and resolve less obvious problems.
- Regulatory Compliance: A professional ensures that any plumbing modifications comply with local building codes, which is essential for both legal and safety reasons.
- Widespread Issues: Multiple leaks or frequent plumbing troubles could be symptomatic of a larger systemic problem that requires a thorough professional evaluation.
- Safety First: Repairs that involve potential hazards, including gas or electrical work, or that could affect the structural integrity of your home, should always be conducted by a professional.
- Warranty and Insurance Considerations: DIY fixes might invalidate warranties and could affect insurance claims. Professional repairs provide documentation that may be necessary for future claims or to maintain warranty coverage.
In essence, while tackling minor leaks can be a cost-saving DIY project, more complex or persistent issues warrant the attention of a professional. Investing in expert plumbing services can safeguard your home and offer assurance that the job is done right.
Preventive Measures and Follow-Up
Taking proactive steps to safeguard your home’s plumbing is crucial for dodging future leaks and the headaches they bring. By embracing regular upkeep and timely interventions, you’ll not only prolong the life of your plumbing components but also sidestep expensive fixes down the road.
Regular Inspections: Make it a habit to scrutinize your plumbing infrastructure periodically. This includes a thorough examination of pipes, faucets, and appliances that use water, to catch any red flags before they escalate.
Reduce Water Pressure: Excessive water pressure can overburden your pipes and fixtures, potentially leading to leaks. A pressure regulator can be a wise investment, helping to keep the pressure within a manageable range.
Soften Hard Water: Mineral deposits from hard water can gradually wear down your plumbing. Implementing a water softener can mitigate this mineral accumulation, thereby preserving the integrity of your pipes.
Prevent Clogs: Steer clear of disposing of oils and fats down the sink and consider employing drain strainers to intercept hair and other debris. This can help maintain unobstructed water flow and prevent undue pressure build-up that might cause leaks.
Insulate Pipes: Insulation is your best defense against the freezing and potential bursting of pipes in the chillier nooks of your abode, like garages or basements.
Resolve Minor Leaks Promptly: Tackling small leaks the moment they’re spotted can forestall more significant issues. It’s also an excellent chance to get acquainted with the nuances of your home’s plumbing landscape.
Follow-Up on Repairs: Keep a watchful eye on any recent repairs to confirm their effectiveness and to ensure that no new concerns have surfaced in the treated vicinity.
Professional Maintenance: It’s prudent to engage a certified plumber for yearly check-ups and maintenance. They’re equipped to identify problems that may not be immediately apparent, ensuring your plumbing remains in top condition.
By integrating these preventive practices, you not only ward off unexpected plumbing dilemmas but also maintain a plumbing system that operates smoothly, catering to your household’s demands with greater efficiency.
Useful FAQs to Know When Considering Repairs
1. What tools might a homeowner need for repairing household leaks?
Homeowners typically require a variety of essential tools for fixing common leaks, including but not limited to pipe wrenches, tube cutters, a plunger, thread tape, and sealant.
2. When should I consider seeking professional assistance for household plumbing leaks?
Professional help may be the best option if a leak persists despite efforts to fix it, is located in a hard-to-reach area, involves major plumbing, or if the homeowner is unsure of the appropriate repair steps.
3. Can leaks detected early in household appliances be easily repaired?
Yes, early detection is crucial in minimizing damage and maintaining appliance function. Leaks in appliances such as washing machines or dishwashers can often be repaired by tightening connections or replacing faulty valves or hoses.
4. Are there preventative measures to reduce the occurrence of household leaks?
Yes, regular inspection and maintenance of plumbing systems and household appliances can help identify potential issues before they result in leaks. Adequate insulation, proper drainage, and not overloading appliances can also contribute to leak prevention.
5. Can one detect a hidden leak without professional equipment?
Yes, although professional equipment can be accurate, homeowners can look for signs such as unusual water usage, damp spots on floors, walls, or ceilings, or reduced water pressure to detect hidden leaks.
6. How can I repair a leaking faucet in my home?
Repairing a dripping faulty faucet often involves disassembling the fixture, replacing worn parts (like the washer or O-ring), and reassembling. Professional help might be needed if simple DIY fixes do not stop the leak.