
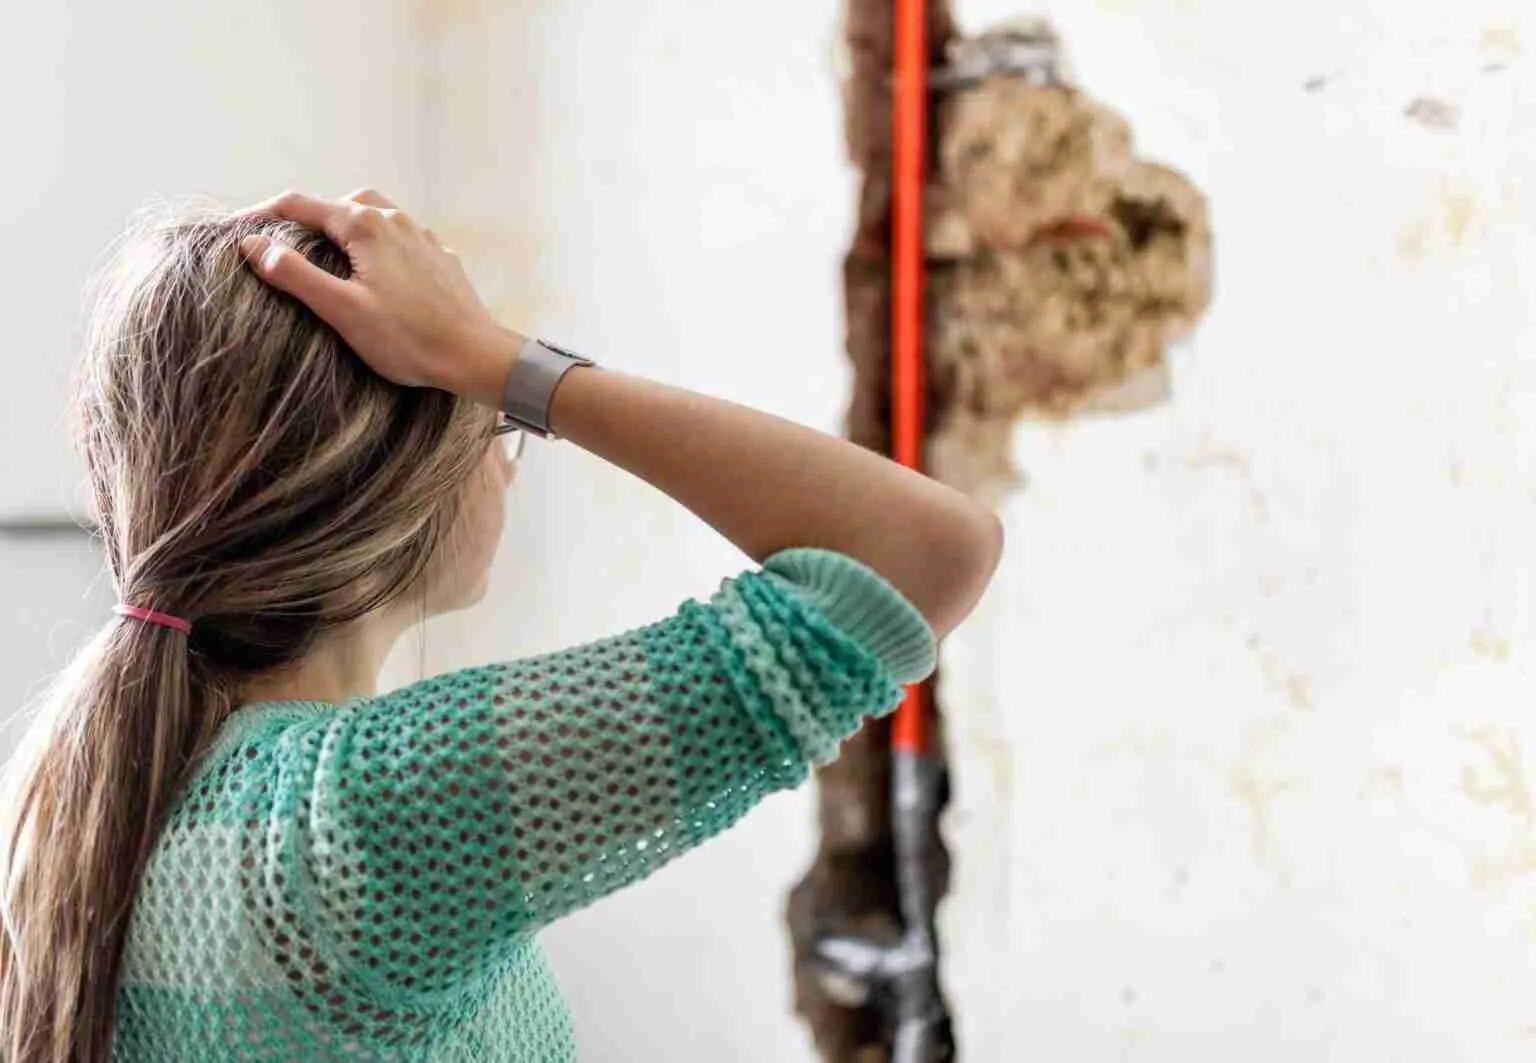
Water leaks in the home can be elusive adversaries, often going unnoticed until they cause significant damage. As a homeowner or a DIY enthusiast, detecting these hidden leaks early is crucial to prevent costly repairs and maintain the structural integrity of your property. This guide is tailored for individuals who prefer to take a hands-on approach to home maintenance, offering a range of do-it-yourself methods for identifying water leaks. By employing these strategies, you can pinpoint problem areas and take action before minor issues escalate. Whether you’re monitoring water usage or inspecting appliance connections, each section of this article will equip you with practical techniques to safeguard your home against the threat of water damage.
Visual Inspection for Home Water Leaks
Embarking on a quest to uncover water leaks in your abode often begins with a meticulous visual examination. Survey all exposed pipes, taps, and water-bearing fixtures for telltale signs of leakage. Be on the lookout for damp areas, small pools of water, or any persistent drips. These clues might manifest beneath sinks, at the foot of faucets, or on ceilings and walls, hinting at leaks from interior plumbing.
Be equally alert to any indicators of water damage or decay, such as rust on pipes, peeling or bubbling paint, distorted surfaces, or the unwelcome presence of mold and mildew, which flourish in moist settings. Unusual dark patches on your floors, walls, or ceilings could be signaling a leak and warrant closer scrutiny. Keep in mind that some leaks might only reveal themselves when water courses through the pipes, so activating the water supply to various sections of your home can be a strategic part of the inspection process.
Examine the sealant around bathtubs, sinks, and commodes as well. Should you discover the sealant is fractured or coming loose, it could be a pathway for water to sneak through and inflict concealed damage. By comparing your current findings with past inspections, you can ascertain if the situation has deteriorated, which strongly suggests an ongoing leak.
While visual inspections can pinpoint many leaks, they can’t catch them all. For those elusive leaks that remain out of sight, the subsequent sections of this article will guide you through additional detection techniques to help you uncover the root of water-related issues in your home.
Checking for Signs of Moisture and Water Damage
Maintaining a home’s integrity involves a keen eye for moisture and water damage, as these issues can compromise your property and pose health risks due to the potential for mold and mildew proliferation. During your inspection, stay alert for certain signs that could indicate moisture problems.
Firstly, an unexpected rise in humidity in particular areas of your home could be a clue pointing to concealed leaks. Rooms that feel unusually moist or emit a musty odor should raise your suspicions.
Physical alterations in walls, ceilings, and floors can also signal water’s impact. Be on the lookout for new or expanding discolorations, particularly those that are yellow or brown. If you notice that paint or wallpaper is peeling, cracking, or blistering, it’s likely that moisture is compromising the wall materials. Flooring that shows signs of warping or buckling, especially in wood or laminate, may be suffering from water damage from beneath.
In tiled areas, scrutinize the grout and sealant. Compromised grout or sealant can allow water to seep through, leading to hidden damage. Corrosion at pipe connections and valves is another red flag. Greenish stains on copper or brass and rust on steel or iron pipes can indicate slow, persistent leaks that may eventually cause a breakdown and more severe leakage.
Wooden structures that have been exposed to ongoing moisture may start to decay, jeopardizing the structural soundness of your home. Use a screwdriver to test suspected areas; healthy wood will resist penetration, while decayed wood will be soft and yielding.
In lower levels of the house, such as basements and crawl spaces, be vigilant for pooled water or efflorescence—the white, chalky substance left by evaporated water—on walls or floors, which suggests water ingress.
Lastly, examine the condensate line and pan of your HVAC system. A full condensate pan or a blocked line can lead to significant leaks and foster mold growth within and around your HVAC unit.
While some signs of moisture and water damage are readily apparent during a visual inspection, others may be more subtle and require additional investigative techniques to identify.

Monitoring Water Usage and Bills
Keeping a watchful eye on your water consumption and monthly statements can be a telltale sign of a leak within your home’s plumbing system. If you notice a surge in your water bill that doesn’t correlate with your regular usage patterns, it’s time to investigate.
Start by pulling out your recent water bills—preferably from the past several months—and line them up for a comparative review. Keep in mind that water use can fluctuate with the seasons; for instance, summer might see an uptick due to gardening or filling a pool. Despite these variations, a steady climb in usage that isn’t justified by seasonal activities or changes in your routine could signal a hidden leak.
To dig deeper, track your daily water use. Establish a baseline of how much water is typically consumed for your usual activities. Any substantial deviation from this baseline, not attributable to changes like additional household members or new water-reliant appliances, could be symptomatic of a leak.
The EPA offers a helpful benchmark: during the winter, when outdoor water use is minimal, if a household of four is using over 12,000 gallons per month, it’s likely that leaks are the culprit.
It’s important to remember that even a small leak can lead to substantial water waste over time. By staying vigilant with your water usage and billing, you’re not only conserving this precious resource but also potentially avoiding steep costs on future bills. For more advanced leak detection techniques involving your water meter, the subsequent section provides further guidance.
Using the Water Meter to Detect Leaks
Your water meter isn’t just for utility readings—it’s a crucial ally in the hunt for leaks. To harness its full potential, follow these instructions:
- Cease all water use in your home. Confirm that appliances are off and that no taps are leaking.
- Find your water meter, which is typically situated in the basement, within the garage, or outside near the street, housed in a concrete box often labeled water.
- Take note of the meter’s current reading. If your meter has a sweep hand, observe its position; if it’s digital, record the exact figure.
- Hold off on using any water for the next 1-2 hours.
- Return to the meter to compare the new reading with your initial note. Any change indicates water consumption, which, in the absence of usage, points to a leak.
Look for a leak indicator on your meter, such as a small triangle or wheel that moves with water flow. Movement in this indicator while all water is shut off is a clear sign of a leak.
Digital smart meters may offer real-time data or usage logs that can reveal continuous flows or unusual patterns indicative of leaks.
For the most telling results, perform this test during a period of extended inactivity, like overnight.
While the water meter can confirm the presence of a leak, it won’t reveal its location. To pinpoint the leak’s source, you’ll need to employ other strategies discussed in this guide, such as visual inspections or the use of moisture meters.
Keep in mind that some leaks may not be constant, making them elusive to a one-time test. In such cases, multiple checks or professional help may be necessary to identify the intermittent leaks.
Dye Test for Toilet Leak Detection
Uncovering a toilet leak can be as simple as using a dye test, a straightforward diagnostic tool. Given that toilets are often significant contributors to household water consumption, identifying and fixing leaks is crucial for conservation and cost savings. Here’s a step-by-step guide to the dye test:
Firstly, carefully remove the toilet tank lid and place it on a towel to avoid any damage or mess. Next, introduce a substantial amount of food coloring or a dye tablet into the tank to change the water’s color. Typically, 10 to 15 drops of food coloring will be adequate for this purpose.
Resist the urge to flush and allow the tank to sit undisturbed for about half an hour. This pause gives the dye time to settle and reveal any potential leaks. If the water in the tank is free of leaks, the dye will remain contained.
Inspect the toilet bowl after the waiting period. The appearance of colored water in the bowl, without a flush, signals a leak from the tank. Often, this issue stems from a deteriorating flapper valve, which is the rubber mechanism tasked with holding back the water until you flush. If the dye test suggests a leak, examine the flapper for wear and tear and consider replacing it if it appears compromised.
This dye test is a cost-effective and straightforward first step in pinpointing a prevalent type of leak in the home. Should the leak continue after you’ve addressed the flapper, or if you suspect additional leaks in the vicinity of your toilet, it may be time to seek out a professional plumber for a comprehensive evaluation.
Performing a Water Pressure Test
A water pressure test is a savvy approach to detecting potential plumbing issues that could result in leaks. When water pressure climbs too high, it can strain pipes and create vulnerabilities. Here’s how to conduct a water pressure test with a pressure gauge:
Begin by securing a water pressure gauge, an indispensable tool for this task, which can be attached to an outdoor hose spigot or a similar connection point. Locate a spigot that’s easily accessible, preferably one close to the water main for the most direct reading.
Before proceeding, ensure that no water is being used throughout the property—this includes indoor faucets, outdoor hoses, and appliances. This step is essential to obtain an accurate reading.
With the gauge in hand, affix it to the chosen spigot, tightening it by hand to create a watertight seal. Then, turn the spigot on to its maximum to get a reading. The gauge will display your water pressure in psi.
Ideal water pressure for a home falls between 40 and 60 psi. Readings above 60 psi suggest that your pressure is on the higher side, which could spell trouble for your plumbing infrastructure over time.
Should the gauge indicate elevated pressure, a pressure regulator may be necessary to prevent potential damage. For homes without a regulator, installation may be a prudent measure to protect against future leaks.
Conducting regular water pressure tests can serve as an early warning system for shifts in your plumbing that may lead to more serious issues. If you’re hesitant about performing this test yourself or if you find your water pressure consistently exceeds recommended levels, enlisting the expertise of a professional plumber is a wise next step.
Listening for Hidden Leaks
Harnessing the power of your hearing can be an effective strategy in uncovering elusive water leaks. For the best results, embark on this auditory investigation when your home is at its quietest, such as during the late evening hours:
- Eliminate all ambient noises by switching off appliances like televisions, HVAC systems, and fans to create a serene environment.
- Explore areas where plumbing is exposed or runs through walls or beneath floors. Placing your ear close to these surfaces can sometimes enhance the sound of any escaping water.
- Stay alert for the telltale sounds of water, such as a persistent drip or the faint hiss that can occur when water is forced through a breach under pressure.
- Focus your attention on common leak-prone areas including beneath sinks, around the base of toilets, and in the vicinity of water heaters, where connections may fail.
- Venture into the basement or crawl space, if accessible, as these areas can amplify the sounds of leaks due to their spacious and often empty nature.
- If you detect any suspicious sounds, attempt to trace them back to their origin. This could narrow down the potential problem spots for a more targeted inspection or professional evaluation.
Keep in mind that while some leaks are audible, others may remain silent, and not all sounds are indicative of a leak. Including auditory checks as part of your broader leak detection approach can be particularly useful for locating significant leaks. If you’re confronted with the sound of water but are unable to pinpoint its source, it may be time to call in a plumber who can employ sophisticated acoustic detection tools to locate the leak with precision.
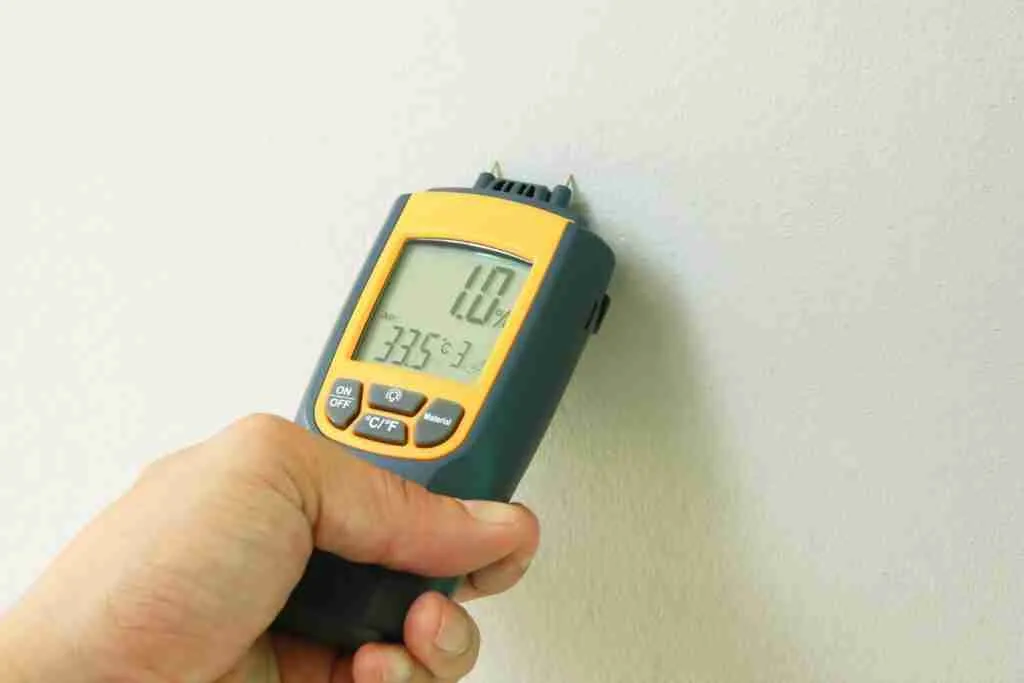
Utilizing Moisture Meters
Moisture meters are invaluable instruments for identifying hidden dampness in your home’s structure, offering a non-destructive means to detect potential leaks. When visual signs are absent, follow these steps to effectively employ a moisture meter:
- Follow the manufacturer’s guidance to properly calibrate your moisture meter before use, as each model will have its own calibration process.
- Adjust the meter to correspond with the type of material you’re assessing, whether it’s plaster, timber, or masonry.
- Firmly press the meter’s probes against the surface in question, starting in areas that are in close proximity to plumbing fixtures and water-utilizing appliances.
- Record moisture levels from various locations to establish what is considered ‘normal’ moisture for your home’s environment.
- Scrutinize the readings, noting any abnormal moisture levels, which could suggest a leak lurking behind the surface.
- Concentrate your use of the moisture meter in areas where you suspect leaks for a more precise diagnosis. Key areas to check include beneath windowsills, around bathroom installations, under sinks, and at points where pipes penetrate walls.
While moisture meters can signal elevated moisture content, they don’t definitively confirm a leak’s presence, as other factors like condensation or external humidity can also contribute to dampness. If your readings consistently point to moisture indicative of a leak, it’s advisable to seek further examination or the expertise of a plumbing professional to accurately identify and resolve the underlying issue.
Inspecting Appliance Connections
Water-utilizing appliances are often the culprits in household water leaks. To keep these leaks at bay, a thorough inspection of appliance connections should be part of your regular home maintenance. Here’s how to go about it:
- Start with a close examination of the hoses and pipes that serve your appliances. Keep an eye out for any signs of deterioration, such as bulges, cracks, or wear on the hoses.
- Be vigilant for any moisture around the connections. This is especially true for the joints and seals, which are common leak locations.
- It’s essential to ensure that connections are secure but remember that over-tightening can cause damage and result in leaks.
- For appliances like washing machines, gently pull them away from the wall to inspect the entire length of the hose. Leaks can hide in the spots that aren’t immediately visible.
- Look for any water accumulation in the drip pans beneath your refrigerator or dishwasher, which could signal a leak.
- With older appliances, pay special attention to the condition of braided steel water supply lines, which can also succumb to wear and corrosion over time.
- Double-check that drain hoses are affixed securely to avoid water escape during the appliance’s draining cycle.
Regular inspections can head off larger issues, saving you from water damage down the line. If you encounter any wet spots, rust, or lime deposits, these could be signs of a slow leak that needs to be addressed. Damaged hoses and fittings should be replaced promptly. And for those issues that seem daunting, don’t hesitate to call in a professional to ensure the job is done right.
Assessing Exterior Water Sources
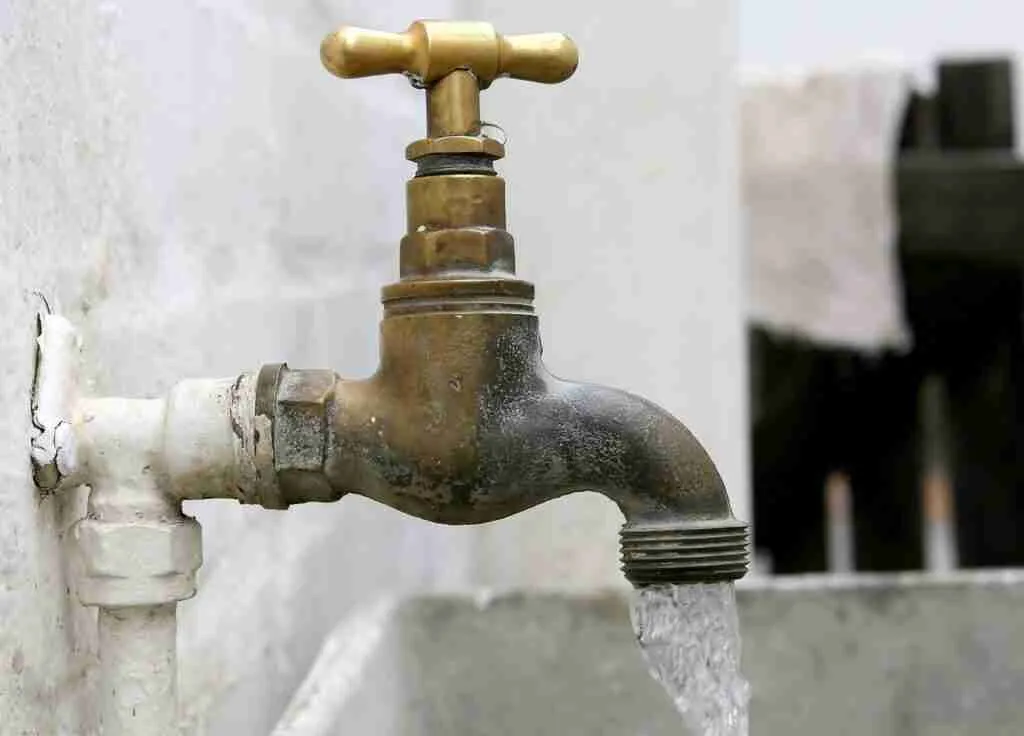
Venturing outside, it’s crucial to examine the exterior water sources around your home for leaks. When you’re checking outdoor plumbing, keep these steps in mind:
- Test outdoor spigots by attaching a hose and turning on the water. Look for any leaks at the connection point. A persistent drip might mean it’s time to replace the washer or even the spigot itself.
- Make sure hose connections are tight to prevent leaks where the hose meets the spigot.
- Inspect your garden hoses for damage, particularly when the seasons change, as extreme temperatures and frequent use can lead to deterioration and leaks.
- Survey your irrigation system at the beginning of the season and after significant weather events. Be on the lookout for wet patches in your lawn or garden that could signify a leak below the surface.
- Keep an eye on water levels in your pool or pond, and watch the filtration system for signs of leaks, such as wet areas or pooling water.
Leaks outside the home can be just as wasteful and damaging as those inside. If you’re stumped by a leak’s source or if it involves buried or inaccessible pipes, it may be time to consult with a plumbing professional who can pinpoint and fix the issue effectively.
Evaluating Outdoor Plumbing
Outdoor plumbing systems are just as susceptible to leaks as indoor ones and require regular checks to maintain their integrity. When examining your outdoor plumbing, focus on these key areas:
- Conduct a thorough inspection of all visible pipes, especially at the joints and curves where leaks frequently occur. Signs of corrosion or rust could indicate underlying issues that need to be addressed.
- Assess any outdoor showers, scrutinizing the pipes and fixtures for leaks, cracks, or signs of deterioration.
- For outdoor kitchens or bars, examine the sinks and related plumbing. Make sure the drains are unobstructed and the pipes are in good condition.
- Test backflow prevention devices, which are crucial for safeguarding water quality. A malfunction in these devices could lead to leaks and water contamination.
- Investigate any accessible underground pipes, such as those leading to garden sheds or other outbuildings. Pay attention to unusual wetness in the soil, which might suggest a subterranean leak.
- Examine the insulation and protective materials surrounding outdoor pipes, ensuring they’re intact to prevent damage from the elements.
Seasonal changes, particularly the transition into and out of winter, can put outdoor plumbing at risk. Regular assessments are key, and while some issues may be resolved with simple fixes like washer replacements, more complex problems may necessitate cutting and replacing pipe sections.
Should you discover a problem with your outdoor plumbing, address it promptly to avoid further damage to your property and the water supply. For significant leaks or complex issues, seeking the expertise of a professional plumber is advisable.
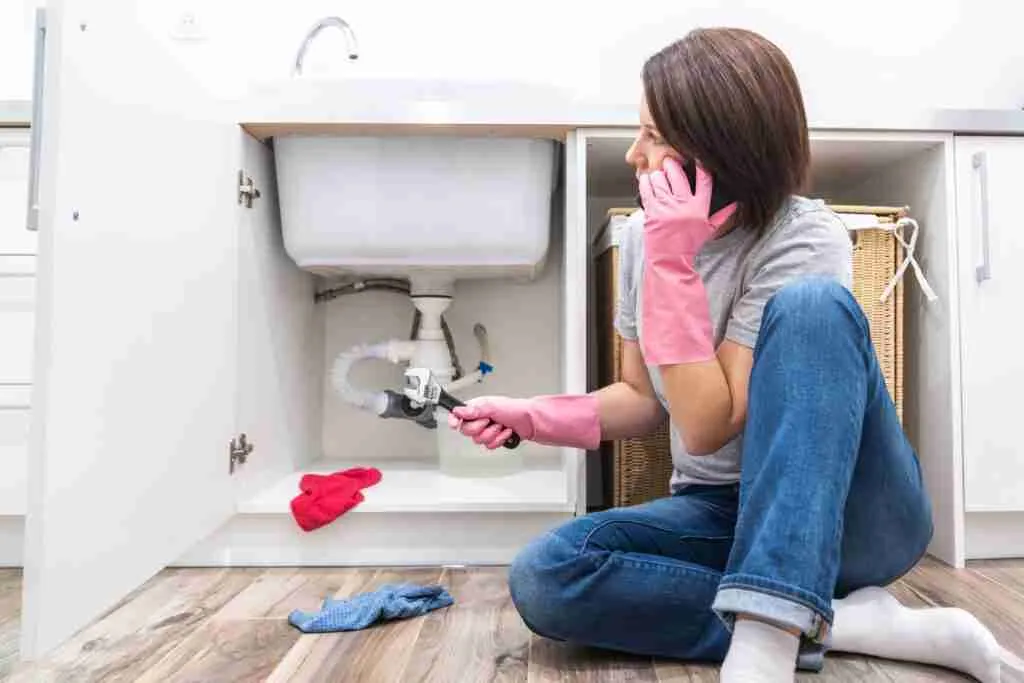
Checking Under Sinks and Cabinets
The concealed spaces beneath sinks and within cabinets are often hotspots for undetected water leaks. To manage these areas effectively:
- Empty the contents under your sinks to gain a clear view and check for any signs of water damage, such as stains, warping, or mold, which could indicate moisture problems.
- Touch the pipes and the underside of the sink to detect any dampness. The sink trap, in particular, should be examined closely as it’s a common source of leaks.
- Inspect the seal between the sink and countertop for any deterioration that might allow water to infiltrate the area.
- Observe the joints and connections for any water droplets; even minor leaks can lead to significant issues over time.
- Verify the condition of the caulking around the faucet base and look for any leaks emanating from the faucet itself.
- Review the water supply lines leading to the faucet. Flexible lines are prone to wear and may not show signs of a leak until the issue becomes pronounced.
- If your dishwasher supply line passes through the cabinet, ensure it is intact and dry.
By conducting routine inspections under sinks and within cabinets, you can prevent extensive damage. At the first hint of moisture, tighten any loose fittings, replace old washers or seals, or if the repair is not straightforward, consider enlisting the help of a professional plumber.
Useful FAQs for Plumbing Leaks
1. What are some common DIY methods for detecting water leaks?
Common DIY methods for detecting water leaks include monitoring the water meter, checking exterior usage, observing food coloring in the toilet tank and inspecting pipe fittings or walls for signs of moisture or mold.
2. How effective can DIY methods for water leak detection be?
DIY methods can be quite effective in identifying basic or straightforward leaks. However, they might not detect complex or hidden leaks, which require professional equipment and expertise.
3. Is the monitoring of the water meter a reliable method for water leak detection?
Yes, a significant change in the water meter readings when all water-consuming appliances are turned off can indicate the occurrence of a leak. However, this method may not detect small leaks.
4. How does the use of food coloring assist in detecting toilet leaks?
Adding food coloring to the toilet tank and observing if it transfers to the bowl without a flush can highlight a leak. This method demonstrates the existence of a leak between the tank and the toilet bowl.
5. Are there any specific signs on walls or pipe fittings that suggest a water leak?
Yes, discoloration, moisture, or mold on walls, ceilings, floors, or near pipe fittings often indicate a water leak. The presence of a damp, musty, or moldy smell also could suggest a leak.
6. What should be the first course of action after detecting a water leak using a DIY method?
First, turn off the water supply to prevent further leakage. Second, try to find the source of the leak, and if possible, seal it temporarily. Finally, contact a professional plumber for a permanent fix.