
Before you begin painting, clearing your space is essential. Start by relocating furniture, rugs, and wall hangings. Slide heavy pieces out and take down any decor for easier access. Next, remove hardware and covers from walls, labeling them for easy reassembly. To safeguard your space, cover floors and furniture with drop cloths and apply FrogTape for precise edges. Make sure walls are clean, fixing any imperfections and sanding for smoothness. Apply primer evenly for a strong base. Finally, tape edges and trim for sharp lines. Each step sets the stage for a flawless paint job, revealing more tips as you progress.
Key Takeaways
- Clear the room of furniture and decor to create a blank canvas for painting.
- Protect floors and any remaining furniture with drop cloths to avoid paint splatters.
- Thoroughly clean walls to remove dirt and stains, ensuring a clean surface for painting.
- Repair any wall imperfections with spackle or patching, then sand for a smooth finish.
- Apply primer evenly to prep the surface, ensuring a uniform surface for a longer-lasting paint job.
Clear the Room
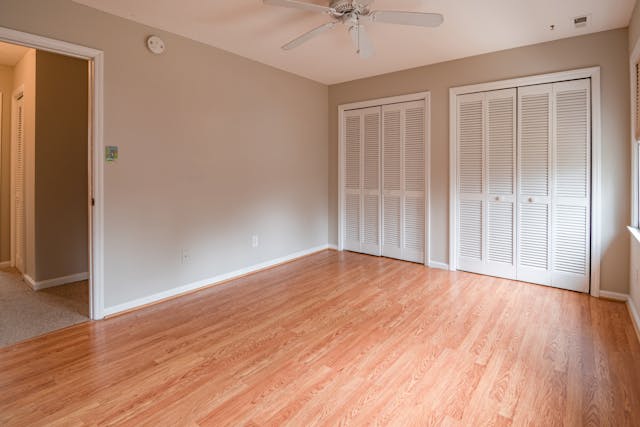
Before you begin painting, it’s vital to clear the room of any furniture, rugs, and wall hangings to avoid accidents and guarantee a smooth process. Removing small items and rugs not only prevents damage but also ensures you won’t trip over anything. For larger furniture that’s a bit more cumbersome to move, consider using furniture sliders. This simple tool can make a world of difference, allowing you to easily shift heavy pieces away from the walls and create ample space for your painting project.
Moreover, taking down wall decor is an important step. You might not realize it, but these items can get in the way and complicate the painting process. By removing them, you’re making sure that every inch of your walls is accessible and ready for a fresh coat of paint. This step is not just about avoiding paint splatters on your cherished items; it’s about creating a blank canvas that will help you achieve clean walls, which is the ultimate goal of any painting project. Remember, a well-prepared room is the foundation of a successful paint job.
Remove Hardware and Covers
Once you’ve cleared the room, it’s time to tackle the hardware and covers. Start by removing and labeling each piece, storing them in plastic bags to prevent misplacement. This step not only creates a smoother painting surface but guarantees you won’t lose track of any parts during the process.
Labeling Removed Items
To guarantee a smooth reassembly process after painting, it’s vital to label all removed hardware and covers, storing them in plastic bags for easy identification. Before you begin cleaning the walls, take a moment to organize. Clear labeling on each bag prevents confusion, making sure you’ll effortlessly find the right piece when it’s time to put everything back. This step not only saves you from the frustration of searching through a pile of hardware but also guarantees each item goes back precisely where it belongs, maintaining the integrity of your project. Organizing your hardware in labeled bags is a simple yet effective way to keep your painting project on track, avoiding any unnecessary delays or mix-ups during the critical reassembly phase.
Safe Storage Tips
After removing wall decor and hardware, it’s crucial to store them safely to prevent damage and misplacement during your painting project. Start by labeling and storing hardware in plastic bags. This simple step keeps you organized and guarantees you won’t lose track of any pieces. Remove switch plates, vents, and outlet covers to shield them from paint splatters. Once removed, place them in a designated area, perhaps on a drop cloth, safeguarding their condition and making it easier for you to reinstall them after painting. By taking off hardware and covers, you not only facilitate a smoother painting process but also protect these items from accidental paint damage. Proper storage is vital to maintaining their condition for when it’s time to put everything back in place.
Protect Surfaces and Furniture
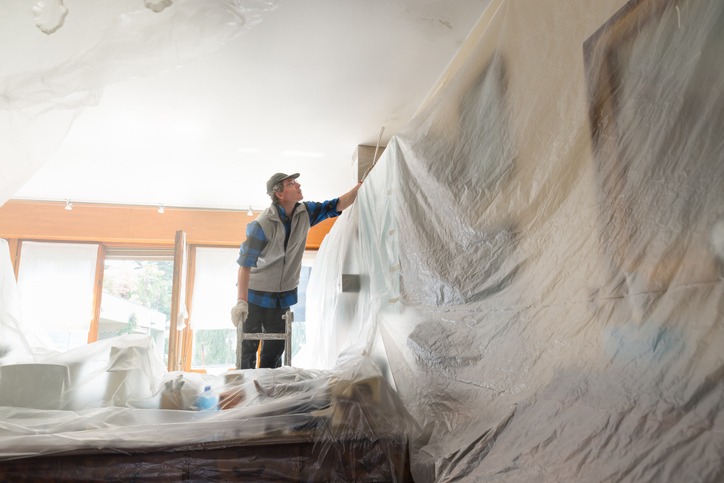
Before you dip your brush into the paint, make sure to cover floors and furniture with a drop cloth, safeguarding them from spills and splatters. This step is vital to preserving the integrity of your space and guaranteeing a mess-free painting experience. Don’t overlook areas that might not seem directly in the line of fire; paint has a way of reaching farther than you might anticipate.
Next, grab some FrogTape and meticulously outline baseboards, trim, windows, and door frames. This precision tape is crafted to shield these areas from accidental paint marks, ensuring sharp, clean lines that define professional-looking results. Remember, the goal is to enhance your space, not to leave it with unintended reminders of your painting project.
Before you proceed with painting, it’s crucial to make sure that all walls and surfaces are completely dry. This step is particularly important if you’ve had to lightly sand any areas to smooth them out or if you’ve used any cleaning solutions during prep work. A dry surface ensures that the primer and paint adhere properly, preventing bubbling or peeling down the line.
Applying primer is your next move. Acting as a barrier, it not only protects but also reduces the number of paint coats needed, saving you time and resources. Protecting surfaces and furniture during prep work isn’t just about keeping them clean; it’s about preparing a smooth canvas that will make your painting job look stellar.
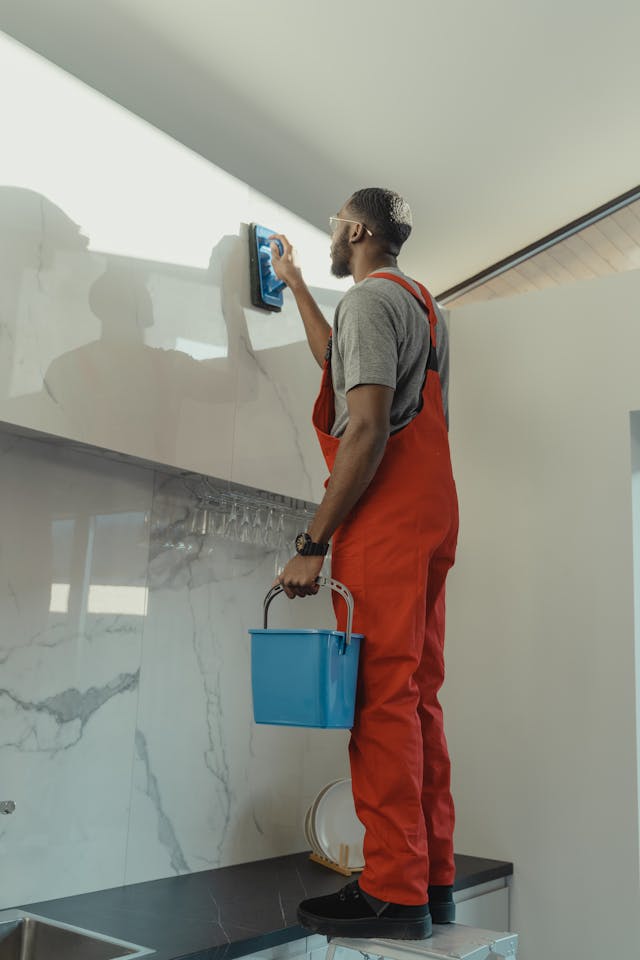
Clean Walls Thoroughly
Before you grab that paintbrush, it’s essential you tackle the walls with a keen eye. You’ll need to spot dirt and stains first, deciding on the best cleaner, like TSP for greasy kitchen messes, to guarantee a flawless paint job. Then, it’s all about scrubbing those stubborn spots and mastering the drying technique to keep dust from undoing your hard work.
Identify Dirt and Stains
Identifying dirt and stains is vital for a clean canvas before you start painting. Dirt and stains can undermine the adhesion and appearance of your new paint, especially if you’re covering old paint. Begin with a duster or vacuum to whisk away dust and loose debris. This step is essential; it’s not just about aesthetics but ensuring the new layer adheres properly and looks pristine.
For stubborn stains, a gentle cleaning solution or mild detergent might be necessary. Kitchens, notorious for oily residues, may require a stronger approach, like using TSP. It’s about more than just making the walls look good; it’s about securing a smooth, long-lasting finish. Clean walls thoroughly, and you’ll thank yourself later when your paint job looks flawless and endures.
Choosing the Right Cleaner
Selecting the right cleaner for your walls is crucial for achieving a flawless and durable paint finish. Before you grab your paintbrush, head to Home Depot and consider these steps to make sure your walls are primed for painting:
- Use a mild detergent to gently remove dirt and grime, guaranteeing a clean canvas for your new color.
- For kitchen walls plagued by oily residues, TSP (trisodium phosphate) is your go-to solution for a grease-free surface.
- Dust off every inch with a duster to achieve that smooth, ready-to-paint surface.
- Don’t shy away from hand-scrubbing those stubborn spots. It’s the secret to preventing any paint adhesion issues later on.
Cleaning your walls is not just a task; it’s the foundation for a professional and enduring finish.
Application and Drying Techniques
Once your walls are spotless, mastering the correct application and drying techniques guarantees a flawless paint job. Before you start painting your dining room, make sure you’ve cleaned the walls thoroughly. Dust and dirt can sabotage your efforts, so use a duster for loose debris and a mild detergent for a deeper cleanse. For kitchen areas that lead into your dining space, consider using TSP to tackle oily residues, making sure the paint sticks properly. Don’t forget to vacuum or sweep the floors afterward to prevent dust from resettling on the walls. This step is essential; a clean surface not only enhances paint adhesion but also contributes to a smoother, more professional-looking finish in your dining room.
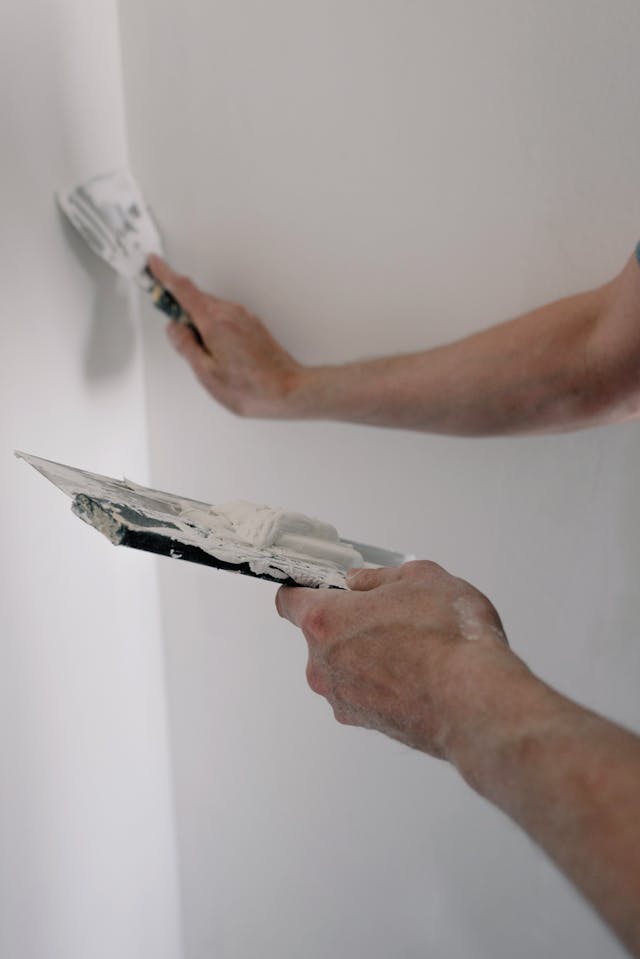
Repair Wall Imperfections
Before you start painting, it’s crucial to rectify any wall imperfections to guarantee a smooth, flawless finish. Ensuring all wall imperfections are addressed and repaired before proceeding with painting is not just a step; it’s a commitment to excellence that sets the tone for your entire project. The attention to detail here will reflect in the quality of your finished walls. Here’s how to make sure every blemish is conquered:
- Fill Small Holes: Small holes, the silent saboteurs of smooth walls, can be easily remedied with a bit of spackle. It’s like erasing mistakes and starting with a clean slate.
- Patch Larger Damage: For those more noticeable signs of wear and tear, a drywall repair kit becomes your best friend. It’s about restoring integrity, not just covering flaws.
- Prime Patches: Any patch larger than a dime deserves a primer’s touch. This ensures your paint doesn’t just stick, but adheres with purpose, avoiding splotchy surprises.
- Address Every Imperfection: It’s a meticulous hunt, but each imperfection you find and fix is a victory for your walls. It’s transforming the ordinary into the extraordinary.
Sand Walls Smooth
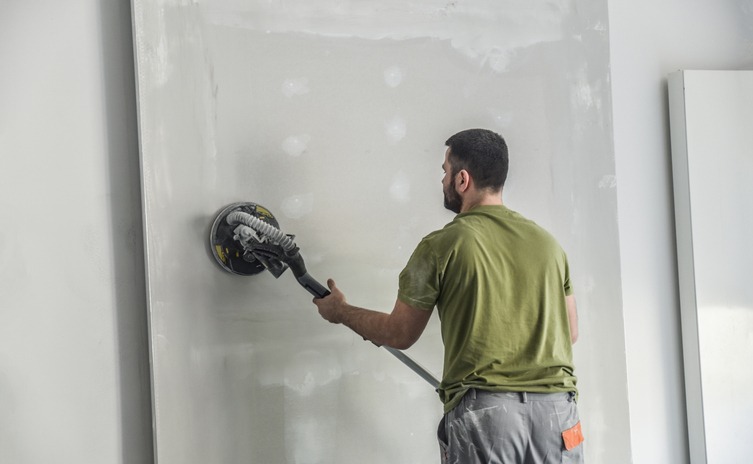
After fixing any wall imperfections, it’s time to sand the walls smooth, ensuring your paint has the perfect canvas to adhere to. This step is essential, especially if you’re aiming for a high gloss finish, as it highlights any bumps or unevenness. Grab a piece of 220 grit sandpaper for light sanding or a pole sander for tackling larger areas efficiently. Gently sand the surface to remove imperfections and rough patches, aiming for a critical-grade smoothness that’ll make your paint job shine.
Apply Primer Evenly
To guarantee a consistent surface for your paint, it’s essential to apply primer evenly across the wall. Achieving an even application of primer not only ensures a uniform surface for your paint to adhere to but also seals the wall. This prevents the paint from soaking in, allowing for a consistent finish that’s free from streaks, blotches, or uneven color coverage. Additionally, a well-primed surface leads to a longer-lasting and more durable paint job. To make sure you’re on the right track, remember to:
- Prep the surface thoroughly: Make sure the wall is clean, dry, and smooth.
- Choose the right primer: Select one that’s suitable for your wall’s surface and the type of paint you’ll be using.
- Use the right tools: A high-quality roller or brush can make all the difference in achieving an even coat.
- Allow it to dry: Ensure the primer is fully dry before moving on to painting. This step is critical for the best results.
Tape Edges and Trim
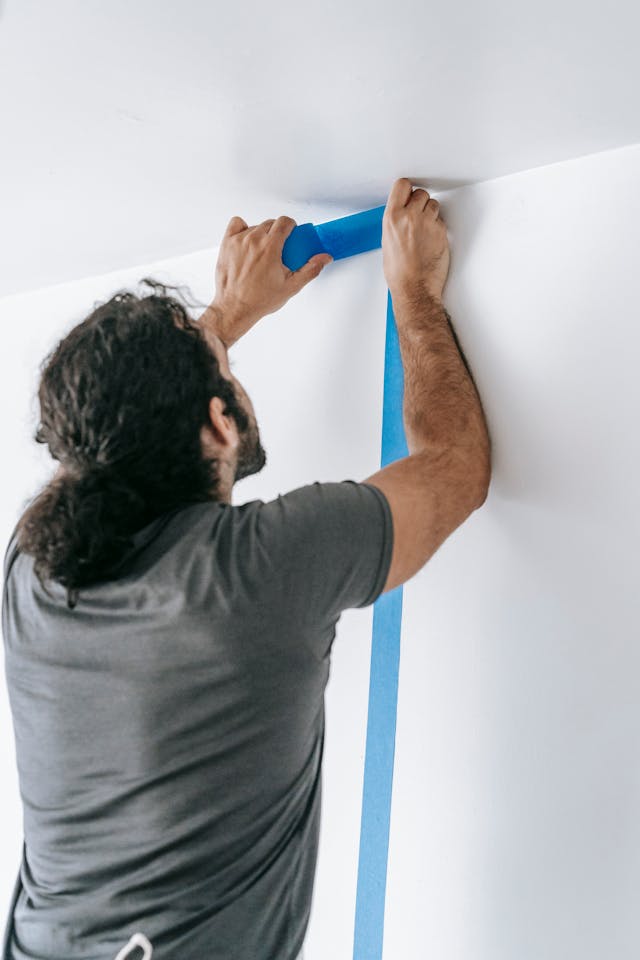
After you’ve applied primer evenly, it’s time to focus on ensuring clean lines by using high-quality painter’s tape on edges and trim. This step is essential for achieving a professional-looking finish. Choose a tape that’s specifically designed to prevent paint bleed, which keeps your edges sharp and clean.
Start by applying the tape along the edge you’re planning to paint, pressing down firmly to create a tight seal against the surface. This prevents any unwanted paint from seeping through. Make sure to overlap the tape at corners and edges; this technique is vital to maintaining those crisp lines that make your work look excellent.
Before you dip your brush in paint, double-check the tape for any leaks or gaps. A thorough inspection now makes it easier to move forward confidently, knowing you won’t have to rectify mistakes later.
When it’s time to remove the tape, do so carefully, pulling it back on itself at a 45-degree angle. This method helps avoid pulling off any fresh paint along with the tape, preserving your hard work. Remember, patience and attention to detail at this stage ensure your painting project looks seamless and professional.
Frequently Asked Questions
How Do You Prepare a Space for Painting?
To prepare for painting, you’ll first choose your colors. Then, clear the room, clean the walls, patch holes, and repair trim. Finally, sand for smoothness and tape off areas for crisp, clean paint lines.
How Do You Prepare an Area for Painting?
Before painting, you’ll want to choose your colors wisely, ensuring they match your vision. Then, clear the room, clean the walls, patch any holes, and tape off areas to avoid mistakes for a flawless finish.
What Do You Need to Prep Before Painting?
You’ll need to choose your color carefully before starting. Then, clear the room, clean and repair walls, and prep trim. It’s all about setting the perfect canvas for your chosen color to shine.
What Preparation Is Needed to Paint a Room?
To prep a room for painting, you’ll need to choose your color first. Then, empty the room, scrub the walls, repair and smooth any imperfections, and finally, tape off areas to guarantee sharp, clean lines.
Conclusion
Now that you’ve prepped like a pro, you’re all set to paint. Remember, the effort you’ve put into preparing your space will pay off. Your walls are clean, smooth, and primed, ensuring your paint job looks flawless. Don’t rush through the final steps. Take your time applying paint, and appreciate the transformation. By following these essential steps, you’ve set yourself up for success. So, grab your paintbrush and let the magic happen. Happy painting!