
In an era where telegraphs have given way to teleconferencing, the importance of a quiet room hasn’t lessened. If you’re grappling with the challenge of minimizing noise transfer between rooms, using drywall for soundproofing might just be your knight in shining armor. By selecting the right type of drywall, such as Type X 5/8-inch, and combining it with techniques like insulating walls with fiberglass batts, you can greatly reduce unwanted sounds. Yet, the devil is in the details, and understanding the nuances of installation and the additional measures you can take to enhance soundproofing is essential.
Stick around to uncover how to turn the volume down in your space without hitting the mute button on style or functionality.
Understanding Sound Transmission
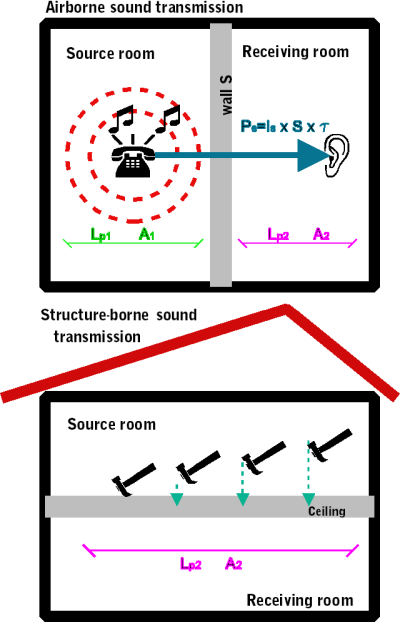
To effectively soundproof your space, grasping how sound waves travel through walls, either as airborne noise, like conversations and music, or as impact noise from activities such as footsteps, is important. Understanding the dynamics of sound transmission helps you tailor soundproofing solutions that address the specific type of noise plaguing your peace. Airborne noise, which includes voices and music, travels through the air and can easily seep through walls if they lack sufficient mass. On the other hand, impact noise, resulting from physical contact like footsteps or objects hitting walls, also poses a challenge by vibrating the structure itself, further complicating noise transfer issues.
Selecting the Right Drywall
When you’re ready to enhance your space’s tranquility, understanding the types of soundproof drywall, like QuietRock or SilentFX, becomes essential. You’ll also need to take into account the thickness of the drywall and how it influences sound dampening. Evaluating drywall performance metrics will guide you in choosing the product that best meets your soundproofing needs.
Types of Soundproof Drywall
Selecting the right soundproof drywall, such as QuietRock, SilentFX, or SoundBreak, depends on your specific sound-dampening needs and project requirements. These brands offer a variety of types each tailored to different soundproofing scenarios:
- EZSnap: Ideal for quick and easy installation without compromising on noise reduction.
- Mold Resistant: Perfect for areas prone to moisture, ensuring durability alongside sound dampening.
- 530/530 RF**: Offers a balance between cost and effectiveness for general soundproofing needs.
- 545**: The best choice for maximum noise reduction in high-demand environments.
All these options feature a three-layer design incorporating viscoelastic sound-absorbing polymers, which greatly enhances noise reduction. The installation process mirrors that of traditional drywall, making it a straightforward choice for your soundproofing project.
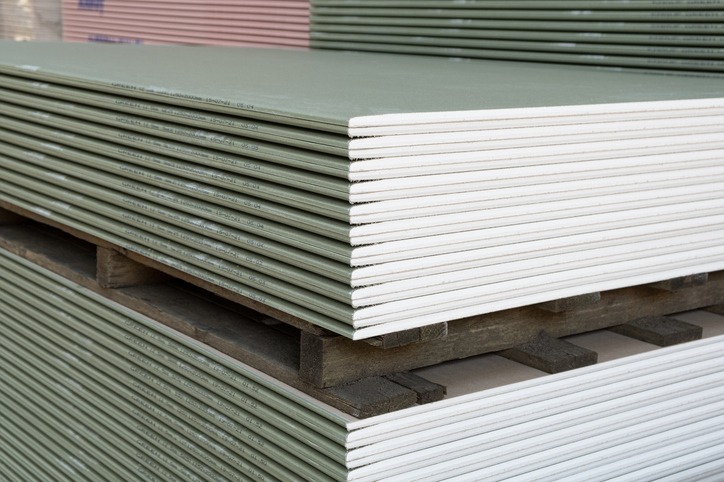
Drywall Thickness and Sound
Considering the desired level of soundproofing, it’s critical to choose the right thickness for your drywall, as thicker options better insulate against noise. Standard drywall typically comes in 1/2 inch thickness, but for enhanced sound insulation, you might consider soundproof drywall ranging from 5/8 inch to 1 inch thick. The principle here is straightforward: thicker drywall absorbs more sound energy, effectively reducing noise transfer between rooms. Soundproof drywall, with its added mass and sound-dampening properties, is specifically designed to minimize noise transmission. Hence, when you’re eyeing the best results in soundproofing, assess the specific requirements of your space to determine the appropriate drywall thickness. This deliberate selection guarantees your efforts in soundproofing pay off, curbing unwanted noise and fostering a quieter environment.
Evaluating Drywall Performance Metrics
To make sure you’re selecting the best soundproofing drywall, it’s important to comprehend metrics like Sound Transmission Class (STC) ratings and Noise Reduction Coefficient (NRC). These are your guiding stars in the quest to minimize noise transfer between rooms. Here’s what you need to know:
- STC ratings measure a material’s ability to block airborne sound. The higher the STC, the better it is at keeping noise at bay.
- NRC values gauge sound absorption. A higher NRC means more sound is absorbed, reducing echoes.
- Choose soundproof drywall with high STC ratings to effectively block noise transfer.
- Understanding both STC and NRC helps in selecting the right drywall, ensuring your space remains tranquil and free from unwanted sound.
Installation Techniques
Now that you’ve selected the right drywall for soundproofing, it’s essential to focus on how you install it to maximize its effectiveness. Applying the right techniques, from using resilient channels to sealing gaps with acoustical sealant, can make a significant difference in noise reduction. Let’s explore the best practices for installation to guarantee your space is as quiet as possible.
Selecting Appropriate Drywall
Selecting the right soundproof drywall, like QuietRock or SilentFX, is essential for maximizing noise reduction in your space. When choosing the most suitable drywall for your needs, consider the following:
- Double or Triple-Layered: Opt for double or triple-layered sound-dampening drywall to minimize noise transfer between rooms.
- Proper Installation Techniques: Guarantee staggered seams and the use of acoustical sealant are part of your installation process for best soundproofing.
- Thickness and Composition: The thickness and specific composition of the drywall play an important role in effectively blocking both airborne and impact noise.
- Overall Strategy: Remember, utilizing soundproof drywall should be part of a broader soundproofing strategy to achieve quieter living or working spaces.
Effective Soundproofing Methods
Implementing effective soundproofing methods, such as using resilient channels and hat channels, dramatically reduces noise transfer through walls by creating a separation between the drywall and the studs. This technique, alongside the use of soundproofing materials like mass loaded vinyl and Green Glue, can greatly enhance the acoustic performance of your space.
| Method | Benefit |
|---|---|
| Double Stud Walls | Adds mass, reducing sound transmission. |
| Green Glue | Absorbs and dissipates sound energy between drywall layers. |
| Acoustical Sealant | Seals gaps and seams, preventing sound leaks. |
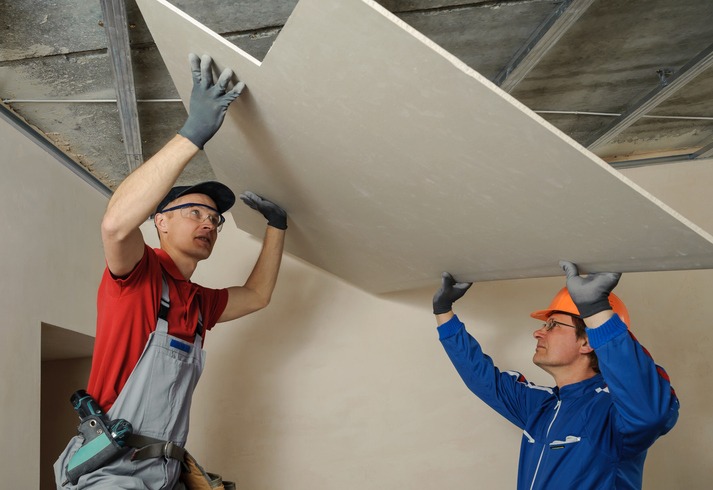
Installation Best Practices
To maximize the soundproofing effectiveness of your space, it is important to adhere to best installation practices for drywall. Here are key steps to make sure you minimize sound transfer between rooms:
- Use resilient channel to decouple drywall from studs, greatly reducing sound transfer through walls.
- Install Type X 5/8-inch drywall for improved soundproofing performance. This thicker drywall variant offers enhanced sound blocking capabilities.
- Seal gaps with acoustical sealant to prevent sound leaks. Making sure all edges and seams are sealed eliminates pathways for sound.
- Utilize backer strips for a secure attachment of drywall to studs, further enhancing soundproofing effectiveness.
Following these practices ensures your drywall installation effectively minimizes noise transfer, creating a quieter and more peaceful environment.
Sealing for Soundproofing
For best soundproofing, sealing any gaps that could allow sound to leak between walls is necessary. Using an acoustic sealant to fill these voids is essential for preventing unwanted noise from traveling through your home. It’s not just the obvious gaps you need to worry about; even small openings around electrical boxes and outlets can undermine your soundproofing efforts if they’re not properly sealed.
| Sealing Method | Application Area | Benefit |
|---|---|---|
| Acoustic Sealant | Between drywall panels | Reduces sound transmission |
| Weatherstrip Tape | Doors and windows | Enhances overall soundproofing |
| Caulking | Plumbing penetrations | Ensures airtight sealing |
| Green Glue | Between drywall layers | Enhances soundproofing performance |
Enhancing With Insulation
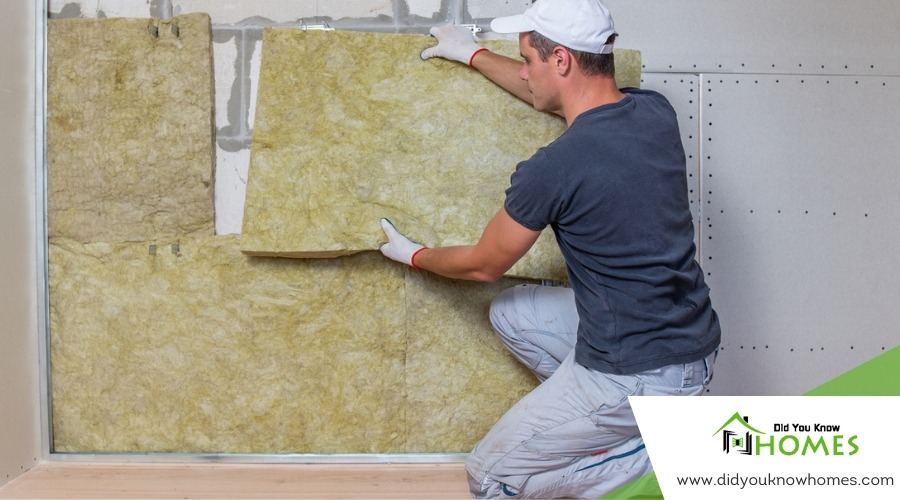
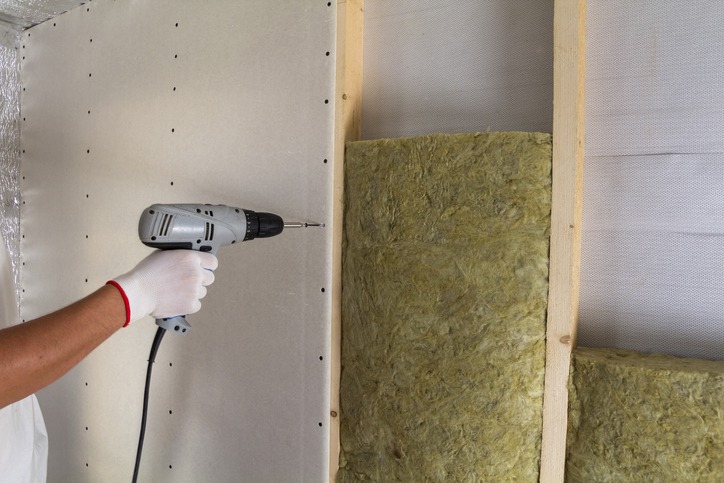
After sealing your walls for soundproofing, it’s time to focus on enhancing insulation to further lessen noise transfer. The right insulation can turn a noisy room into a peaceful space, ensuring that sound from one area doesn’t easily travel to another. Here’s how you can use various insulation materials alongside drywall to achieve better soundproofing:
- R-11 Fiberglass Batts**: Installing R-11 fiberglass batts between wall studs greatly reduces noise transfer. Its dense structure absorbs sound, making it harder for noise to pass through walls.
- Closed Cell Foam Insulation: For vibrations and low-frequency sounds, closed cell foam insulation is your best bet. It prevents resonance, absorbing sound waves before they can bounce back into the room or travel to adjacent spaces.
- Mass-Loaded Vinyl: Adding a layer of mass-loaded vinyl insulation between drywall sheets greatly enhances soundproofing. This material acts as a dense, sound-blocking barrier, making it difficult for noise to penetrate.
- Acoustic Mineral Wool**: For superior sound absorption, consider insulating walls with acoustic mineral wool. This material excels at preventing sound transmission, ensuring that conversations, music, or any form of noise stays confined to its origin.
Incorporating these insulation materials into your soundproofing project, you’ll not only reduce noise transfer but also enhance the overall tranquility of your environment.
Common Soundproofing Challenges
Despite your best efforts with drywall, you’ll likely encounter common soundproofing challenges such as airborne noise sneaking through walls. Even when you’re armed with the determination to create a serene space, the reality of acoustic noise seeping into your existing room can be disheartening. Understanding that standard drywall, while a popular choice for interior walls, falls short when it comes to effectively blocking out sound is crucial.
The heart of the issue lies in airborne noise transmission – those pesky sounds that travel through the air and find their way through the smallest openings. You might think that simply adding more layers of standard drywall would do the trick, but this approach often fails to provide the desired quietude. Instead, specialized soundproof drywall, like QuietRock, comes into play as a superior alternative for soundproofing walls.
However, integrating soundproof drywall isn’t a simple plug-and-play solution. Proper installation is key, requiring a thorough understanding of how to incorporate it into a complete wall system designed to minimize noise transfer. Without this careful integration, even the best soundproof drywall can fall short of its potential to keep your space tranquil.
Maintenance and Upgrades
Maintaining your drywall by patching up holes and cracks is essential to keeping sound from sneaking between rooms. But when you’re ready to take noise reduction to the next level, consider these upgrades:
- Upgrade to Soundproof Drywall: Options like QuietRock offer specialized layers that greatly reduce noise transfer compared to standard drywall. This switch can be a game-changer for creating a more serene environment.
- Add an Extra Layer: If completely replacing drywall isn’t in the cards, adding an extra layer of soundproof drywall or applying a soundproof compound can bolster your walls’ ability to dampen sound. This step can effectively enhance your space’s overall tranquility.
- Seal Gaps with Acoustical Sealant: Inspecting your drywall seams and edges for any gaps and sealing them with acoustical sealant is a must. This simple action can prevent sound waves from traveling through tiny openings, improving your room’s soundproofing performance.
- Regular Drywall Maintenance: Don’t forget the basics of drywall maintenance. Regularly patching up holes or cracks not only keeps your walls looking good but also maintains their soundproofing integrity, ensuring that your efforts in noise reduction last longer.
Conclusion
In wrapping up, remember that effectively minimizing noise transfer between rooms with drywall involves more than just choosing the right materials. You’ve got to seal gaps, enhance with insulation, and tackle common challenges head-on. Regular maintenance and considering upgrades are also key. By understanding sound transmission, selecting appropriate drywall, and applying proper installation techniques, you’re well on your way to creating a quieter, more peaceful environment. So, don’t overlook these steps—they’re your blueprint to soundproofing success.