
You might think that transforming your walls into a masterpiece requires the touch of a Michelangelo, but with a few simple DIY drywall projects, you’ll be well on your way to mastering the art of drywall yourself. From patching small holes that seem to mysteriously appear, to installing new drywall that can change the entire feel of a room, these tasks are within your reach. With the right guidance on techniques and tools, you’ll discover how tackling these projects on your own can not only save you money but also equip you with skills that’ll last a lifetime. Curious about where to start? Let’s explore the essentials of drywall repair and installation together, and uncover the tricks that can turn you into a DIY drywall wizard in no time.
Patching Small Holes
For patching small holes in your drywall, you’ll need spackle, a putty knife, sandpaper, and matching paint to achieve a seamless repair. Spackle is your go-to material because it’s specifically designed to fill in those pesky little holes and cracks that can mar your walls. It’s a lightweight compound, making it easy to work with, especially for quick fixes.
When you’re ready to patch, start by applying the spackle with your putty knife. It’s important to remember that thin layers are key. Piling on too much at once won’t do you any favors. Instead, apply a thin layer, let it dry completely, and then add more if needed. This step-by-step approach ensures the spackle bonds well with your drywall, creating a smooth base for the final touches.
Once the spackle is dry, grab your sandpaper and smooth out the patched area. This step is all about blending the repair into the surrounding wall for that professional finish. Finally, match your paint color as closely as possible and apply it over the patched area. With these steps, you’ll have your drywall looking as good as new, blending the repair seamlessly into the rest of your wall.
Repairing Large Holes
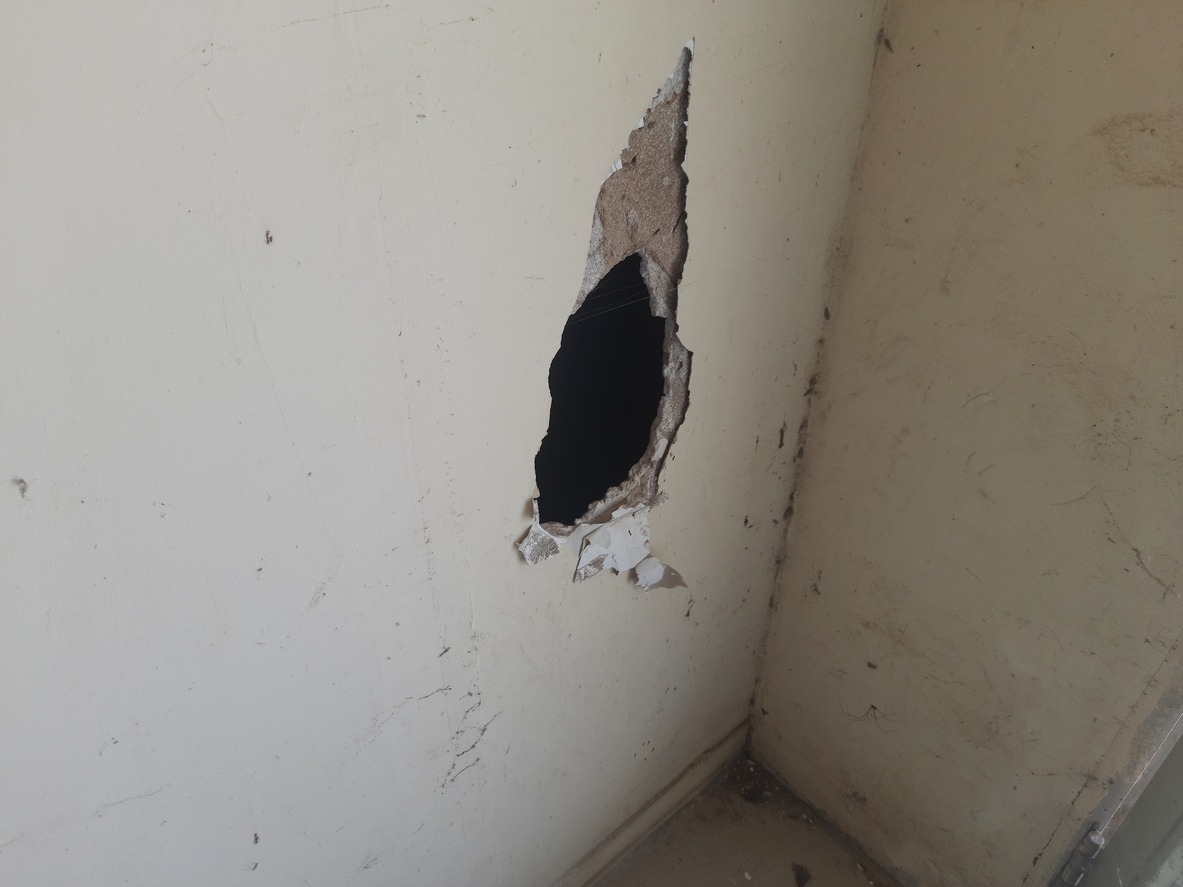
While patching small holes might seem straightforward, repairing larger holes in your drywall involves a more involved process. Large holes require a methodical approach to make sure the repair is not only effective but also blends seamlessly with the rest of your wall. Here’s a step-by-step guide to tackling large holes with confidence.
| Step | Action |
|---|---|
| 1 | Cut out the damaged drywall to create a clean area for the patch. |
| 2 | Install wood backing behind the existing drywall for support. |
| 3 | Attach a new piece of drywall to the wood backing. |
| 4 | Apply joint compound and mesh tape over the seams. |
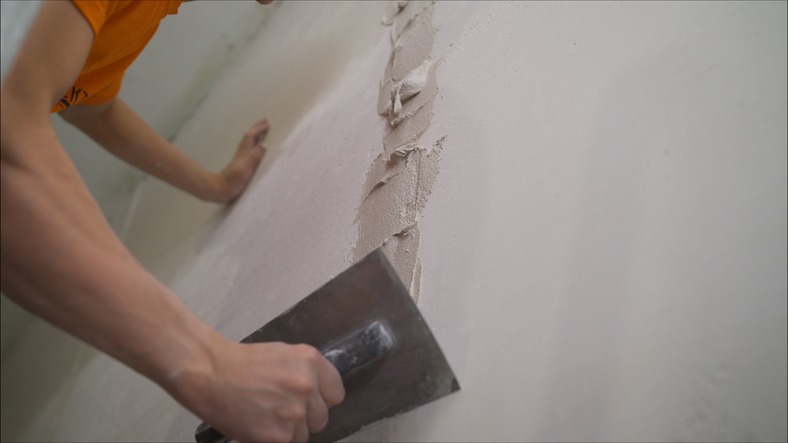
Once you’ve installed the patch and secured it with wood backing, the next step is to apply joint compound. This compound, along with mesh tape, is essential for reinforcing the patch and making sure a smooth, seamless finish. After the joint compound has dried, sanding the area is important to achieve a flat and even surface. The final step in your drywall repair process involves priming and painting the repaired area to match the surrounding wall. This meticulous approach ensures your large holes are fixed with precision, leaving your walls looking as good as new.
Smoothing Wall Dings
Next, let’s tackle smoothing wall dings, starting with identifying those small imperfections on your walls. You’ll need to apply spackle correctly to fill in those dents and secure a smooth finish. This step is vital for preparing your wall for a fresh coat of paint or simply making it look pristine.
Identifying Wall Imperfections
You’ll often notice that wall dings, those minor yet annoying imperfections, can mar your home’s smooth surfaces due to everyday accidents or movements. These imperfections on your drywall don’t have to be a permanent eyesore. Understanding how to fill these dings is the first step towards restoring your walls.
| Step | Description |
|---|---|
| Identifying Dings | Look for minor imperfections caused by daily activities. |
| Choosing Filler | Select spackle or joint compound for the best results. |
| Application Tool | Use a putty knife for even application over the dings. |
Don’t let these minor setbacks detract from the beauty of your home. With the right approach, you can tackle these imperfections head-on.
Applying Spackle Correctly
Applying spackle correctly can effortlessly transform those unsightly wall dings into seamless surfaces. When you’re faced with dents and small holes in your drywall, spackle is your go-to solution. Start by grabbing a putty knife to apply the spackle, ensuring the hole is thoroughly filled for a seamless repair. You’ll want to scrape off any excess spackle to create a smooth surface before it dries. Once dried, sanding is essential to achieve that polished finish on the repaired area. For a flawless blend with the surrounding wall, applying matching paint over the dried spackle is the final step. With these simple steps, you’ll have your wall looking as good as new in no time.
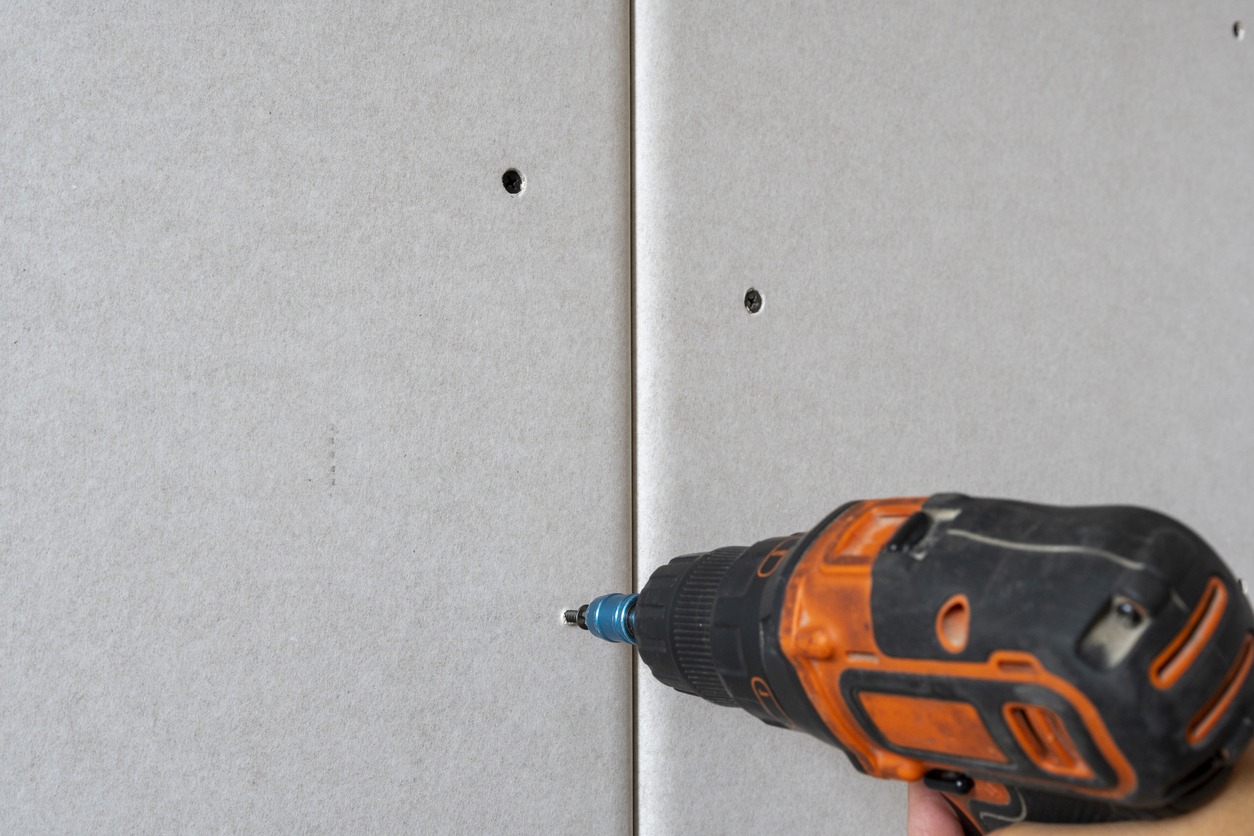
Installing New Drywall
To start installing new drywall, first determine the project’s size to figure out how much and what type of drywall you’ll need. Once you’ve got your measurements, you’ll need to buy the right amount of drywall sheets. After that, it’s time to get cutting and hanging.
Using a T-square and saw, you’ll accurately cut the drywall sheets to fit your specific installation area. This precision guarantees that your drywall fits perfectly against the framing, minimizing gaps and potential weak points.
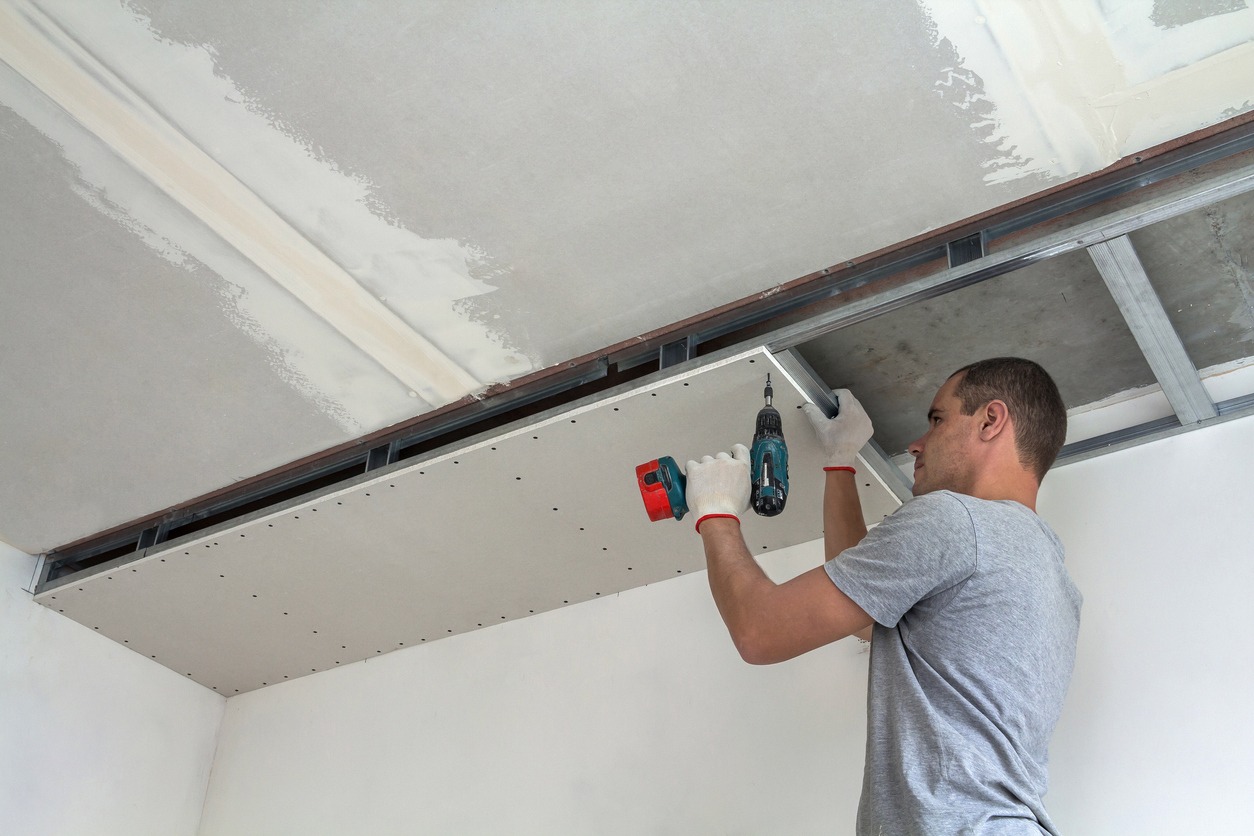
When it’s time to hang the drywall, remember that the orientation matters. For wood studs, you’ll want to hang the drywall horizontally. This provides more stability and support. On the other hand, if you’re working with metal studs, hang the drywall vertically for the best results.
Here’s a quick reference table for your installation process:
| Step | Tool Needed | Orientation |
|---|---|---|
| Measure & Plan | Tape Measure | N/A |
| Cut | T-square, Saw | N/A |
| Hang on Wood Studs | Drill, Screws | Horizontal |
| Hang on Metal Studs | Drill, Screws | Vertical |
Follow these steps, and you’ll have your new drywall installed with a solid foundation for the next steps of your project.
Mudding and Taping Techniques
Now that your drywall is up, it’s time to focus on mudding and taping, the key steps that guarantee a smooth, seamless finish. You’ll need to prep your surfaces carefully before you start applying joint tape correctly. Mastering smooth mudding techniques will elevate the look of your walls, making them ready for a fresh coat of paint.
Preparing Surfaces for Mudding
Before you start mudding, make sure the drywall joints are clean, dust-free, and securely taped. This important step is essential for a smooth, professional finish on your walls. Here are the key actions to prepare your surfaces:
- Inspect all drywall joints for cleanliness and make sure there’s no debris or dust.
- Use a taping knife effectively to press down any protruding tape.
- Prepare your joint compound according to the manufacturer’s instructions.
- Feather the edges of the joint compound to blend seamlessly with the drywall.
- Allow yourself patience; don’t rush the drying process between applications.
Applying Joint Tape Correctly
Applying joint tape correctly is an important step in making sure your drywall seams are reinforced and smooth. Whether you’re using paper tape or fiberglass mesh tape, the key is embedding it properly in joint compound, or mud. After hanging your drywall sheets, spread a thin layer of mud along the seams. Carefully apply the tape, pressing it into the wet compound. For paper tape, fold it along the center crease before application, making sure it fits snugly into corners. With fiberglass mesh tape, which is self-adhesive, simply press it directly onto the seam. Avoid overlapping the tape as this can create thickness that’s challenging to smooth out. Applying multiple layers of joint compound over the tape will guarantee a strong, seamless finish.
Smooth Mudding Techniques
To achieve a seamless finish on your drywall, mastering smooth mudding techniques is essential. Here’s how you can get that flawless look:
- Mudding is about applying joint compound to cover drywall seams and screw indentations.
- Taping involves placing drywall tape over joints to reinforce them and prevent cracks.
- For a professional finish, it’s important you perfect both mudding and taping.
- Use a taping knife to feather out the compound, ensuring a smooth change between taped areas and the rest of the wall.
- After drying, sand the mudded and taped areas to achieve a flat, uniform surface ready for paint or texture.
These steps will guide you towards a beautifully finished drywall project you’ll be proud of.
Sanding for a Smooth Finish
Achieving a smooth and seamless finish on your drywall repairs hinges on mastering the art of sanding. Over-sanding can irreparably damage your drywall, forcing you to start over with a new sheet. It’s important to use the right sanding techniques to avoid creating uneven surfaces or compromising the integrity of your repair. By carefully following proper sanding methods, you guarantee the repaired area blends seamlessly with the surrounding drywall, achieving a professional-looking finish.
Here are some essential tips and techniques for effective drywall sanding:
| Technique | Tool | Tip |
|---|---|---|
| Gentle Circles | Fine-grit Sanding Sponge | Prevent gouges and uneven surfaces |
| Edge Sanding | Sanding Block | Achieve crisp edges without overdoing it |
| Final Pass | 120-grit Sandpaper | Smooth finish ready for painting |
Fixing Drywall Cracks
Moving on from achieving a smooth finish, let’s tackle fixing drywall cracks, a common issue you’re likely to encounter. You’ll need to first identify the type of crack you’re dealing with, gather the right materials, and understand the patching process. These steps are essential in restoring the look and strength of your walls.
Identifying Drywall Cracks
Before tackling drywall cracks, it’s important to identify their causes, which can range from settling and temperature changes to structural issues. Knowing the cause can help you choose the right fix and repair approach. To properly address drywall cracks:
- Inspect the crack’s width and length. Small, hairline cracks are common and usually not a pivotal concern.
- Check for signs of moisture. Water damage can cause cracks and may require a different repair strategy.
- Look for patterns. Diagonal or stair-step cracks near doors and windows might indicate a more serious issue.
- Consider the age of your home. Settling is more common in newer homes.
- Observe changes over time. If cracks widen or new ones appear, it could signal a structural problem.
Understanding these factors is fundamental before proceeding with any repair.
Crack Repair Materials
To effectively fix drywall cracks, you’ll need materials such as joint compound, mesh tape, a putty knife, and sandpaper. Drywall cracks often result from settling, temperature changes, or improper installation, making it essential to have the right tools and materials on hand for repairs. The joint compound is your go-to for filling in those unsightly cracks. Once the crack is filled, mesh tape comes into play, reinforcing the repair and ensuring it holds up over time. You’ll use the putty knife to apply and smooth the joint compound, making sure it blends seamlessly with the surrounding wall. Finally, sandpaper is indispensable for smoothing the repaired area, ensuring a flawless finish. Tackling this DIY project not only saves you money but also keeps your home looking its best.
Patching Process Steps
Having gathered the necessary materials for fixing drywall cracks, let’s now walk through the step-by-step patching process to guarantee a smooth, invisible repair. Here’s what you’ll need to do:
- Determine the extent of the crack in the drywall to assess the repair needed.
- Use a utility knife to cut along the crack and remove any loose or damaged material.
- Apply a thin layer of joint compound over the crack, ensuring it is smooth and even.
- Embed drywall tape into the wet joint compound to reinforce the repair and prevent future cracking.
- Allow the joint compound to dry completely before sanding, priming, and painting the patched area for a seamless finish.
Creating Drywall Textures
Adding texture to your drywall can transform the ambiance of any room, offering depth and personality through a variety of techniques. Drywall textures, such as orange peel, knockdown, popcorn, and skip trowel, allow you to add character to walls and ceilings effortlessly. The key to achieving these finishes lies in the application of joint compound using specific texturing techniques.
By applying the joint compound in different patterns, you can create unique finishes that not only beautify your space but also help conceal any imperfections on the drywall surface. This is a practical way to make sure your walls look visually appealing without the need for extensive repairs.
Different textures require distinct tools for application. For instance, brushes and rollers might be ideal for simpler textures like orange peel, while trowels and sprayers are often used for more complex patterns such as knockdown or skip trowel. It’s important to choose the right tool for the texture you’re aiming for to achieve the best results. With a bit of practice and the right technique, you can master the art of drywall texturing and give your home a fresh, personalized look.
Drywall Corner Repair
After exploring how textures can enhance your walls, let’s focus on repairing drywall corners to make certain your surfaces remain flawless and sturdy. Whether you’re dealing with dented, chipped, or worn-out corners, fixing them is crucial for maintaining both the structural integrity and aesthetics of your walls. Here’s how you can tackle drywall corner repair on your own:
- Apply a Corner Bead: This helps provide a smooth edge to work with and guarantees your repair blends seamlessly with the existing wall.
- Spread Joint Compound: Use a putty knife to apply joint compound over the corner bead, filling in any gaps or dents.
- Use a Corner Trowel: This tool assists in applying the joint compound evenly on both sides of the corner for a professional finish.
- Sand for Smoothness: Once the joint compound dries, sand the area until it’s smooth and flush with the rest of the wall.
- Feather Out the Edges: Gradually thin out the joint compound at the edges to avoid visible lines or bumps.
With patience and the right technique, you can repair drywall corners to look as good as new. Remember, a flawless finish starts with careful preparation and ends with meticulous smoothing and sanding.
Cutting Drywall Sheets
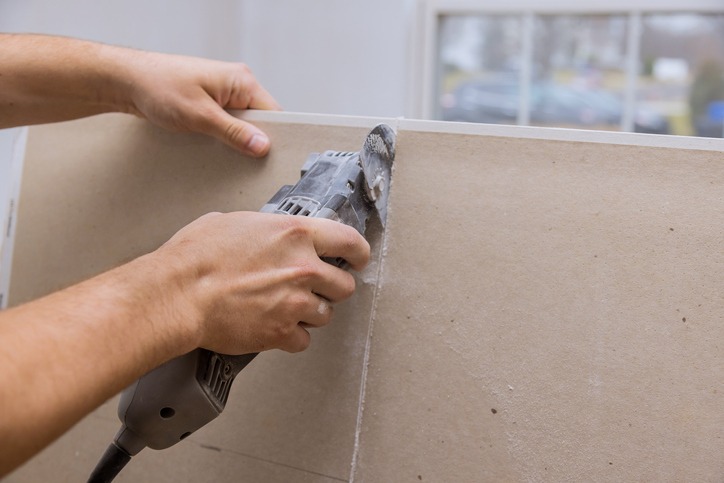
Cutting drywall sheets accurately is an important step in making sure your DIY project looks professional and seamless. With the right tools and techniques, it’s easy to get precise cuts that fit perfectly into your space. You’ll start by using a T-square and a utility knife to score the drywall along the cut line. This method guarantees precise cutting, making your work look neat and tidy.
After scoring, simply snap the scored drywall sheet along the cut line for a clean break. This technique prevents damage to the gypsum core, an essential aspect of maintaining the integrity of your drywall. To avoid over-cutting, it’s important to score the paper on both sides of the drywall sheet before snapping it. This little trick can save you from unnecessary waste and frustration.
When cutting holes for outlets or switches, first mark the area clearly. Then, drill starter holes and use a keyhole saw for those precise cuts. This approach allows for a snug fit around your electrical fixtures, enhancing the overall look of your project.
Conclusion
Now that you’ve got the basics down, tackling your own drywall projects should feel less intimidating. Whether you’re patching small holes, repairing large ones, or smoothing out those annoying dings, you’ve got this. Remember, installing new drywall, mastering mudding and taping, fixing cracks, creating textures, and repairing corners are all within your reach. Grab your tools, follow these steps, and you’ll be sprucing up your walls in no time. Here’s to making your home look its best, all by yourself!