
If you stroll through historic downtown areas, you’ll often find charming old brick buildings that have been around for a century or even more. These buildings, including commercial ones like courthouses, libraries, churches, hospitals, and even jails, are often made of bricks or stone masonry.
But as the years go by, the mortar that holds these bricks and stones together can deteriorate due to factors like moisture and mold. Even if the bricks themselves are still in good condition, the mortar can wear out. That’s where a technique called “tuckpointing” comes into play, and it’s one of the reasons why Europe has so many beautifully preserved old masonry buildings.
So, if you’re looking to protect your aging bricks from mortar decay while giving them a fresh appearance, keep reading to discover all you need to know about tuckpointing, along with some helpful tips.
What is Tuckpointing?
Brick can stand the test of time for centuries, but the mortar that holds it together doesn’t last nearly as long. Mortar is softer than brick, making it the weak link that eventually needs repair after about 25 to 30 years, especially in tough conditions.
Tuckpointing, or repointing, involves removing damaged or deteriorated mortar to a consistent depth. Then, new mortar is pushed into the gaps between the bricks using either a pointing trowel or a mortar gun, which is similar to a caulking gun. Finally, a rounded pointing tool smooths and shapes the mortar.
Tuckpointing means swapping out old mortar for new mortar that matches your brick or stone closely. Then, thin, contrasting lines are drawn within an impression in the mortar using putty. Traditional tuckpointing is often used to restore historic brick homes, but it can give a fresh look to any brick structure with aging mortar.
If done right, you might not have to replace the mortar for up to 30 years, though this can vary depending on where you live.
While tuckpointing can spruce up the appearance of your home’s masonry, it’s also a lifesaver for its structural integrity. Adding fresh mortar can prevent the weakening of walls and chimneys and create a better seal between bricks to keep moisture at bay.
Benefits of Tuckpointing:
- Makes the mortar lines look crisp and thin
- Conceals wear along the edges of bricks
- Extends the life of the brick structure
- Adds years to the brick’s lifespan
- Protects the brick and structure from the elements
Tuckpointing vs. Repointing vs. Pointing: What’s the Difference?
When it comes to brickwork, you might hear terms like “tuckpointing,” “repointing,” and “pointing” tossed around, and it’s easy to get a bit confused. Let’s break it down:
1. Tuckpointing and Repointing
Many folks use the term “tuckpointing” to describe the process of swapping out old mortar with new mortar. However, traditional tuckpointing takes it up a notch. It uses mortar that perfectly matches the color of the brick, creating a seamless blend. Then, a contrasting putty is added to the new mortar lines, making it pop against the brick and new mortar. This creates a crisp, visually appealing look that rejuvenates the overall appearance of the brick.
Typically, tuckpointing is seen as a cosmetic enhancement, while repointing is considered a structural repair. However, don’t let the term fool you; tuckpointing offers the same structural benefits as repointing, with the added aesthetic touch of contrasting putty lines.
2. Pointing
As mentioned earlier, pointing is a bit different. It’s all about filling the mortar joints between bricks during the initial installation of the bricks. This happens when the bricks are being laid for the first time.
When you’re hiring a professional for your brick or stone project, it’s crucial to clarify which term you’re using since “tuckpointing” and “repointing” are often used interchangeably. This clears up any confusion about the scope of the work.
So, why choose tuckpointing over repointing? Tuckpointing can give you the appearance of thin, delicate joint lines in standard-width brick joints. It involves laying brick-colored mortar flush with the brick face and then adding a thin strip of contrasting mortar down the center to create the illusion of thin mortar joints.
When Do You Need Tuckpointing?
If it’s done properly, you might not need to replace mortar for up to 30 years, but this can vary based on where you live. In regions with frequent weather changes, like coastal areas, you might need tuckpointing more often because water absorption by the brick and mortar can cause expansion, potentially harming your home.
To figure out if and when you require tuckpointing, have a trained mason or construction expert inspect the exterior of your building. It’s important to plan ahead and budget for tuckpointing as part of your long-term maintenance, even if you don’t see an immediate need.
Ideally, tuckpointing should be performed proactively, well before the brickwork shows obvious signs of needing repair. Early mortar damage can be challenging for the average person to spot, so it’s wise to have an expert assess your needs. If you’re planning an addition to your property, ask your construction manager to inspect your existing facility for any necessary repairs and include it in your construction budget.
Tuckpointing is best when used as a preventative measure, and you can usually spot the signs indicating it’s time. Here are some things to look out for:
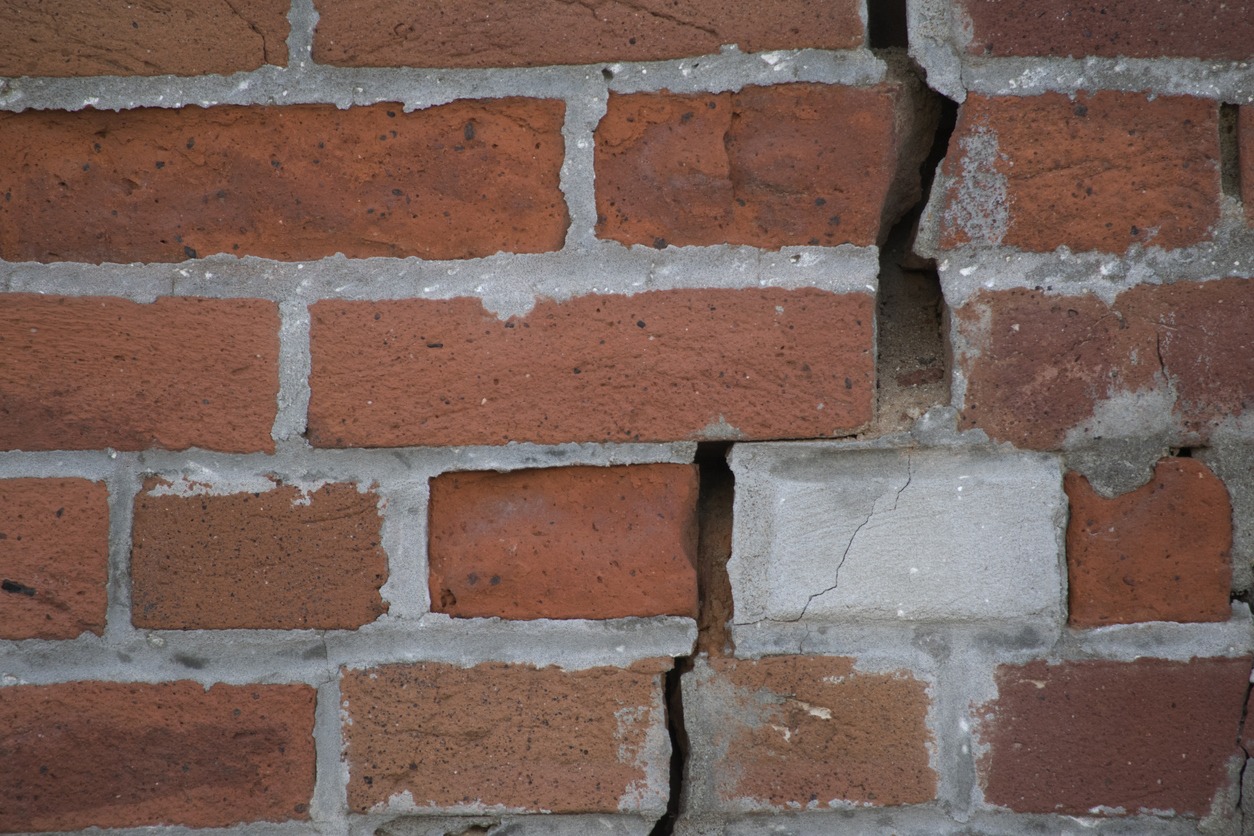
- Mortar joints that are cracked, broken, crumbling, or partly missing.
- Bricks that are showing cracks or crumbling.
- Mortar erosion exceeding 1/4-inch.
- Noticeable voids in the mortar
- Hairline cracks in the mortar
- Cracks between the bricks and mortar
- Vines finding their way through the bricks or mortar
You can sometimes see mortar deterioration, but occasionally you might need to do a bit of poking around to find loose spots. Fixing these loose areas is essential for both appearances and keeping moisture from getting into your walls.
You can also bring in a professional mason to inspect your home and determine if any mortar needs replacing.
When Mortar Needs Attention
Before diving into mortar repair, it’s essential to understand why mortar joints can go south. There are various reasons, including shoddy craftsmanship, erosion from harsh weather, temperature fluctuations, or the weight of the bricks overhead. While bricks can often last for a century, mortar typically has a lifespan of 25 to 30 years. That means it may need replacing or repointing more than once during a brick building’s life.
Since mortar joints are the weak spots in a brick wall, it’s pretty common to spot cracks running through them, even when the bricks themselves are holding up. A few tiny cracks here and there usually don’t require repointing or tuckpointing. However, when mortar starts crumbling and falling out of those cracks, it’s time to fix it before more mortar loss puts the wall’s structure at risk. If deteriorating mortar goes unaddressed, it could potentially lead to a wall or chimney collapse.
If bricks or stones are falling out of a wall, never try to fix the issue with just a fresh layer of mortar. It’s crucial to bring in a professional who can assess the wall and suggest proper repair methods, which may involve removing and resetting the bricks before repointing them with mortar.
Should You Repoint Mortar Before Painting Brick?
If you’re planning to give your brick a fresh coat of paint, doing so without repointing the mortar first might not yield the best results. This is especially true if you intend to paint the brick a light color, like white or a neutral shade, which is pretty common. In such cases, traditional tuckpointing wouldn’t be necessary, as the contrasting putty lines wouldn’t have much value once the paint is applied. If you want to know when your chimney needs repointing, check out the Signs Your House Needs Chimney Repointing or Capping.
Can You DIY Tuckpointing Projects?
A professional can get the job done quickly, but the repair process is quite straightforward and doable as a DIY project if you have the right tools. It’s crucial to ensure that the color of the new mortar matches the existing color. Check with your local masonry supplier for pigments that can be added to the mortar to achieve a perfect match.
While homeowners can certainly take on tuckpointing as a DIY project, it’s essential to weigh the pros and cons. The process can be labor-intensive and requires precision to create the appearance of level mortar joints. If the fillets used to create the finished joint effect are even slightly misaligned, the whole project might end up looking messy.
Tuckpointing a brick wall can be quite the job, as the mortar joints can stretch for hundreds of feet, making it a labor-intensive endeavor. Using power tools to remove mortar, especially in perpendicular joints, carries the risk of accidentally damaging the brick. Additionally, achieving a perfect color match between new and old mortar, especially when partially tuckpointing a brick surface, requires expertise.
If you’re concerned about damaging the brick or aren’t confident in your ability to cleanly remove the mortar without causing harm, it’s wise to have a qualified mason handle the tuckpointing job, particularly if you plan to tuckpoint all the joints.
Ultimately, before performing tuckpointing, it is important to recognize that if entire bricks need replacement, especially in exterior load-bearing walls, it’s best to leave the job to professionals. Installing or resetting new bricks is a more complex process than repointing or tuckpointing on a structurally sound wall or chimney.
Materials and Tools for Tuckpointing
Before you kick off the project, you need the proper materials and tools, including:
Materials:
- Type N ready-mix mortar for pointing
- Plastic sheeting
Tools:
- 4-1/2-inch angle grinder
- Mortar removal blade (4-1/2-inch) for angle grinders
- Wheeled raking tool
- Toothed masonry hand chisel
- 3/8-inch pointing trowel
- Mortar gun with flat and angled nozzles
- Hammer
- 5-gallon bucket
- Soft brush
- Shop vacuum
- Personal protective equipment for breathing, eye, and hearing protection
The Essential Steps for DIY Tuckpointing
Tuckpointing is a manageable DIY project. Basically, here’s how it is done:
- A mason starts by using a router or grinder to eliminate damaged mortar. Personal protective equipment (PPE) such as respirators, goggles, face shields, and dust suppression systems are often used to reduce the risks associated with fine dust particles.
- Typically, new mortar that matches the brick is used to fill the routed areas. Thin strips are then cut down the middle of the joints to create grooves. The final step involves blending the last coat of mortar to match the original mortar color and filling in the narrower groove. This technique results in clean lines and sturdy joints. Effective coordination with masons and mortar suppliers is often necessary to ensure the new mortar blends in as seamlessly as possible.
- However, if you’re dealing with entire bricks that need replacement, especially in exterior load-bearing walls, it’s best to consult a professional and let them do the tuckpointing.
These are the detailed steps for tuckpointing:
Step 1: The first step is to protect anything that may be damaged by the tuckpointing work. Cover sensitive areas and shrubbery with plastic sheeting.
Step 2: Before removing mortar, decide on a uniform depth. Use a straight-edge ruler to measure the width of the brick joints. The depth for mortar removal should be either twice the mortar joint thickness or deep enough to reach solid mortar. Mark this depth with the painter’s tape on the straight edge.
Step 3: Wearing safety gear (respirator mask, eye, and ear protection), fit the tuckpoint blade onto an angle grinder. Work from top to bottom to prevent mortar debris from falling into cleaned-out joints. Use the grinder to remove mortar from the horizontal (bed) joints. A 1/4-inch-thick grinder tuckpoint blade is ideal for 3/8-inch mortar joints, allowing room to work at the top and bottom.
Step 4: Clear mortar from the vertical (perpendicular) joints, starting from the top and working downwards. The angle grinder and tuckpoint blade may be tricky for perpendicular joints, as they risk cutting into surrounding bricks. Instead, opt for a wheeled skate-style raking tool or a toothed masonry chisel for better control in tight spaces.
Step 5: Use a stiff brush and a shop vacuum to thoroughly clean all debris from the brick joints.
Step 6: Mix type N mortar with water in a five-gallon bucket until it reaches a smooth, workable consistency.
Step 7: Transfer mortar from the bucket to the mortar gun’s empty tube using the gun’s scoop.
Step 8: Squeeze mortar into the brick joints using the mortar gun. Begin with the long, continuous horizontal bed runs, then fill the shorter vertical or perpendicular joints. Ensure the mortar reaches the back of the joint, and the mortar should stand slightly proud of the brick face, not flush or recessed.
Step 9: Allow the mortar to partially dry for approximately 30 to 45 minutes. Test its readiness by pressing it with your finger—if it doesn’t leave a depression, it’s ready for repointing. Don’t let the mortar completely dry out.
Step 10: Starting with the vertical perpendicular sections, press the pointing tool into the mortar flatly. Slide the tool up and down to smooth and compress the mortar. Repeat this for all vertical joints.
Step 11: Immediately follow by repointing the horizontal bed mortar courses.
Step 12: Return to the vertical perpendiculars and use the pointing tool to clean them up.
Step 13: Using a soft-bristled brush, gently remove excess mortar from the face of the brick. Be careful not to dig into the newly repointed mortar between the bricks.
How Much Does Tuckpointing Cost?
Tuckpointing can be a valuable investment for your home’s appearance and structural integrity, but it comes with a price tag. The cost of tuckpointing typically falls between $5 and $25 per square foot. However, several factors influence the final expense, including project size, accessibility, time of year, mortar type, construction materials, labor, and whether your home is considered historic.
For chimney tuckpointing, expect prices to begin at $10 per square foot, and additional costs often apply beyond 8 feet.
If your home is of average size, around two stories and 2,600 square feet, tuckpointing the entire house could range from $10,000 to $50,000, according to HomeAdvisor.
Tuckpointing comes with a higher cost due to its labor-intensive nature and the precision required. It’s an investment worth considering because it safeguards your home’s roof and overall structure, potentially preventing more expensive structural repairs down the line.
Moreover, tuckpointing offers aesthetic benefits, enhancing your home’s curb appeal. By rejuvenating weathered brickwork, it can give your home the appearance of a fresh build, boosting its visual appeal.
Tips for Choosing a Skilled Tuckpointing Mason
If you choose to hire a professional mason, it’s wise to choose only the best that you can afford. Not every masonry company specializes in tuckpointing, so it’s important to find a true expert for the job. Here’s what you should do:
1. Review their portfolio: Ask the contractor to show you their portfolio of past work. Pay close attention to their ability to match colors. Matching the new mortar to the existing one can be a tricky part of tuckpointing. It might take a few weeks for the new mortar’s final color to show, but it should seamlessly blend in with the rest of the chimney or wall. You can even ask if they’ve worked on tuckpointing projects in your area that you can inspect in person.
2. Get multiple quotes: Don’t settle for the first quote you receive. Request estimates from several masons or contractors in your area. This will give you a better understanding of the typical price range for your tuckpointing project.
FAQs About Tuckpointing
What does tuckpointing do? Tuckpointing involves removing deteriorated mortar between bricks and filling the joints with fresh mortar.
Why is it called tuckpointing? The name “tuckpointing” comes from the practice of tightly pushing or “tucking” mortar into the brick joints, usually using a pointing trowel.
What is the difference between tuckpointing and repointing? In most cases, tuckpointing and repointing mean the same thing. While tuckpointing can also refer to creating the appearance of thin mortar lines, this usage is less common.
What is the difference between pointing and tuckpointing? Pointing is the process of adding mortar to brick joints during initial installation while tuckpointing or repointing is done to replace deteriorated mortar in older brickwork.
What happens if you don’t do tuckpointing? Neglecting tuckpointing can lead to water infiltrating the wall between bricks, accelerating mortar decay, and eventually, deterioration of the bricks itself.
How often should tuckpointing be done? Generally, tuckpointing is needed every 25 to 30 years or when you notice crumbling or cracking mortar.
How long does tuckpointing last? Properly done tuckpointing can last for about 30 years. However, in heavily weathered conditions, such as coastal areas, it may be required more frequently.