

Just as a painter needs a blank canvas to create a masterpiece, you need to master the art of drywall installation to transform a skeleton of studs into a solid, smooth wall. You’ll start by selecting the right type of drywall for your project, considering factors like moisture resistance for bathrooms or soundproofing for bedrooms and offices. Next, you’ll measure and cut your drywall to fit perfectly around windows, doors, and fixtures. But it’s not just about hanging sheets on the wall; the real skill lies in mudding, taping, and sanding to achieve that seamless finish.
Stick around to uncover the techniques that can elevate your project from amateur to professional quality, and why understanding the nuances of each step is important for anyone tackling a construction or renovation project.
Selecting Your Drywall
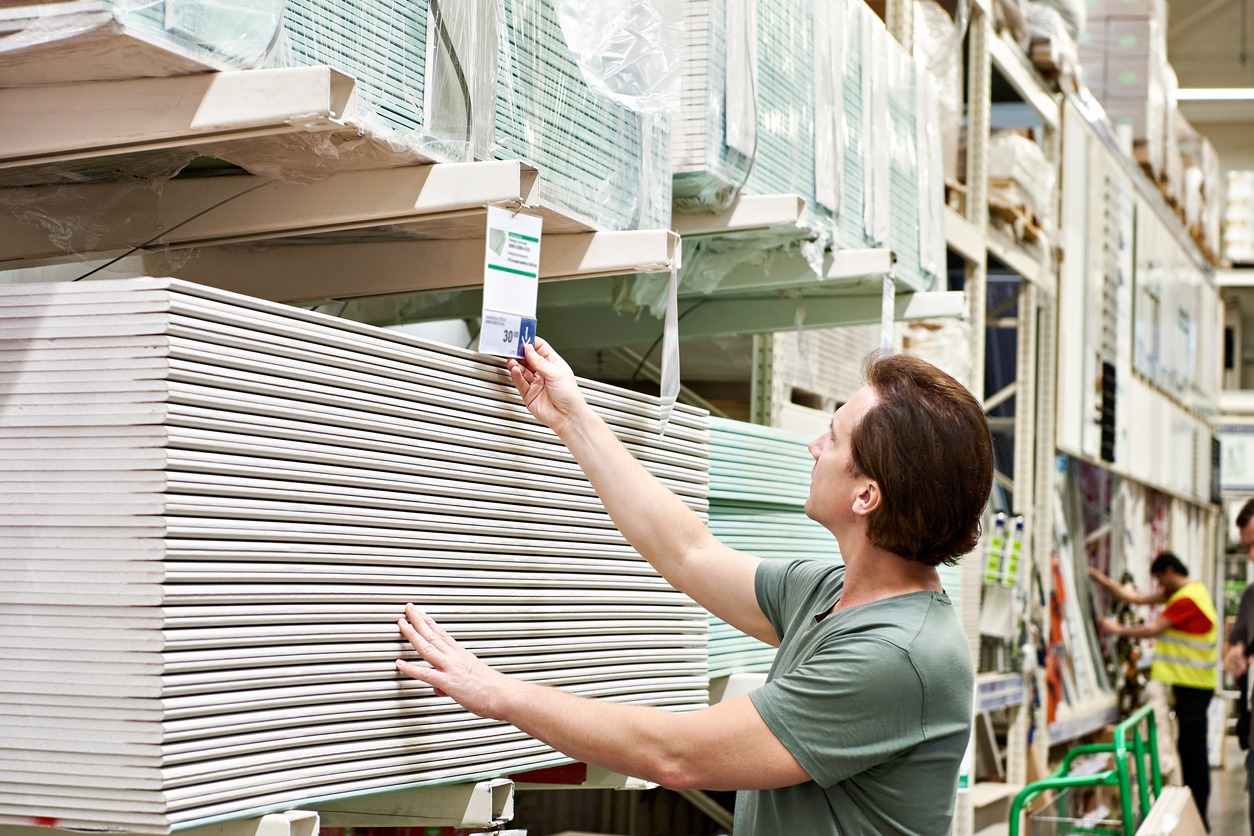
Choosing the right drywall for your project involves considering the room’s environment, such as opting for moisture-resistant greenboard in bathrooms. When selecting drywall, you’re not just picking a panel; you’re choosing the backbone for your room’s walls or ceiling. Given the variety of sizes, from 4×8 to 4×12 sheets, and thickness options ranging from 1/4 to 5/8 inches, it’s important to match the drywall to both the room environment and your installation site’s specific needs.
Drywall types extend beyond standard panels. There are flexible panels for curved walls, abuse-resistant panels for high-traffic areas, and Type X for enhanced fire resistance. These options ensure you can customize your choice to the demands of each space. For projects involving steel studs, selecting the right drywall becomes even more important to guarantee compatibility and structural integrity.
Furthermore, considering the insulation behind your drywall is essential. You’ll want to repair any tears with Kraft tape, enhancing energy efficiency. This step not only prepares for a smoother installation process but also contributes to your home’s overall thermal performance. By keeping these considerations in mind, you’ll set the stage for a successful drywall project.
Preparing the Installation Site
Before hanging your drywall, it’s important to prepare the installation site by clearing away any obstacles and ensuring the area is free of debris and protruding objects. This initial step is critical for a smooth installation process and to guarantee that the drywall sheets fit perfectly without any hindrances. Here’s a step-by-step guide to effectively prepare your installation site:
- Debris Clearance and Obstacle Removal: Start by removing any items that could interfere with the drywall installation. This includes tools, construction materials, and personal belongings. Make sure the surface is smooth and free from any protrusions that could affect the drywall’s placement.
- Structural Inspection and Framing Reinforcement: Conduct a thorough inspection of the walls and ceilings for any signs of damage or structural issues. If you find any, address these before proceeding. Consider reinforcing the framing, especially at corners and joints, to provide additional support for the drywall.
- Insulation Assessment: Check that the insulation is properly installed and meets your energy efficiency and soundproofing requirements. This step is important before proceeding with the drywall installation.
- Accurate Measurements and Installation Layout Planning: Take precise measurements of your space to determine the number of drywall sheets needed. Plan the installation layout to minimize waste and ensure a seamless finish.
Hanging Ceiling Panels
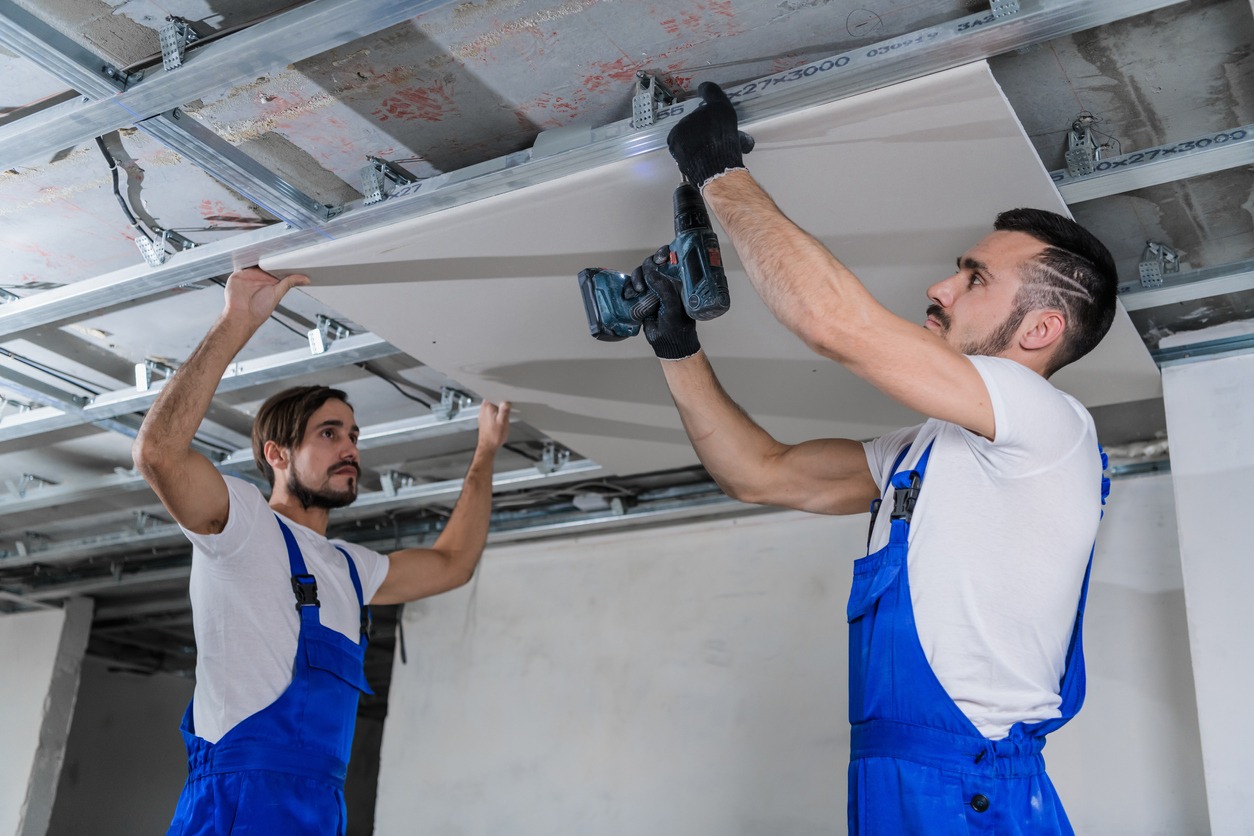
Having prepared your installation site, it’s time to focus on hanging ceiling panels, a step that demands accuracy and the right techniques for a successful outcome. Begin by spacing your fasteners 12 inches apart on joists that are 16 inches on center. This spacing guarantees that your ceiling panels receive proper support throughout the installation process.
Next, don’t forget to apply drywall adhesive to the joists before attaching the panels. This extra step helps secure the panels more firmly than fasteners alone. As you attach each panel, drive screws or nails into each joist behind the panel to securely fasten the ceiling panels in place.
For a professional finish, attach fasteners every 8 inches along the non-tapered edges of the panels, keeping them 3/8 inches from the edge. This detail prevents the edges from crumbling and ensures a smooth, finished look.
Installing Wall Drywall
After successfully hanging your ceiling panels, it’s time to focus on installing wall drywall for a cohesive look. Achieving a professional installation isn’t as intimidating as it may seem, especially when you follow these key steps:
- Start from the Top: Begin hanging drywall from the ceiling down. This approach guarantees a snug fit between panels, minimizing gaps and creating a seamless appearance.
- Secure with Screws: Fasten the drywall to wall studs using screws, spaced 16 inches apart. This method provides a strong and stable installation, essential for the longevity of your walls.
- Use a Drywall Lift: For higher sections, a drywall lift can be invaluable. It simplifies the process of lifting and holding panels in place, making it easier to secure them accurately.
- Cut Openings Precisely: Before affixing the drywall to the walls, cut openings for outlets and fixtures. Precision here is key for a clean, professional finish.
Remember to apply drywall adhesive to the wall studs before attaching the panels. This extra step enhances stability and reduces the risk of sagging, ensuring your drywall remains firmly in place over time.
Mudding and Taping
After you’ve hung your wall drywall, it’s time to move on to mudding and taping, important steps for a sleek finish. You’ll learn how to apply joint compound smoothly and embed drywall tape properly to reinforce your seams. These techniques guarantee your walls are smooth and crack-free, ready for the final touches.
Mudding Techniques Overview
To achieve a smooth and seamless drywall finish, you’ll need to master the art of mudding and taping, which involves carefully applying joint compound and embedding drywall tape along seams. Here’s how you can guarantee a flawless finish:
- Apply the First Coat: Spread joint compound over drywall seams and press drywall tape into the wet compound to reinforce joints and prevent cracks.
- Add Multiple Coats: Layer multiple coats of mud, allowing each to dry and sanding between coats for a seamless surface.
- Use Corner Beads: Install corner beads at outside corners to protect and reinforce these areas, applying mud to secure them in place.
- Achieve Smoothness: Through these mudding techniques, you’ll work towards a seamless and professional-looking finish that’s primed for painting or further decoration.
Taping Strategies Simplified
Mastering taping strategies simplifies the mudding process, ensuring your drywall seams remain invisible and durable. Start by using joint compound to cover drywall seams, embedding drywall tape for extra reinforcement. This is important for cracks prevention and achieving seamless seams. Apply multiple thin coats of mud over the joints, letting each layer dry completely before adding the next. Remember, patience pays off for a professional finish. Sanding between coats is essential for a smooth surface and to blend the seams seamlessly into the wall. For corners, don’t forget to install a metal corner bead. This provides reinforcement and helps maintain clean, sharp edges. Proper taping techniques make all the difference in preventing visible seams and ensuring your project looks polished and professional.
Sanding and Finishing

For a flawless finish, you’ll need to sand the drywall to create a smooth surface that’s ready for painting or finishing touches. Sanding is important for eliminating imperfections and ensuring your walls look their best. Here’s how to tackle this step effectively:
- Start with a Coarse Grit Sandpaper: Begin your sanding process with a coarser grit to efficiently smooth out the larger imperfections. This sets the foundation for a polished finish.
- Use a Sanding Block or Sponge for Precision: To feather the edges of the joint compound and avoid gouging the surface, opt for a sanding block or sponge. These tools offer better control and help blend seams seamlessly.
- Gradually Move to Finer Grit Sandpaper: Once the major flaws are addressed, switch to a finer grit sandpaper. This step is important for achieving that smooth, painter-ready surface. It’s all about the details here.
- Wipe Down with a Damp Cloth Before Priming: After sanding, dust will cover your surface. Use a damp cloth to wipe down the walls. This not only cleans up but also preps the area for priming and painting, ensuring a clean, professional finish.
Conclusion
To sum up, mastering drywall installation is all about getting the basics right. From selecting the right type of drywall to preparing your site, and from hanging panels on ceilings and walls to the art of mudding and taping, each step is essential. Remember to sand and finish for that professional touch. With these fundamental steps, you’ll transform any space, making your construction or renovation project a success. Stay safe, and enjoy the process of bringing your vision to life.