
Embarking on the journey of sealing a driveway unfolds an array of choices, each tailored to the unique demands of different driveway materials and homeowner preferences. From the resilience of asphalt sealant ideal for blacktop driveways to the aesthetic enhancement offered by acrylic sealants, the realm of driveway sealing is rich with solutions designed to prevent water damage, prolong the surface’s life, and elevate the property’s curb appeal. This comprehensive guide navigates through the critical aspects of driveway maintenance, shedding light on the pivotal reasons for sealing, the spectrum of sealant types, and the meticulous preparation and application processes. It further explores the timing for resealing, ongoing maintenance tips, and the financial and environmental considerations, culminating in a strategic approach to selecting the perfect sealant. Whether you’re leaning towards a professional service or embracing a DIY project, understanding the nuances of driveway sealing empowers you to make choices that align with your goals, budget, and the enduring beauty and functionality of your driveway.
What is driveway sealing?
Driveway sealing is the application of a protective coating to asphalt or concrete driveways. This crucial maintenance step shields the surface from the detrimental effects of water, UV rays, and chemical spills, significantly extending the driveway’s lifespan. By forming a barrier, it effectively prevents the development of cracks and potholes, thereby preserving both the structural integrity and aesthetic appeal of the driveway. Depending on the material of the driveway, a variety of sealants—ranging from asphalt, concrete, to acrylic—are available, each designed to meet specific needs such as enhancing the driveway’s color or providing a glossy finish.
Why seal a driveway?
Sealing a driveway is a crucial preventive measure that serves to protect and enhance a property’s driveway. The primary benefit of sealing is the prevention of water damage; water can penetrate small cracks, freeze, and expand, causing significant structural damage. By applying a sealant, homeowners can significantly reduce this risk, effectively extending the driveway’s lifespan. Beyond protection, a sealed driveway also enhances the property’s appearance, contributing to its curb appeal with a fresh, well-maintained look. Whether dealing with an asphalt or concrete surface, the appropriate sealant not only safeguards the driveway but also elevates its aesthetic value, underscoring the importance of this maintenance task in preserving both the functionality and beauty of the home environment.
Prevents water damage
Sealing a driveway creates a protective barrier that prevents moisture from seeping into cracks and pores. This layer is crucial in thwarting the freeze-thaw cycle that can lead to cracks and potholes, thus preserving the driveway’s structural integrity.
Extends driveway lifespan
By effectively mitigating damage from water, UV rays, and chemical spills, driveway sealing significantly prolongs the surface’s durability. This preventive maintenance step ensures the driveway remains functional and in good condition for a longer period, reducing the need for costly repairs or replacement.
Enhances appearance
A sealed driveway boasts a refreshed and well-maintained look, significantly boosting the property’s curb appeal. Depending on the sealant chosen, it can also provide a glossy finish or enhance the natural color of the driveway, contributing positively to the home’s overall aesthetic.

Types of driveway sealants
Choosing the right driveway sealant is crucial for both protection and aesthetic enhancement of your driveway. The market offers a variety of sealants, each with unique benefits tailored to different driveway materials and homeowner preferences. From the resilience of asphalt sealant ideal for blacktop driveways to the aesthetic enhancement offered by acrylic sealants, selecting the appropriate product is key to preventing water damage, prolonging the surface’s life, and elevating the property’s curb appeal. Below is a detailed comparison of popular sealants, including specific brand recommendations and product features that distinguish one sealant from another within these categories.
| Sealant Type | Brand Example | Best For | Durability | Finish | Features |
|---|---|---|---|---|---|
| Asphalt | Black Jack Drive-Maxx | Blacktop driveways | High | Matte | Enhanced with polymer for flexibility, UV protection, and water resistance. |
| Concrete | DryWay Water-Repellent Sealer | Concrete surfaces | Very High | Natural | Penetrating sealer that offers water repellency and protects against stains. |
| Acrylic | Eagle Supreme Seal | Aesthetic enhancement | Moderate | Glossy | UV-resistant, non-yellowing, and offers a high-gloss finish. |
Asphalt sealant
Asphalt sealant, such as Black Jack Drive-Maxx, is tailor-made for blacktop driveways, enhancing their durability and providing a rich, dark finish. This sealant rejuvenates the surface, significantly improving its resistance to wear and tear with added flexibility and UV protection.
Best for blacktop driveways
Asphalt sealant stands out as the premier choice for blacktop driveways, delivering unmatched protection that notably extends the driveway’s lifespan while preserving its aesthetic quality. The polymer-enhanced formulation ensures superior performance.
Concrete sealant
Concrete sealant, exemplified by DryWay Water-Repellent Sealer, is specifically designed for concrete surfaces, offering robust protection against the elements. It effectively prevents stains and erosion, safeguarding the driveway’s structural integrity with its penetrating water-repellent properties.
Ideal for concrete surfaces
Concrete sealant is the optimal solution for concrete driveways, ensuring the surface is well-protected from stains, water damage, and chemical spills, thereby prolonging its functional life. DryWay, in particular, offers long-lasting protection without altering the natural appearance of the concrete.
Acrylic sealant
Acrylic sealant, such as Eagle Supreme Seal, is known for providing a glossy finish, significantly enhancing the driveway’s visual appeal. Beyond aesthetics, it adds a protective layer, making the driveway more resilient to damage with its UV-resistant and non-yellowing formula.
Offers a glossy finish
Acrylic sealant is the choice for homeowners aiming to boost their driveway’s appearance with a glossy finish. Eagle Supreme Seal not only beautifies the surface but also fortifies it against the elements, blending aesthetics with protection and offering a durable, high-gloss finish.
By considering these specific sealant options, homeowners can make a more informed decision that aligns with their driveway maintenance goals, ensuring both the longevity and aesthetic appeal of their driveway.
Preparing the driveway for sealing
Before the sealant application, preparing the driveway is a crucial step that directly impacts the seal’s effectiveness. Proper preparation involves cleaning the driveway thoroughly, removing debris, dirt, and stains, and repairing any cracks. This meticulous preparation not only facilitates a smoother application process but also maximizes the longevity and performance of the sealant, setting the stage for a driveway that is both durable and visually appealing.
Cleaning the driveway
A clean surface is essential for the sealant to adhere properly. Use a driveway cleaner that is effective against the type of stains present on your driveway. For oil and grease stains, a degreaser like Krud Kutter Original Cleaner/Degreaser is highly effective. For general cleaning, a pressure washer paired with a detergent such as Simple Green Concrete and Driveway Cleaner can remove dirt and mildew.
| Cleaner Type | Product Recommendation | Best For |
|---|---|---|
| General Driveway Cleaner | Simple Green Concrete and Driveway Cleaner | Dirt, mildew, and general stains |
| Degreaser | Krud Kutter Original Cleaner/Degreaser | Oil and grease stains |
Remove debris and stains
Sweep the driveway to remove loose debris. For stubborn stains, apply the recommended cleaner according to the manufacturer’s instructions, scrubbing with a stiff brush if necessary. Rinse thoroughly with water, preferably using a pressure washer for the best results.
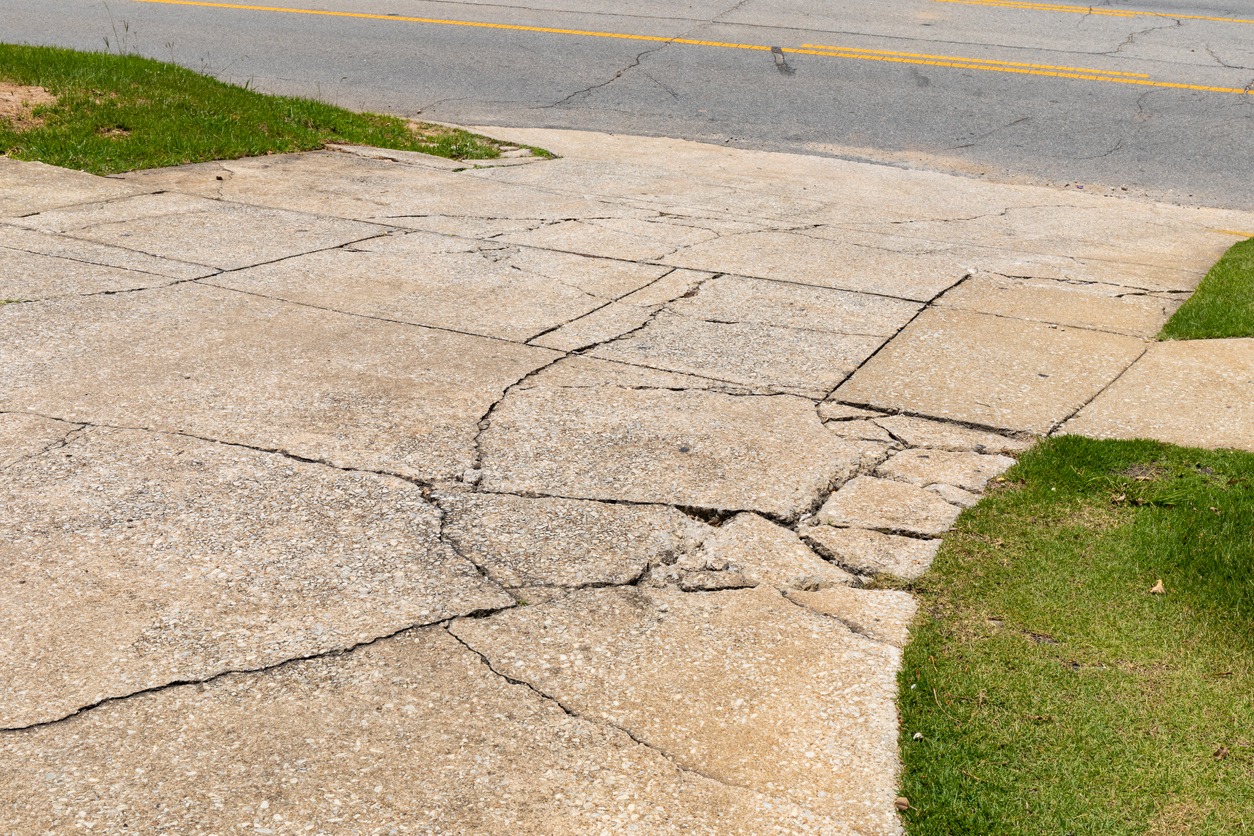
Repairing cracks
Addressing cracks before sealing is vital to prevent water infiltration and further damage. Use a crack filler that is compatible with your driveway material. For asphalt driveways, Latex-ite PLI-STIX offers a permanent solution for cracks up to 1 inch wide. For concrete driveways, Sikaflex Concrete Fix can fill and seal cracks effectively.
| Crack Filler Type | Product Recommendation | Best For |
|---|---|---|
| Asphalt Crack Filler | Latex-ite PLI-STIX | Asphalt driveways, cracks up to 1 inch wide |
| Concrete Crack Filler | Sikaflex Concrete Fix | Concrete driveways, durable repair |
Fill cracks with appropriate filler
Clean the crack thoroughly, removing any loose material. Apply the crack filler according to the manufacturer’s instructions, ensuring it is level with the driveway surface. Allow sufficient drying time before proceeding with the sealant application.
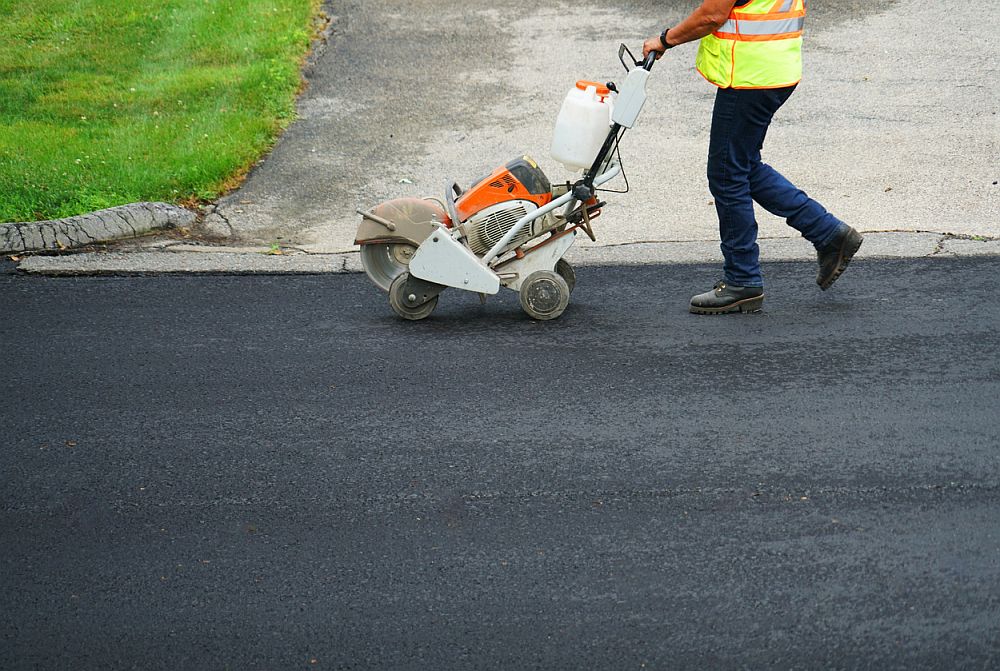
How to apply sealant
Applying sealant to a driveway is a meticulous process that demands careful planning and precise execution for the best outcome. Choosing the right day is paramount; aim for a time when the weather is dry with moderate temperatures to ensure the sealant dries and cures properly. Below are detailed instructions for both squeegee and spray application methods, along with tips to avoid common mistakes.
Choosing the right day
- Ideal Conditions: Aim for a dry day with temperatures between 50°F and 90°F. Avoid sealing if rain is forecasted within 24 hours of application.
Applying the sealant
Squeegee Method
- Equipment: Use a rubber-bladed squeegee for even application. Ensure the squeegee is clean and in good condition.
- Technique: Pour a ribbon of sealant across one edge of the driveway. Using the squeegee, pull the sealant across the surface in a controlled manner, ensuring even coverage. Overlap each pass by a few inches to avoid streaks.
- Tips: For best results, maintain a consistent angle and pressure on the squeegee. Avoid overworking the sealant, as this can lead to an uneven finish.
Spray Method
- Equipment: Use a sealant sprayer designed for driveway applications. Ensure the sprayer’s nozzle is clean and set to the correct spray pattern.
- Technique: Start at one end of the driveway and walk at a steady pace while spraying, keeping the nozzle at a consistent height from the surface. Overlap each pass by 6-8 inches to ensure full coverage.
- Tips: Practice spraying on a piece of cardboard to get a feel for the equipment and adjust the spray pattern as needed. Avoid spraying too thickly, as this can lead to splotchy areas or longer drying times.
Avoiding Common Mistakes
- Do Not Rush: Allow ample time for preparation, application, and drying. Rushing any of these steps can compromise the quality of the seal.
- Temperature Sensitivity: Applying sealant in too hot or too cold temperatures can affect its curing process and final appearance.
- Overapplication: Applying too much sealant can lead to a slippery surface and extended drying times. Follow the manufacturer’s recommended coverage rates.
- Uneven Coverage: Pay close attention to edges and corners, ensuring they receive the same amount of sealant as the main driveway area.
When to seal a driveway
Determining the optimal time to seal a driveway is essential for maintaining its condition and appearance. While the general recommendation is to seal a driveway every 2-4 years, several factors can influence this timeframe, including the driveway’s material, usage, exposure to elements, and the specific sealant applied. Here are specific methods and signs to help you assess whether it’s time to reseal your driveway:
Conducting a Water Bead Test
- Method: Sprinkle water across various sections of your driveway.
- What to Look For: If the water beads up, the sealant is still effective. If the water soaks into the driveway, it’s a sign that the protective barrier has diminished, and resealing may be necessary.
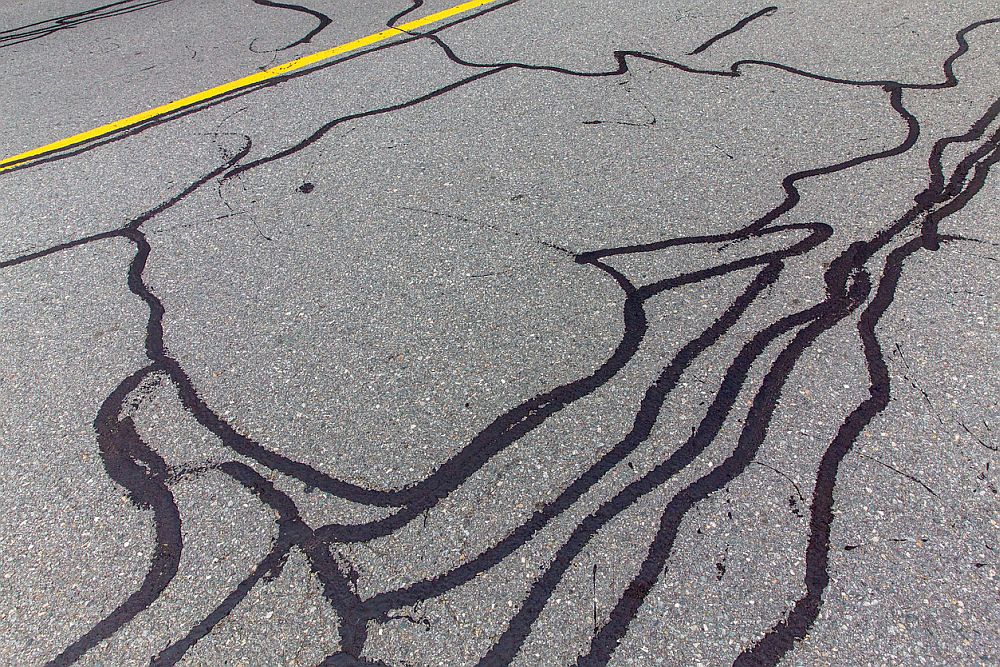
Identifying Types of Cracks
- Hairline Cracks: Small, fine cracks can often be sealed without needing a full reseal. However, they indicate the beginning of wear.
- Widening Cracks: Cracks that are widening or larger than ¼ inch indicate significant wear and the need for resealing.
- Multiple Cracks: The presence of multiple cracks throughout the driveway suggests it’s time to reapply sealant.
Observing Color and Texture Changes
- Fading Color: A noticeable fading of the driveway’s color suggests that the sealant is wearing off.
- Texture Changes: If the surface texture becomes rough or the stones in the asphalt are visible, the sealant may have worn away.
Evaluating the Driveway’s Appearance After Rain
- Water Absorption: After rain, observe if water is absorbed into the driveway rather than beading on the surface. Absorption indicates that resealing is needed.
Checking for Potholes and Surface Wear
- Potholes: The formation of potholes is a clear sign of wear and may indicate the need for resealing and repair.
- Surface Wear: General wear and tear, such as the loss of the top layer or aggregate becoming visible, suggests it’s time to reseal.
Tips for Timely Resealing
- Keep Records: Maintain records of when your driveway was last sealed to help plan for future resealing.
- Seasonal Considerations: The best time to seal a driveway is in warmer months when temperatures are between 50°F and 90°F.
- Professional Assessment: If unsure, consider hiring a professional to assess the condition of your driveway and recommend whether resealing is necessary.
By regularly monitoring your driveway’s condition and responding to the signs of wear, you can ensure its longevity and maintain its aesthetic appeal. Remember, the frequency of resealing can vary based on several factors, so it’s important to stay vigilant and address any issues promptly.
Maintenance after sealing
After the application of sealant, maintaining your driveway is crucial to prolong the sealant’s protective qualities and preserve the driveway’s aesthetic appeal. Regular cleaning and immediate stain removal are essential practices. Here are specific methods and products recommended for safely maintaining your sealed driveway, along with tips for addressing common stains.
Regular cleaningFor routine cleaning, it’s important to use products that won’t degrade the sealant. A mild detergent or a cleaner specifically designed for sealed driveways can be used. Here are steps and a product recommendation:
- Sweeping: Regularly sweep the driveway to remove debris and loose dirt.
- Washing: Use a garden hose with a spray attachment or a pressure washer on a low setting to wash the surface. For dirt and grime, apply a mild detergent or a cleaner like Simple Green Oxy Solve Concrete and Driveway Cleaner which is safe for sealed surfaces.
- Rinsing: Thoroughly rinse the driveway with clean water to remove any soap residue.
| Cleaning Activity | Recommended Product | Notes |
|---|---|---|
| General Cleaning | Simple Green Oxy Solve Concrete and Driveway Cleaner | Biodegradable and safe for sealed driveways |
Immediate stain removal
Promptly addressing spills and stains is key to preventing permanent discoloration or damage. Here’s how to handle common driveway stains:
- Oil Stains: Apply a layer of cat litter to absorb fresh oil. For existing stains, use a degreaser like Krud Kutter Original Cleaner/Degreaser, following the product instructions for application and rinsing.
- Tire Marks: Tire marks often fade over time with regular cleaning. For persistent marks, a mild solvent like isopropyl alcohol can be dabbed on the area, followed by washing with soap and water.
- Leaf Stains: Leaves can leave tannin stains on the driveway. A solution of water and oxygen bleach (in a ratio recommended by the bleach manufacturer) can be effective for removing these stains without damaging the sealant.
| Stain Type | Recommended Product | Application Method |
|---|---|---|
| Oil | Krud Kutter Original Cleaner/Degreaser | Apply, scrub, and rinse |
| Tire Marks | Isopropyl Alcohol | Dab on marks, then wash area |
| Leaf Stains | Oxygen Bleach Solution | Apply solution, scrub lightly, and rinse |
Tips for Maintaining Sealed Driveways
- Avoid Harsh Chemicals: Harsh chemicals can damage the sealant. Always use cleaners that are specified as safe for sealed driveways.
- Sealant-Friendly Deicing Agents: In winter, use deicing agents that are safe for sealed driveways to avoid chemical damage.
- Regular Inspection: Periodically inspect your driveway for signs of wear or damage to the sealant, addressing any issues promptly to maintain its protective qualities.
Pros and cons of professional sealing vs. DIY
Choosing between professional sealing and DIY involves weighing the benefits and drawbacks of each approach. To help you make an informed decision, we’ve compiled detailed comparisons including average cost, time investment, and key considerations for both options.
| Aspect | Professional Sealing | DIY Sealing |
|---|---|---|
| Cost | Higher upfront cost. Average $0.50 – $1.00 per square foot. | Lower upfront cost. Cost of materials only, averaging $0.15 – $0.25 per square foot. |
| Time Investment | Minimal. The professional team handles the entire process. | Significant. Requires several hours to a full day, depending on driveway size and condition. |
| Quality | High. Professionals bring expertise and high-grade materials. | Variable. Depends on the homeowner’s skill and the quality of materials used. |
| Convenience | High. No personal effort required beyond scheduling the service. | Low. Requires personal time and effort for preparation, application, and cleanup. |
| Equipment | Not required. Professionals bring their own equipment. | Required. Homeowners need to purchase or rent application tools. |
| Experience | Professionals have extensive experience and can ensure the sealant is applied evenly. | Limited to the homeowner’s previous experience, which can affect the outcome. |
| Warranty | Often included, offering protection against defects and poor workmanship. | None. Homeowners are responsible for any necessary touch-ups or corrections. |
Professional sealing
Professional sealing services, while presenting a higher cost, significantly lessen the hassle for the homeowner. Utilizing professional services ensures efficiency and high-quality results, thanks to the expertise of seasoned specialists. When selecting a professional service, look for companies with positive reviews, a solid warranty, and transparent pricing to ensure you’re getting the best value.
Higher cost but less hassle
Choosing professional services entails a higher financial investment but offers the advantage of convenience, eliminating the need for personal involvement in the sealing process and guaranteeing a swift, effective outcome. The average cost for professional sealing services can range from $0.50 to $1.00 per square foot, depending on the driveway’s condition and size.
DIY sealing
DIY sealing stands out as a more budget-friendly alternative, allowing homeowners to save on the costs associated with hiring professionals. However, this approach is notably time-consuming and demands a substantial personal commitment. Before embarking on a DIY project, ensure you have the necessary tools, materials, and a clear understanding of the application process to achieve the best results.
More affordable but time-consuming
Opting for a DIY approach to driveway sealing is economically advantageous, reducing the expenses linked to professional services. Yet, it requires a significant investment of time and effort, with the final quality hinging on the homeowner’s proficiency and dedication. The cost of materials for DIY sealing typically ranges from $0.15 to $0.25 per square foot, making it a cost-effective option for those willing to invest their time.
By considering these detailed comparisons, homeowners can make a more informed decision that aligns with their budget, availability, and confidence in their DIY skills, ensuring their driveway remains protected and visually appealing.
Cost considerations

When planning to seal a driveway, understanding the various cost considerations is crucial. The overall expense can vary significantly based on the type of sealant chosen, the size of the driveway, whether you opt for professional services or a DIY approach, and any additional repairs or preparation work needed. Below is a detailed breakdown of these factors to help you budget effectively for your driveway sealing project.
| Factor | Description | Average Cost Range |
|---|---|---|
| Sealant Type | Costs vary by sealant type due to differences in material and application. | $0.15 – $0.50 per square foot |
| Driveway Size | Larger driveways require more sealant and labor, increasing overall costs. | Depends on square footage |
| Professional vs. DIY | Professional services include labor costs, while DIY only involves materials. | Professional: $0.50 – $1.50 per square foot, DIY: $0.15 – $0.25 per square foot |
| Preparation Work | Cleaning, crack filling, and other prep work can add to the total cost. | $0.10 – $0.50 per square foot additional |
| Repairs | Significant cracks or damage may need to be repaired before sealing. | $2 – $5 per square foot for crack repair |
Sealant Type Impacts Cost
The choice of sealant plays a significant role in the project’s cost. For instance, acrylic sealants tend to be more expensive than asphalt-based sealants due to their longer lifespan and aesthetic benefits. Eco-friendly options might also come at a premium but offer savings in long-term maintenance and environmental impact.
Size of Driveway
The total area of your driveway directly affects the amount of sealant needed and, consequently, the overall cost. Professional services often charge by the square foot, making larger driveways more expensive to seal.
Professional Sealing vs. DIY
Opting for professional sealing services includes labor costs, which can significantly increase the project’s total expense. In contrast, a DIY approach primarily involves the cost of materials, although it requires a significant time investment. Here’s a quick comparison:
- Professional Sealing: Offers convenience and expertise but at a higher cost, averaging $0.50 to $1.50 per square foot.
- DIY Sealing: More affordable, with material costs ranging from $0.15 to $0.25 per square foot, but requires personal time and effort.
Additional Costs: Preparation Work and Repairs
Preparation is key to a successful sealing project. Costs can include cleaning the driveway, filling cracks, and other repairs. Neglecting these steps can lead to suboptimal sealing results and potentially higher long-term costs due to accelerated wear and tear.
By considering these detailed cost factors, homeowners can make informed decisions that align with their budget and ensure their driveway remains protected and visually appealing. Remember, investing in quality materials and proper preparation can save money over time by extending the lifespan of your driveway and reducing the need for frequent resealing.
Environmental considerations
When undertaking driveway sealing, prioritizing environmental considerations is crucial for selecting the most appropriate sealants and disposal methods. Opting for eco-friendly sealants and adhering to responsible disposal practices minimizes the ecological footprint of your project, ensuring safety for both the planet and human health.
Eco-friendly sealants
Choosing eco-friendly sealants involves selecting products that are low in volatile organic compounds (VOCs), biodegradable, or made from natural materials. These sealants are designed to emit fewer harmful chemicals into the environment, making them a safer choice.
| Eco-Friendly Sealant Brands | Key Features | Ingredients to Avoid |
|---|---|---|
| EcoShield Sealant | Water-based, low VOC, durable | Coal Tar, High VOC Solvents |
| BioSeal Asphalt Sealer | Plant-based, petroleum-free, low odor | Heavy Metals, Toxic Preservatives |
| GreenGuard Driveway Sealer | Non-toxic, water-repellent, UV-resistant | Phthalates, Formaldehyde |
Proper disposal of waste
Proper disposal of leftover sealant and cleaning materials is essential for preventing environmental pollution and ensuring compliance with local regulations. Here are some tips for responsible disposal:
- Leftover Sealant: Never pour leftover sealant down the drain or into the soil. Check with your local waste management facility for guidelines on disposing of hazardous materials. Some areas offer special collection days for hazardous waste.
- Cleaning Materials: Use eco-friendly cleaners when possible. For disposal of chemical-based cleaners, follow the same guidelines as for sealants, ensuring they are taken to a proper hazardous waste disposal site.
- Recycling: Clean and empty sealant containers can often be recycled. Check the labeling for recycling symbols and adhere to your local recycling guidelines.
Reducing Environmental Impact
- Buy Only What You Need: Calculate the amount of sealant needed for your project accurately to minimize waste.
- Choose Eco-Friendly Products: Whenever possible, select sealants and cleaning products with eco-friendly labels and certifications.
- Educate Yourself: Stay informed about the environmental impact of the products you use and seek out alternatives that offer lower risks to health and the environment.
By focusing on these environmental aspects, homeowners not only ensure their driveways are well-protected but also contribute positively to environmental conservation. Making informed choices about the products used and their disposal can significantly reduce the environmental impact of your driveway sealing project.
Choosing the right sealant for your driveway
Selecting the appropriate sealant for your driveway is a decision with lasting implications on its longevity and appearance. The climate of your area and the material comprising your driveway are critical factors in this selection process. Sealants vary in their performance across different weather conditions, with certain types offering superior protection against specific environmental challenges. Additionally, the composition of your driveway, whether asphalt, concrete, or another material, dictates the type of sealant that will perform best. Homeowners should also weigh their preference for the driveway’s final look, choosing between a matte or glossy finish, and determine whether a thicker or thinner sealer is needed based on the driveway’s current condition and usage. By taking these factors into account, you can choose a sealant that not only effectively safeguards your driveway but also significantly boosts its curb appeal.
- Consider the climate of your location, as the environmental conditions play a crucial role in selecting a sealant that offers the best defense against weather-induced wear.
- Consider the driveway material, since the composition of your driveway—be it asphalt, concrete, or another substance—dictates the ideal type of sealant for enhanced durability and aesthetics.
- Opt for a thick sealer in scenarios where the driveway exhibits extensive cracking or is subject to high traffic. This type of sealer provides a denser protective barrier, effectively shielding the surface.
- A thin sealer is recommended for driveways that are relatively intact or for homeowners preferring to maintain the natural look of their driveway. It delivers adequate protection while preserving the original appearance of the surface.