
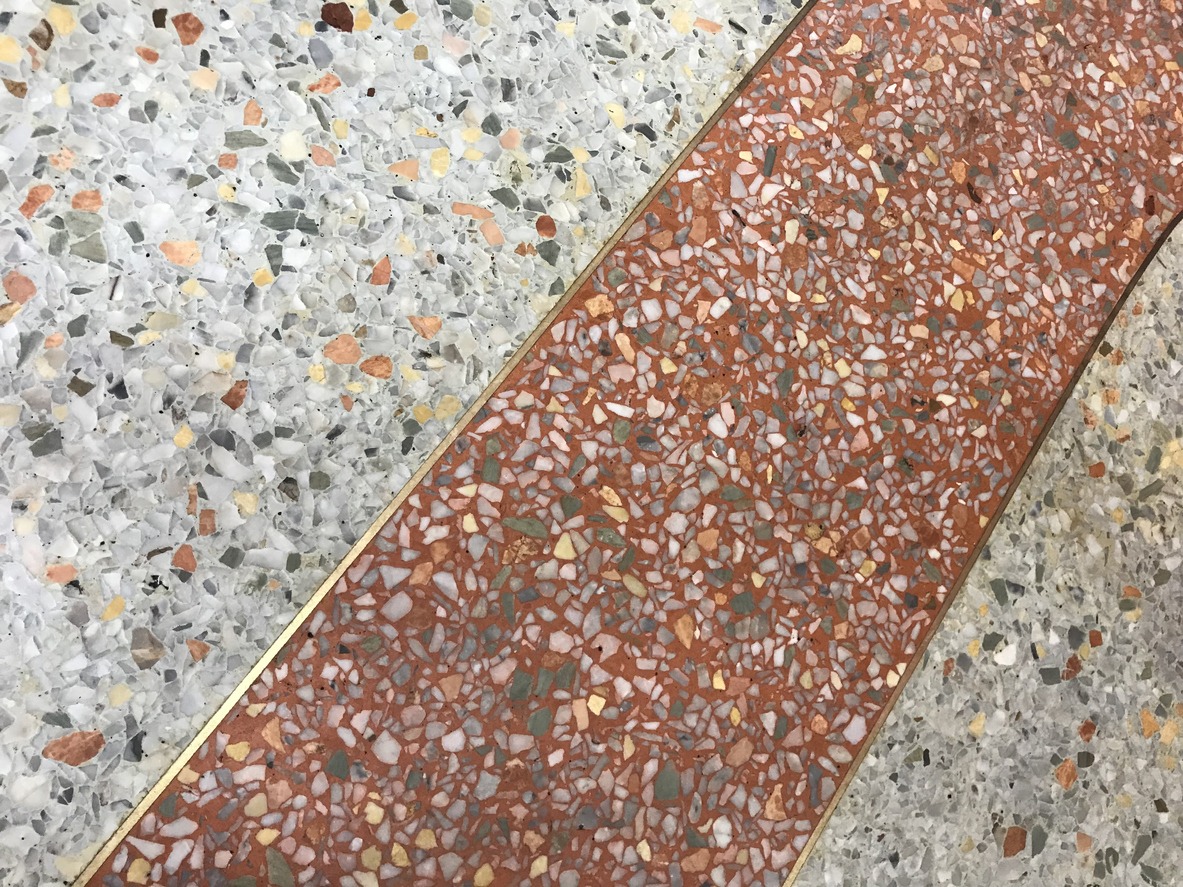
A terrazzo flooring material is made from marble, glass, or other materials mixed into colored cement and polished to a smooth, glossy finish. It was stumbled upon by Italian mosaic artisans who used marble chips on their terraces in the 15th century, simply smoothing them by walking over them. Over time, it evolved into the beautiful material we know today. It’s graced iconic places like St. Peter’s Basilica and Mount Vernon.
In the 1950s and ’60s, terrazzo was everywhere in homes across the Southeast and Southwest. However, its installation costs went up, making it a pricier option, often around $10 per square foot for custom homes.
Recently, terrazzo has made a comeback in homes, schools, airports, and commercial spaces due to its timeless beauty and eco-friendly qualities. Architects appreciate its long lifespan and endless design possibilities. In fact, you’ll find terrazzo in many LEED-certified buildings worldwide.
But what about the installation process? It’s just as fascinating as the end result. Let’s take a closer look at the step-by-step process of installing terrazzo floors.
Primary Installation Options
When it comes to installing terrazzo floors, you have two primary methods to choose from: in situ and precast tiles.
In Situ Method
A mixture of materials, including a cement binder like concrete or epoxy resin, is combined for the in situ method. This mixture is poured directly onto the floor surface, creating a seamless and continuous flooring system. You can also add mineral pigments to achieve a variety of colors to suit your preferences.
Precast Tiles Method
The precast tiles method involves using molds to shape the terrazzo mixture into desired tile forms. These molds are filled with the mixture and then baked in an oven or kiln until they harden and become solid tiles.
Afterward, a water jet is used to precisely cut the tiles into various shapes, intricate patterns, or even custom logos. This water jet cutting technique allows for highly detailed and customizable patterns, making it possible to create truly unique and personalized terrazzo floor designs.
Installing Terrazzo: In Situ Method
To install terrazzo, these are the steps that professional contractors typically do:
1. Prepare and Level the Floor
Next, the installers focus on getting the concrete floor ready. They check for any cracks, and if there are any, they fill them in. They also examine the flooring for moisture issues, and if moisture is a problem, they might use a moisture mitigation system. Sometimes, the floor might not be perfectly level, so the installers level it out by applying a flexible membrane to ensure a smooth surface for the terrazzo to be poured onto.
To prepare for pouring the terrazzo material, workers make inch-deep grooves called control joints in the concrete. These help guide and control any inevitable cracking as the concrete cures and contracts.
Afterward, it’s time for a meticulous cleaning. The concrete slab is power-washed and swept to remove loose debris. Following this, a scrubdown using a diluted muriatic acid solution is carried out to eliminate algae, which can weaken the bond between the concrete and the terrazzo.
2. Set Up Cement Dividers on the Slab
During this phase, the installers carefully plan how the final floor will look. This involves cutting divider strips to separate colors and manage expansion joints.
Zinc dividers are securely cemented to the concrete slab, forming a grid of 3-foot squares. To prevent the wet terrazzo from spreading into areas where walls will be constructed, attach the plywood strips temporarily around the perimeter. Just before the terrazzo is poured, the entire surface receives a thin coat of epoxy solution.
Divider strips, which can be made of metal or plastic, are firmly attached to the subfloor to separate different colors, create unique designs, and control expansion joints.
3. Prepare the Terrazzo Mix
Now that the layout is all set, it’s time to create the terrazzo mixture. Following specific guidelines, the installers accurately measure and blend the components using mixing equipment. Cementitious terrazzo is usually a mixture of a 2:1 ratio of marble aggregate and cement, then iron oxide is added for coloring.
4. Pour it Out
The mix is poured in within the specified panels and troweled to the preferred height.
Now that the divider strips are in place, it’s time to pour the terrazzo mixture onto the floor surface. Using a trowel, the installer spreads and evenly distributes the mixture, which includes aggregates like marble chips and recycled glass.
A worker then scatters more of the aggregate mix to ensure a tightly packed finished surface. A mechanical roller is then used to compress the aggregate further, expel air bubbles, and remove excess cement and water. This rolling process is repeated a few times with differently weighted rollers to continue to extract excess water and cement from the floor. Once this process is done, the floor is lightly troweled to the preferred height.
The floor cures for at least 48 hours before the grinding is to start.
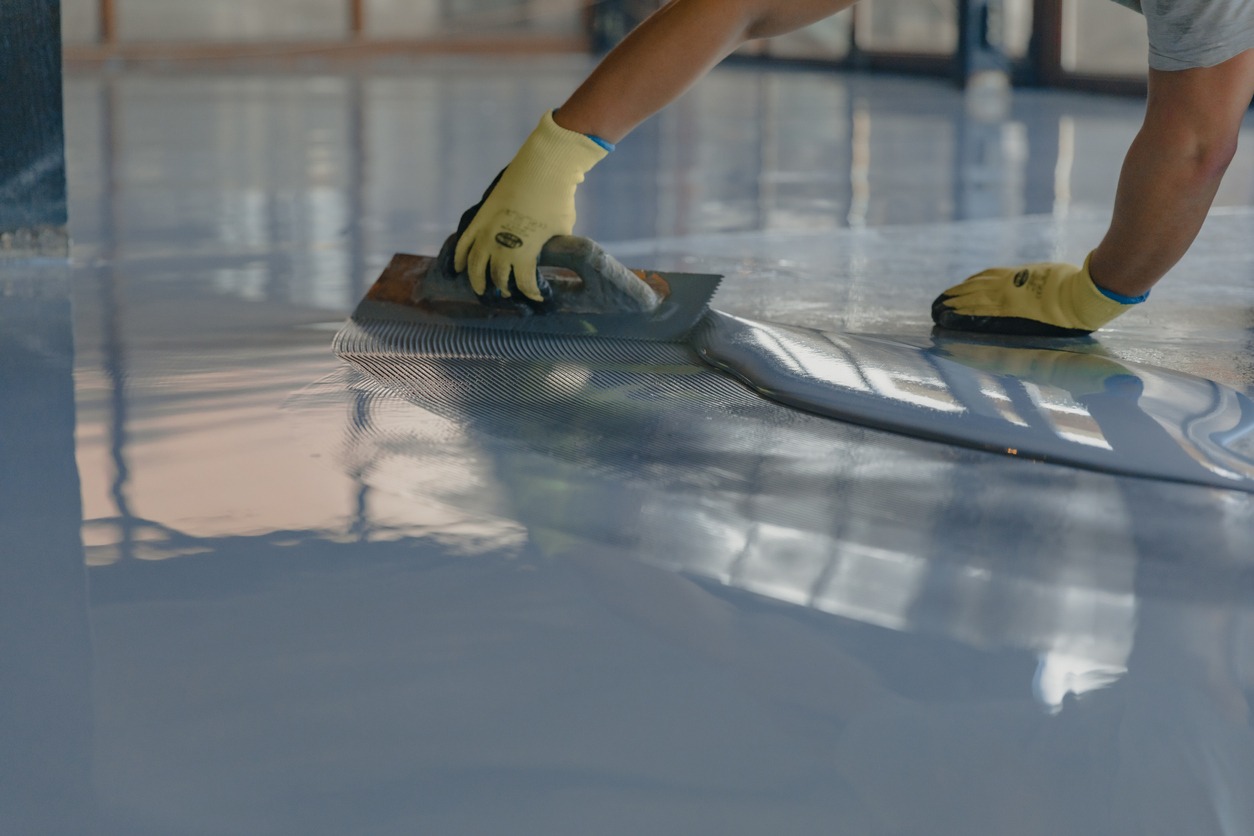
5. Smooth It Out
After the terrazzo floor has fully cured, it’s time to use a grinding machine to make the surface smooth and shiny. The grinding machine, armed with a dozen 4-inch-diameter diamond-grit stones, is slowly moved across the floor surface. A smaller, more agile grinder is also used to reach into corners and around obstacles like plumbing and electrical components.
After multiple passes, the stones are replaced with finer-grit ones to enhance the shine. This polishing process can take most of a day, revealing the vibrant colors beneath.
Spraying down the terrazzo may uncover tiny pinholes, indicating bubbles that the roller missed. To fill these, a thin slurry of tinted cement is spread across the entire floor.
6. Polish the Floor
Following the instructions provided by the supplier, the worker proceeds to polish the floor and apply a sealer. If they are working with cement-based terrazzo, they should make sure to seal it with a water-based sealant to prevent stains.
Installing Terrazzo Tiles

For the DIY enthusiasts out there, installing terrazzo tiles can be a satisfying project. Here’s a step-by-step guide to help you get started:
1. Measure the Area
Begin by measuring the space where you intend to install the terrazzo tiles. Multiply the length by the width to determine the area’s size. Make sure to purchase enough tiles to cover the area, plus a few extras to accommodate cuts or any design preferences.
2. Prepare the Surface
Remove any existing flooring, and if necessary, use a leveling compound to ensure the surface is even and smooth. Your goal is to create a clean and level canvas ready for the terrazzo flooring.
3. Adhere to the Tiles
Apply a layer of adhesive onto the prepared surface, and carefully place the tiles in a neat and orderly fashion.
4. Complete the Terrazzo Flooring
After placing each tile, firmly press it down to ensure a secure bond. Repeat this process until you’ve covered the entire area with terrazzo tiles. Wait for two to three days after installation, allowing time for the tiles to set.
5. Grout and Fill
Once the tiles have settled, it’s time to grout the joints and fill in any gaps between the tiles.
6. Coat and Seal
Finish by applying a coat of water-based or permanent sealer to the entire terrazzo floor. This step helps protect the surface and adds a polished finish to your project.
Remember that working with terrazzo tiles can be a rewarding DIY project, but attention to detail and patience are key to achieving a beautiful result.
Different Terrazzo Systems and How They Are Installed
The installation procedures slightly vary depending on the type of terrazzo system applied.
1. Thin-Set Epoxy Terrazzo Systems
Thin-set terrazzo systems use either epoxy resin or polyacrylate as the binding material. Polyacrylate is a type of cement-modified acrylate known for its higher compressive strength and superior impact resistance compared to cement alone. Additionally, polyacrylate allows for the transmission of vapor.
These systems are installed similarly to traditional monolithic terrazzo but at a minimum thickness of 3/8 inches. In the case of an epoxy resin matrix, a two-component resin forms a direct bond with the concrete slab. Sometimes, you might need a moisture mitigation system or a crack suppression membrane. For all slab-on-grade applications, a vapor barrier beneath the slab is a requirement. In contemporary commercial construction, epoxy terrazzo is the most widely used system, accounting for over 90% of terrazzo installations in the United States.
The benefits of this material over cement-based terrazzo are many. You have access to an extensive range of colors, and you can even incorporate exotic aggregates like mirrors, Mother of Pearl, and plastic aggregates into epoxy terrazzo systems. It’s applied with a finish thickness ranging from 1/4 inch to 3/8 inch. Other advantages include its lighter weight, higher strength with PSI rates exceeding 10,000, quicker installation, impermeable finish, and reduced susceptibility to cracking.
However, epoxy terrazzo is suitable exclusively for interior applications and not for outdoor use. Additionally, the topping is not vapor-permeable, which may necessitate the use of moisture mitigation products. If an older building lacks an active vapor barrier under the slab on grade, epoxy terrazzo is not recommended.
2. Cementitious Terrazzo Systems
Cementitious systems involve various approaches to create terrazzo flooring. Here are the main methods:
- Monolithic Terrazzo
In this method, a 1/2-inch thick terrazzo topping is directly bonded to the concrete structural slab without the use of an under-bed. This is a suitable option when time and budget constraints are a concern. Divider strips are placed at regular intervals to separate colors or for decorative purposes.
- Sand Cushion Cementitious Terrazzo
In this approach, the material is poured over a wire-reinforced mud bed of sand and cement mixture, typically 2 1/2 to 3 inches thick. During the mud bed’s soft stage, metal divider strips are partially embedded wherever joints or color changes are needed. Beneath the mud bed, there is an isolation sheet on top of a 1/8-inch sand dusting, creating a floating floor that accommodates horizontal movement in the building, reducing the risk of cracking. It’s important to note that the Sand Cushion system requires the building to have a 3-inch recessed concrete slab to accommodate flooring elevations.
- Bonded Cementitious Terrazzo
Here, an under bed of sand and cement acts as a bond between the concrete slab and the terrazzo topping. The bonded terrazzo system is 1 3/4 to 2 1/4 inches thick, including a 1/2-inch terrazzo topping. Divider strips are strategically placed to prevent cracking.
3. Rustic Terrazzo
Rustic Terrazzo, also known as Washed Terrazzo, is primarily designed for outdoor use due to its textured, slip-resistant finish. Instead of the typical grinding and polishing process, the desired finish is achieved by gently washing away some of the cement before curing. This reveals the embedded marble, granite, and quartz aggregate, giving it a natural and rustic appearance. Rustic terrazzo systems can be applied either in a monolithic style or as a bonded mud bed application.
Rustic terrazzo can have varying thicknesses, ranging from 1/2 inch to 6 inches. Unlike traditional terrazzo, the surface of rustic terrazzo is treated with water or other methods to uncover the beauty of the marble chips, creating a distinct and rugged finish.
Tips for Crafting the Ideal Terrazzo Flooring Design
Different clients come with varying tastes and preferences when it comes to designing terrazzo flooring. They may utilize different materials like terrazzo tiles or terrazzo pavers and employ unique approaches to achieve a design that aligns with their goals and complements the overall architectural style of the structure. While the vision for a residential project may differ from that of a public construction project, there are tips that can help you create the perfect terrazzo flooring design for any project, ensuring an elegant outcome.
1. Embrace the Beauty of Aggregates
The heart of terrazzo lies in its aggregates—the colorful chips that set it apart from ordinary cement and infuse it with artistic complexity. You have a wealth of options, including shiny glass, iridescent mother-of-pearl, bright plastic, and classic marble. These materials offer a vast spectrum of colors and nearly limitless combinations of chips and pigments. Terrazzo installers typically start with standardized mixes provided by the National Terrazzo and Mosaic Association (NTMA) but then create customized samples for their clients.
Clients often want their terrazzo to coordinate with other types of flooring like carpet, tile, or even stone. Granite can be matched so closely that it’s nearly indistinguishable. However, achieving the perfect color can be influenced by various factors, including humidity, temperature, and even the amount of water used. It’s truly more of an art than a science.
2. Collaborate with Your Team
Start by having an open conversation with your project partners and other stakeholders. Great designs often emerge when you’re willing to explore various concepts rather than sticking rigidly to one. Engage in discussion with your project team to craft a fitting design that aligns with your theme.
3. Seek Inspiration from Your Surroundings
One of the best sources of inspiration is right in your surroundings. Whether you’re inside a newly constructed building or outside amidst nature, your environment can offer valuable creative cues. If you’re indoors, look to the elements within the structure for inspiration. If you’re in a natural setting, draw ideas from the natural world and contemplate ways to seamlessly integrate outdoor elements into your indoor space. In an urban environment, derive inspiration from the solid urban features surrounding you and consider incorporating these elements into your floor design or color scheme.
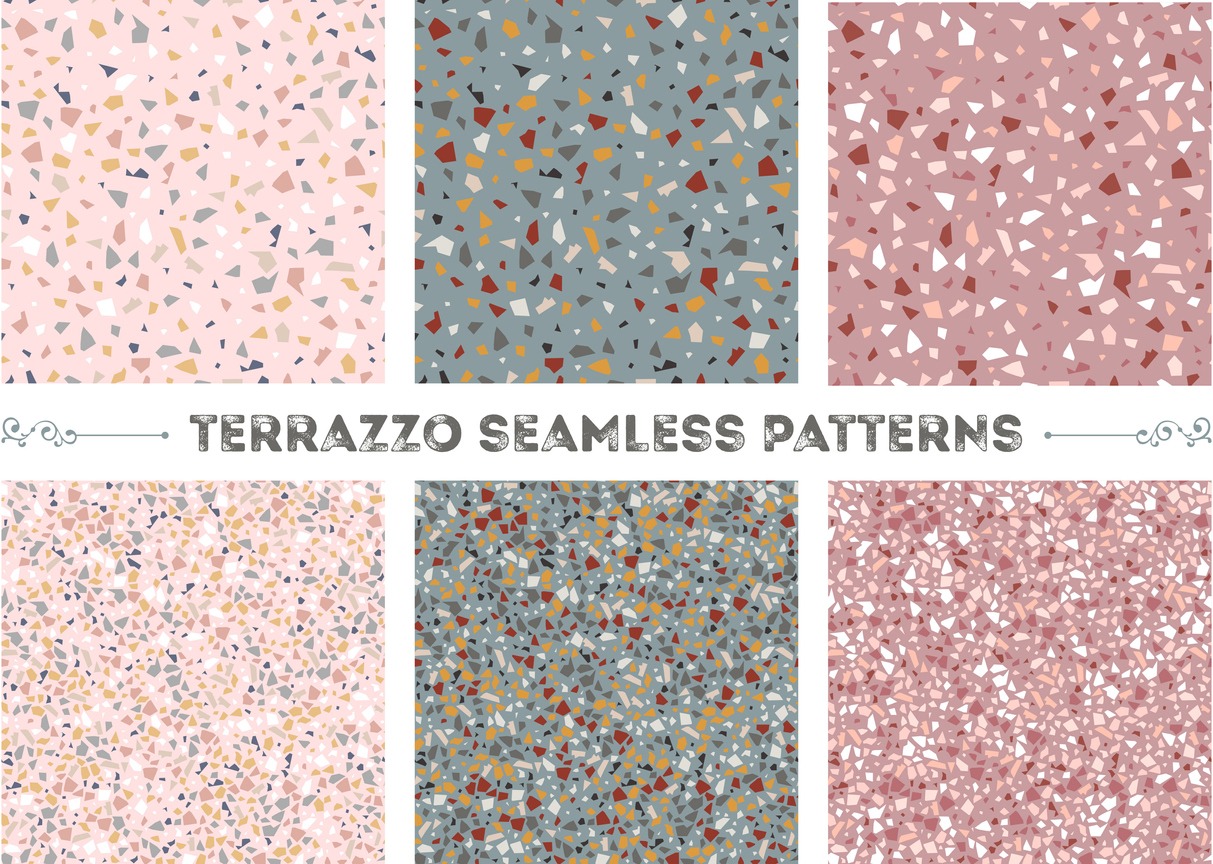
4. Imagine Your Color Palette
Consider your color choices and have them ready for consideration when designing your terrazzo flooring. Terrazzo offers incredible flexibility with its wide range of available colors. Don’t hesitate to experiment with the diverse hues at your disposal. Incorporating a variety of colors into your terrazzo design can enhance its visual appeal, except for minimalist designs that rely on singular colors. Terrazzo’s potential shines when you mix and match colors to achieve a standout design.
5. Strategically Plan Control Joints
If you’ve worked on Terrazzo flooring before, you’re likely aware of the challenges control joints can pose, especially when dealing with flowing or irregular designs. Control joints should not disrupt your design or make it appear fractured in the wrong places, particularly if you have important elements like logos or brands in your design. While control joints are essential, careful planning is crucial to ensure they align harmoniously with your overall design rather than defining it in an undesirable way.