
You’re prepared to enhance your space, and a strong DIY painting toolkit is essential. Start with essentials: a spackling knife, filler, abrasive paper, and a detergent solution for prepping your walls. When selecting brushes, artificial bristles are ideal for water-based paints, while organic bristles suit oil-based ones. Don’t cut corners on a high-quality roller frame and select roller covers with the appropriate nap size. Include a roller tray, extension pole, and perhaps a paint filter for efficiency. Prepare areas with painter’s tape and shield them with protective cloths. Finally, safety equipment like coveralls and a respirator mask is necessary. Equipped with the correct tools, you’ll reveal a beautifully painted space that exudes a professional touch.
Key Takeaways
- Essential prep tools include putty knife, metal paint scraper, sandpaper, and a mild soap solution for cleaning.
- Select the right brushes and rollers, with synthetic bristles for water-based paints and appropriate nap size for desired finishes.
- Don’t forget protective gear like coveralls, non-slip shoes, and a NIOSH-approved respirator for safety.
- Organize your workspace with drop cloths for floor protection, adequate lighting, and proper ventilation.
- Clean and maintain tools post-painting; store brushes, rollers, and paint in a cool, dry place for future use.
Essential Prep Materials
Before delving into the painting process, you’ll need to gather the essential prep materials, ensuring a smooth and flawless finish on your walls. Start with a putty knife and spackle; they’re your best friends for patching up those pesky holes and imperfections that would otherwise mar your walls’ beauty. Don’t overlook the significance of a metal paint scraper—it’s vital for chipping away any peeling paint, ensuring you’re not just glossing over a problem that’ll reappear.
Next, grab some fine grit sandpaper. It’s your go-to for smoothing out those rough patches, making sure your surface is as even as a freshly zambonied ice rink. And don’t forget about cleaning; a simple solution of mild soap and water will do wonders. It’s like giving your walls a fresh start, washing away any dust or grease that might sabotage your paint job.
Choosing the Right Brushes
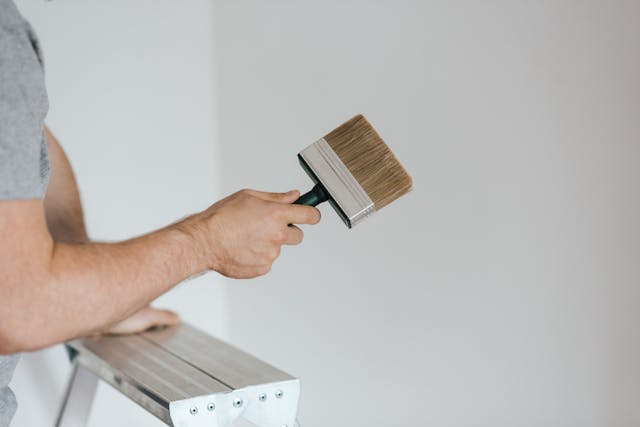
Picking the correct brushes can make or break your painting project, so it’s crucial to select wisely based on the paint type and the surface you’re working on. If you’re using water-based paints, grab brushes with synthetic bristles. They won’t absorb water and swell like natural bristles, providing you with a smoother finish. For oil-based paints, natural bristle brushes are your best option. They’re designed to hold and spread these thicker paints evenly.
Size matters as well. Don’t attempt to cover a large area with a tiny brush; you’ll waste time and likely end up with an uneven coat. Utilize smaller brushes for detail work where precision is crucial, and switch to larger brushes for broad strokes on larger surfaces.
Angled brushes can be your hidden weapon for cutting in or achieving sharp lines around trim. Flat brushes, on the other hand, are ideal for covering flat surfaces quickly and evenly. Search for quality brushes with flagged tips—they hold more paint and release it smoothly, leaving you with a professional-looking finish.
Lastly, take care of your brushes. Clean them properly after each use and store them correctly. This guarantees they maintain their shape and perform beautifully project after project.
Rollers and Roller Accessories

To elevate your painting project, consider investing in a high-quality roller frame that guarantees a smooth application across walls and ceilings. The right roller frame doesn’t just make the job easier; it transforms the finish, turning amateur work into a masterpiece with every stroke. But a roller frame alone isn’t enough. You’ll need roller covers, and the secret here lies in the nap size. Different nap sizes cater to different finishes, from sleek and smooth to richly textured. It’s not just about the paint roller and roller frame; think about how you’ll use them.
Imagine dipping your roller in paint without the mess. That’s where roller trays come into play, holding your paint and ensuring an even coat on your roller cover with each dip. And for those hard-to-reach spots? A roller handle extension rod will be your best friend, letting you paint high walls and ceilings without teetering atop a ladder. Eventually, consider using a screen inside your paint bucket. It’ll help you remove excess paint from the roller cover, ensuring a cleaner, more professional finish. With these tools, you’re not just painting; you’re crafting a masterpiece.
Essential Painting Supplies
Before you start your painting project, you’ll need to pick the right paint, brushes, and rollers. Understanding how to prep surfaces properly will save you time and guarantee a smoother finish. Let’s get you set up with the essentials to transform your space with ease.
Paint Selection Guide
Selecting the right paint type can transform any space, whether it’s the durability of satin for high-traffic areas or the subtle sheen of semi-gloss for trim. Before diving into your project, there are a few key points to ponder to guarantee your walls look stunning and the color lasts:
- Choose Your Paint Wisely: Flat paint is perfect for low-traffic areas, while satin or eggshell offers both resilience and ease of cleaning for spaces that see more action.
- Don’t Skip the Primer: Primer isn’t just an extra step; it’s the foundation for even color application and enhanced paint adhesion.
- Surface Prep is Key: Patch, clean, and sand your walls for a flawless finish.
Brushes and Rollers
When starting on your painting adventure, selecting the appropriate brushes and rollers is essential for achieving a flawless finish. Quality brushes with the right bristle types glide smoothly across surfaces, ensuring even paint application. Roller frames paired with the correct roller covers make covering large areas not only efficient but enjoyable.
| Tool Type | Purpose | Key Feature |
|---|---|---|
| Brushes | Smooth, even paint application | Suitable bristle types |
| Roller Frames | Efficient paint application on large surfaces | Holds roller covers |
| Roller Covers | Provides texture; covers large areas quickly | Different nap lengths available |
| Paint Trays | Holds paint for easy access | Essential for brush and roller use |
| Paint Sprayers | Quick, even coverage for large areas | Speed and efficiency |
With these tools, you’re set for a painting project that’s not just successful but satisfying.
Prepping Surfaces Properly
Armed with the right brushes and rollers, it’s time to make sure your surfaces are prepped to perfection, setting the stage for a flawless paint job. Achieving that impeccable finish isn’t just about the paint; it’s about the groundwork. Here’s what you’ll need:
- Painter’s Tape and Hand Masker: It’s time to get those lines crisp. Use a hand masker for efficiency and painter’s tape for precise edges.
- Filler and Caulking Gun: Don’t let holes and cracks betray your efforts. Fill them up, smooth them out, and make certain your canvas is seamless.
- Sandpaper: Rough spots? Sand them down. It’s about starting smooth to end smooth.
Paint Selection Tips
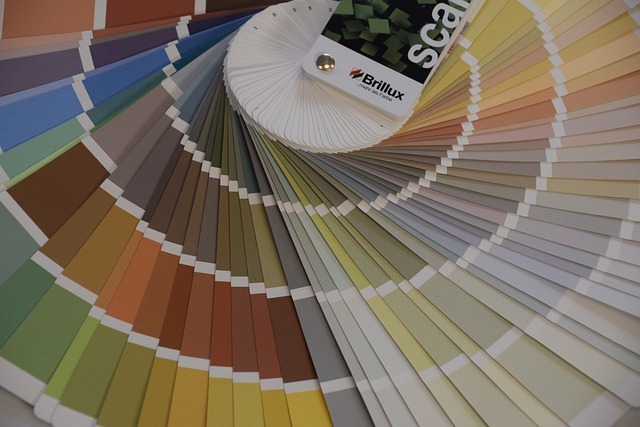
Choosing the right paint involves understanding your surface, prioritizing eco-friendliness, and matching the area’s aesthetic demands. When you’re delving into painting, paint selection becomes your cornerstone. It’s not just about selecting a color; it’s about picking paint that aligns with your project’s needs, guaranteeing durability, and contributing to a healthier environment.
| Surface Type | Paint Type | Sheen Level |
|---|---|---|
| Interior Walls | Acrylic | Matte |
| Wood Trim | Oil-based | Semi-gloss |
| High-Traffic Areas | Acrylic | Satin/Eggshell |
| Eco-Friendly Option | Low VOC | Any |
| Influenced by Lighting | Any | Depends on Light |
Remember, the finish matters just as much as the hue. Satin and eggshell finishes are your allies in high-traffic areas, offering both durability and a subtle sheen that conceals imperfections well. And don’t overlook the importance of low VOC options for a greener choice that doesn’t compromise on quality.
As you select your paint, consider the room’s lighting and color scheme to make certain the final look captures the ambiance you’re aiming for. The right paint can transform a space, but only if you’re attentive to these key aspects.
Surface Preparation Tools
Before delving into the transformative power of paint, it’s essential to properly prep your surfaces with the right tools. A flawless paint job isn’t just about the color or quality of the paint; it’s equally about the groundwork laid before a single drop is applied. Here’s a quick guide to make sure your walls are primed for perfection:
- Paint Scraper: Essential for removing peeling paint and ensuring a smooth base. Don’t underestimate the power of starting with a clean slate. A paint scraper is your first step towards a surface that’s ready to embrace a new coat.
- Sandpaper: After scraping away old paint, sandpaper becomes your best friend. It’s perfect for smoothing out rough patches and ensuring your surface is as smooth as silk. Remember, the smoother the surface, the better the paint will adhere and the more professional the finished product will look.
- Caulking Gun and Filler: Cracks and gaps? No problem. Using a caulking gun paired with quality filler will help you repair any imperfections, sealing them for that seamless finish every painter aims for.
Armed with these tools, you’re not just painting; you’re crafting a masterpiece. Let’s make those walls not just a backdrop, but a statement.
Safety and Protection Gear

Before you splash on that first coat, let’s talk safety. You’ll need protective clothing and masks to shield you from harmful fumes and accidental splatters. Ensuring you’re well-ventilated with fans or open windows isn’t just wise; it’s vital for your health.
Protective Clothing Essentials
To ensure your safety while expressing your creativity with paint, it’s crucial to gear up with the correct protective clothing essentials. Immersing yourself in a DIY painting project involves more than just selecting the right shades; it’s about safeguarding yourself too. Here’s what you need to have:
- Coveralls: Full-body coveralls shield your skin and clothes from paint splatters and chemical exposure. Opt for ones with long sleeves and pants for maximum protection.
- Non-slip closed-toe shoes: Keep your footing secure on slippery surfaces to avoid accidents. Safety first means no open sandals.
- A hat or cap: Prevent drips from messing up your hair and protect your scalp. It’s a simple addition that can save you a lot of hassle.
Respiratory Safety Measures
When addressing a painting project, it is vital to prioritize respiratory safety by wearing a NIOSH-approved respirator to protect your lungs from hazardous fumes and particles. This isn’t just a recommendation—it’s essential for your health. Respiratory safety precautions, including a properly fitted respirator mask, are your best defense against the unseen dangers of paint fumes and airborne particles. Choose a mask with filters specifically designed to block these hazards. Remember, even the best respirators can’t do their job if the filters are old and clogged. Follow the manufacturer’s guidelines for replacing them regularly. Additionally, make sure your workspace is well-ventilated. It’s not just about comfort; it’s about reducing the concentration of fumes and keeping the air in your work area clean and safe.
Cleanup and Maintenance Tools
After completing your painting project, it’s important to properly clean and maintain your tools for their longevity and performance. The cleanup and storage of your brushes and rollers are vital steps that cannot be overlooked. Here’s a concise guide to keep your painting tools in top shape:
- Immediate Cleaning: Always clean brushes and rollers promptly after use. If paint dries and hardens, it compromises the tools’ effectiveness and makes future cleanup a nightmare. Use a roller and brush cleaner to efficiently remove all paint residue. This step guarantees your tools are ready for reuse and maintains their quality over time.
- Proper Storage: Once cleaned, store your brushes and rollers in a dry area. This helps maintain their shape and prevents any mildew or mold buildup, which can ruin the tools. Proper storage is essential to prolonging the life of your painting equipment.
- Regular Inspection and Disposal: Don’t forget to regularly inspect your tools for wear and tear. Replace worn-out rollers to ensure a smooth and even application of paint in your next project. Also, responsibly dispose of used paint cans and other disposable materials in line with local regulations to keep your workspace safe and environmentally friendly.
Advanced Painting Tools
After discussing how to clean and maintain your painting tools, let’s delve into the advanced tools that can enhance your painting projects. Your painting supplies won’t be complete without considering these game-changers that could greatly enhance efficiency and quality.
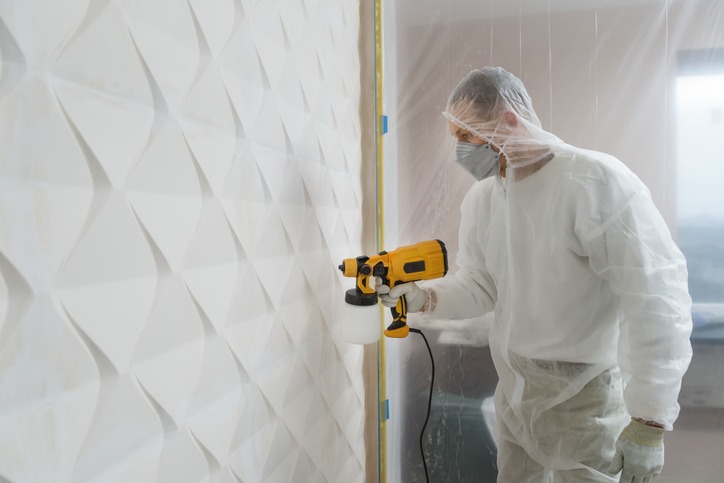
First up, airless paint sprayers are essential for tackling large areas swiftly while achieving that desired smooth finish. They’re a lifesaver for both exterior and interior projects, reducing your painting time substantially. Add this to your supply checklist if you’re facing a sizable task ahead.
For those delicate jobs requiring a finesse touch, like renovating your cabinets or adding a high-end finish to furniture, HVLP (High Volume Low Pressure) paint sprayers are your best choice. They ensure you achieve those fine finishes without the annoyance of brush marks.
Don’t underestimate the importance of paint edgers and shields in your arsenal. Edgers are your secret weapon for sharp lines along ceilings, baseboards, and trim, guaranteeing a professional look. Meanwhile, paint shields are the underrated heroes that safeguard your floors and adjacent walls from the dreaded overspray.
Lastly, detail paint brushes are a necessity for any intricate work. Whether it’s touching up corners, edges, or small areas, these brushes guarantee precision where it’s most needed, making them an essential part of your painting supplies checklist.
Organizing Your Painting Workspace
Before you start your next masterpiece, let’s tackle organizing your painting workspace. A smart layout and proper lighting are your best allies, ensuring you don’t waste time searching for supplies or straining your eyes. By storing paints and tools efficiently, you’ll keep your creative zone both inspiring and functional.
Workspace Layout Essentials
To set the stage for your painting masterpiece, start by carving out a well-lit, ventilated corner as your creative sanctuary. By prioritizing your workspace layout essentials, you’re not just preparing to create; you’re setting yourself up for success.
Here are three key elements to ponder:
- Protect Floors: Lay down a drop cloth or plastic sheeting. It’s not just about being tidy; it’s about safeguarding your creative zone.
- Organize Tools: Keep your brushes, paints, and palettes on a sturdy workbench or table. Efficiency is king.
- Smart Storage: Use shelves, pegboards, or bins to keep everything within arm’s reach. Your focus should be on your art, not on hunting for supplies.
Lighting and Ventilation Tips
While organizing your painting workspace, don’t overlook the crucial roles of lighting and ventilation in crafting a masterpiece. Adequate lighting isn’t just a luxury; it’s a necessity to accurately see colors and details. Task lighting or natural light can greatly enhance your precision, but remember to position lights strategically to minimize shadows and improve visibility. This isn’t just about seeing your work clearly; it’s about protecting your health too. Proper ventilation is essential to avoid inhaling harmful fumes and to keep your working environment comfortable. A well-lit and ventilated space not only boosts your painting efficiency but also enhances the overall results of your work. So, make sure your space is bright and breezy to keep your creativity flowing.
Storing Paints and Tools
Efficiently organizing your paints and tools is a game-changer in maintaining a streamlined workspace, ensuring everything you need is within arm’s reach. Here’s how you can keep your painting essentials tidy and ready for action:
- Use shelving units or pegboards: Perfect for storing paint cans and tools, making them easily accessible.
- Label everything: Differentiate between various paint cans, brushes, and rollers with clear labels, keeping your space organized.
- Preserve your tools: Store brushes and rollers in plastic bags to prevent them from drying out between uses. Flip paint cans upside down to create a better seal and minimize air exposure.
Frequently Asked Questions
What Equipment Do You Need to Be a Painter?
To be a painter, you’ll need brushes, rollers, trays, and extension poles. Master color mixing techniques and paintbrush care tips. Don’t forget spackling compound, sandpaper, and painter’s tape for prep. Quality paint supplies are a must.
What Do You Need for a Beginner Painter?
As a novice painter, you’ll need fundamental tools, an understanding of color theory, and knowledge on brush care. Begin with essential brushes, rollers, and paints, then delve into techniques that bring your vision to life.
What Supplies Are Needed to Paint a House?
To paint a house, you’ll need a variety of supplies focusing on color selection and surface preparation. Essential items include tape measures, painters tape, fillers, caulking, paint sprayers, brushes, rollers, and paint trays.
What Does a Painter Need?
You’ll need brushes, rollers, and a solid grasp of color theory. Don’t forget about brush maintenance, protective gear, and quality paint. It’s all about the prep work and choosing the right tools for a flawless finish.
Conclusion
Now that you’ve got your DIY painting checklist, you’re prepared to plunge in. Remember, selecting the right tools and paint makes all the difference. Don’t skimp on prep materials and safety gear; they’ll save you headaches later. Keep your workspace organized for a smoother process. Embrace the cleanup as part of the journey. With these tips in your pocket, you’ll transform any space confidently. So, grab your brushes and let your creativity flow. Happy painting!