
Air conditioners are essential for maintaining a comfortable indoor environment, but when they start rattling, it can be both annoying and concerning. This unsettling noise often indicates an issue that, if left unaddressed, could lead to more significant problems or even system failure. Homeowners and property managers alike should be aware of the common causes behind this disruptive sound and understand the steps to diagnose and remedy the situation. This guide will walk you through the typical culprits of air conditioner rattling and provide practical solutions to ensure your unit runs smoothly and quietly. Whether you’re a DIY enthusiast or simply seeking knowledge before calling in the professionals, you’ll find valuable insights on maintaining your air conditioner’s performance and longevity.
Loose Parts and Panels
A prevalent cause for a cacophony of rattles in an air conditioner is the loosening of various parts and panels. The unit’s vibrations during operation can, over time, lead to the gradual loosening of screws, bolts, and fasteners that secure the components together. Panels that enclose the unit may also become unfastened, resulting in a noticeable rattling as they quiver against the unit’s core structure.
To address this issue, pinpointing the culprits is the first step. Shut off the unit and commence with a thorough visual examination. Search for any signs that suggest movement in the panels or internal parts. Gently press on each panel to test for instability or noise production. It’s crucial to scrutinize the connections within the air conditioner, particularly where the rattling seems to be most pronounced. The access panels, often overlooked, can become unsecured and should be checked for loose screws or latches.
Following the identification of loose elements, proceed to secure them. Employ a screwdriver or wrench to carefully tighten any discovered loose screws or bolts. Exercise caution to prevent thread stripping or component damage. If the panels themselves are unsteady, reaffix them firmly, ensuring all latches or fasteners are intact. Should you encounter any damaged hardware, it’s imperative to replace it promptly to mitigate further noise.
Occasionally, the issue may not lie with the fasteners but with the holes they are meant to secure, which may have enlarged. In such instances, consider using larger screws, incorporating washers, or applying a thread-locking compound to ensure a firm hold.
Before undertaking any repairs, always disconnect power to the unit and handle each part with due diligence to avoid inadvertent damage or warranty voidance. Should the rattling persist after all visible components have been secured, it’s possible that internal parts are at fault, necessitating a professional evaluation.
Identifying and Tightening Loose Components
To effectively silence a rattling air conditioner, one must first locate any components that have shifted out of place. Here’s a step-by-step guide to identifying these components:
- Power Down the System: Safety is paramount; ensure the system is entirely deactivated before proceeding.
- Perform a Physical Inspection: Conduct a tactile examination of the unit before it’s powered on. Press gently on the exterior panels and listen for any signs of movement or noise that could indicate looseness. Examine all accessible fasteners and secure any that appear loose.
- Operational Check: Once the initial inspection is complete, activate the system and listen attentively. This may help pinpoint the source of the rattling.
- Component-Specific Inspection: Investigate further into the air conditioner to examine components that are likely noise generators. Pay particular attention to the compressor’s mounting bolts, as well as the blower motor and fan assembly, ensuring they are firmly in place.
- Tighten with Appropriate Tools: Utilize the proper screwdrivers or wrenches to tighten any loose screws or bolts you come across. Be mindful not to overtighten, as this could lead to threading damage or component harm.
- Use Care with Internal Components: Approach internal components with caution to prevent causing additional damage or dislodging. If the rattling source remains elusive or inaccessible, or if the noise persists despite tightening all visible components, this suggests an internal issue that likely requires professional intervention.
Refer back to the guidance on handling access panels provided in the preceding section. Regular maintenance checks and proactive measures can help avert these disruptions from becoming a recurring nuisance.
Debris in the Air Conditioner
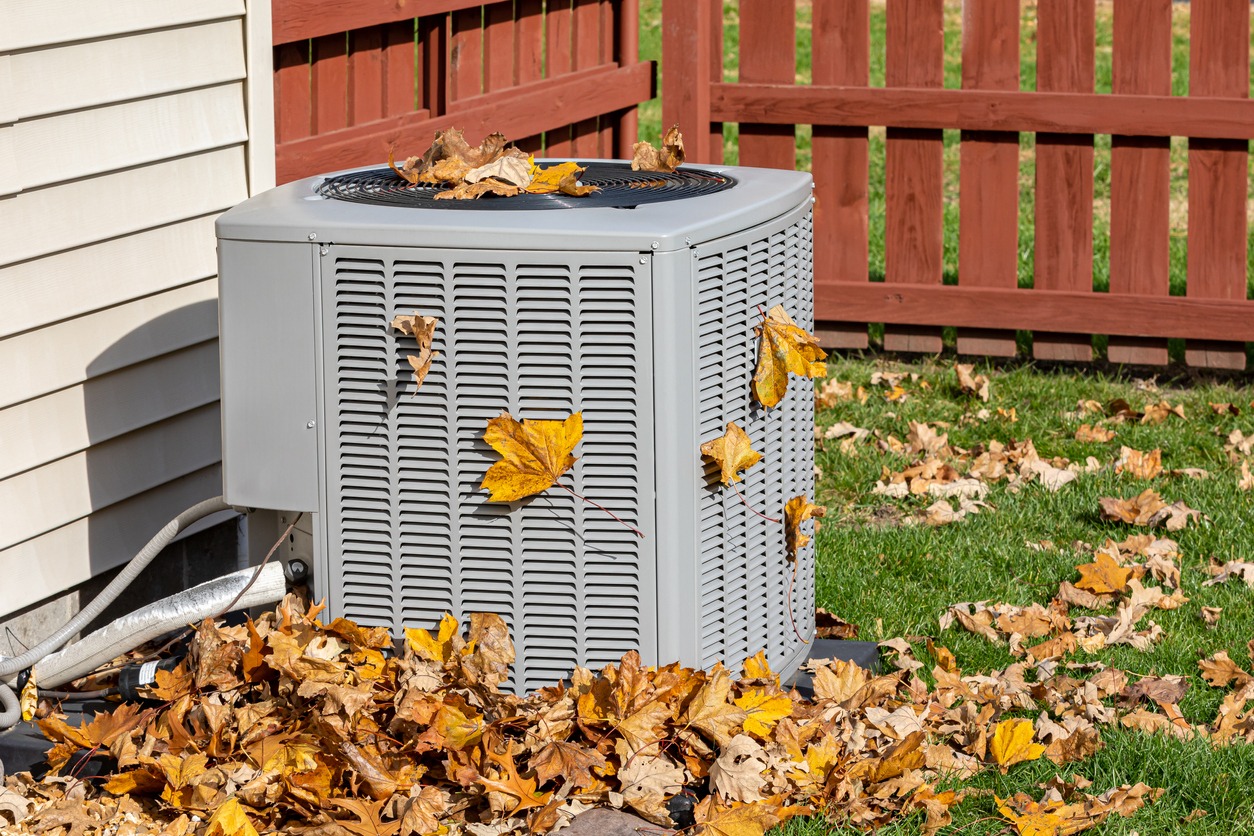
A common culprit behind the mysterious rattles emanating from your air conditioner is the unwelcome presence of debris. Over time, an assortment of outdoor detritus such as leaves, twigs, and even the occasional pebble can infiltrate your unit. More unsettling, small critters or insects may find their way inside, setting the stage for noise and potential damage. To tackle this issue effectively:
- Power Down the Unit: Safety is paramount. Ensure the air conditioner is completely shut off before you begin any maintenance tasks.
- External Inspection: Start with a thorough examination of the area surrounding the outdoor unit. Clear away any natural debris that could potentially enter the system.
- Remove the Access Panel: Proceed with caution when removing the access panel. Consult the user manual for guidance to avoid causing harm to the unit.
- Visual Inspection: Shine a light inside the unit and scrutinize every nook and cranny, paying special attention to the fan blades and condenser coils where debris tends to accumulate.
- Gentle Cleaning: Employ a vacuum equipped with a soft brush attachment to carefully extract loose debris. For those hard-to-reach places, consider using a can of compressed air to dislodge stubborn particles.
- Manual Removal: Should you encounter larger obstructions or evidence of nesting, don protective gloves and delicately remove these items to avoid damaging sensitive internal components.
- Check the Condenser Coil: Occasionally, debris can cause the condenser coil fins to bend. Utilize a fin comb to gently realign any misshapen fins, as these can contribute to the rattling if ignored.
- Secure the Access Panel: After the cleaning process is complete, reattach and secure the access panel firmly. This not only prevents new debris from entering but also mitigates the chances of panel-related rattles.
Periodic cleaning and preventative maintenance are your best defenses against the persistent annoyance of rattling noises, particularly during seasons when debris is more prevalent. Should the rattling persist after a thorough cleaning, it may signal a deeper issue, such as internal blockages or damage, warranting the expertise of an HVAC professional.
Inspecting for and Cleaning Out Debris
Diving deeper into the process of debris removal, it’s essential to adopt a methodical approach to ensure nothing is overlooked. After powering down the unit and removing the access panel as previously outlined, proceed with the following steps:
- Comprehensive Interior Inspection: With the use of a flashlight, methodically examine the interior compartment of the air conditioner. Pay close attention to the fan blades, motor housing, and condenser coils, as these areas are prone to debris accumulation.
- Vacuum with Precision: Using a vacuum cleaner with a soft brush attachment, gently navigate the interior space, removing any loose debris. The brush attachment is particularly useful in preventing scratches or damage to delicate components.
- Targeted Cleaning with Compressed Air: For debris that is more challenging to reach, a can of compressed air can be an invaluable tool. Direct the air stream towards the trapped particles to effectively dislodge them from their hiding spots.
- Manual Debris Extraction: In some cases, you may encounter larger debris that requires manual removal. With gloves on, carefully extract these items, taking care not to exert undue force on any internal parts.
- Fin Inspection and Correction: After clearing out debris, inspect the condenser coil fins for any signs of bending or damage. A fin comb can be used to straighten out any bent fins, restoring proper airflow and eliminating potential noise sources.
- Reassembly with Care: Once you are satisfied that the unit is free of debris, reattach the access panel securely. This not only prevents future debris entry but also ensures that the panel itself does not become a source of noise.
By following these detailed steps, you can maintain the integrity of your air conditioner and prevent the intrusion of debris that leads to those pesky rattling sounds. Remember, consistent upkeep is key to a quiet and efficient air conditioning system.
Fan and Motor Issues
A persistent rattling from your air conditioner may point to complications with the fan or motor—key components for its operation. Addressing these concerns swiftly is crucial. Here’s a guide to navigate through the inspection and troubleshooting process:
Power Down the Unit: Safety comes first. Ensure the air conditioner is off and unplugged before you begin.
Access the Fan Compartment: Carefully remove the access panel to the fan compartment. Remember, gentle handling is paramount to prevent any unintended damage.
Inspect the Fan Blades: Examine the blades for damage, such as bends or cracks. Damaged blades can disrupt airflow and may require replacement.
Check for Obstructions: Ensure nothing is obstructing the fan blades. Even small debris can cause a rattling noise when they come into contact with the moving parts.
Test Fan Movement: Rotate the fan manually to feel for resistance or instability, which could suggest bearing wear or misalignment.
Motor Mounts and Fasteners: Verify that motor mounts and fasteners are secure. A loose motor mount can not only rattle but also cause damage to the motor.
Blower Wheel Examination: Check the blower wheel for dirt accumulation or imbalance, both of which can lead to rattling.
Lubrication: Some motors and fans need regular lubrication. Consult the manufacturer’s guide and, if necessary, apply the recommended lubricant.
Wiring and Electrical Connections: Ensure all wiring and connections are tight and intact to prevent vibrations and potential electrical hazards.
If these steps don’t uncover or fix the fan or motor issues, professional expertise is recommended. Tinkering with electrical components or internal mechanisms without the right knowledge can be dangerous and may exacerbate the problem.
Inspecting the Fan and Motor
To delve into the fan and motor inspection, adopt a methodical approach. Here are the steps to a comprehensive evaluation:
Safety Precautions: Confirm the air conditioner is completely powered off before you start.
Access and Visual Inspection: Open the unit to reveal the fan and motor. Look for any apparent signs of wear or damage.
Fan Blade Integrity: Check the fan blades for any abnormalities or buildup of debris that could throw them off balance. If needed, clean the blades as per the guidelines provided earlier.
Stability Check: Apply a gentle pressure to the fan assembly to test for stability. A properly secured fan should exhibit minimal movement.
Motor Bearings: Manually spin the fan to detect any grinding or resistance, indicative of bearing issues. Noisy or stiff bearings often necessitate professional attention.
Securing Hardware: Ensure all bolts and screws are tight. Vibrations from any loose components can amplify rattling noises.
Blower Wheel Condition: Assess the blower wheel for any signs of dirt, misalignment, or imbalance, which can cause significant noise.
Check Electrical Connections: Double-check that all electrical connections are firm and secure, as previously mentioned. Loose connections can lead to erratic motor behavior and noise.
Motor Function Test: Once everything is reassembled and power is restored, observe the motor’s sound during operation. Any unusual noises may point to internal motor problems, warranting a professional evaluation.
Adhering to these steps will help pinpoint typical fan and motor issues that could be causing your air conditioner to rattle. If the noise persists or you’re uncertain about performing repairs, it’s prudent to call in an HVAC specialist for a safe and effective resolution.
Refrigerant Piping and Coil Fins
The intricate network of refrigerant piping and coil fins is pivotal to your air conditioner’s ability to cool your space effectively. When these components start to rattle, it’s a sign that attention is needed. Here’s what might be causing the commotion:
- Vibrations from Refrigerant Piping: If the piping isn’t firmly anchored, it can lead to a symphony of rattles. Check the connections at the evaporator and condenser coils for any slack and fasten them securely with clamps or additional insulation to quell the vibrations.
- Physical Damage to Piping: Keep an eye out for any dents or kinks in the refrigerant lines, as these imperfections can not only be noisy but also impede refrigerant flow. Such damage often necessitates a professional’s touch for repair or replacement.
- Coil Fin Maintenance: Dirt buildup on coil fins can obstruct airflow and amplify noise. Carefully use a fin brush or comb to cleanse and realign any misshapen fins, taking care not to compromise their delicate structure.
- Fin Vibration: Bent fins or an unlevel unit can cause the fins to tremble against other parts. Straightening the fins and ensuring the unit is properly balanced can help alleviate this issue.
- Enhanced Insulation: Proper insulation around the refrigerant lines can prevent them from rattling against other surfaces, simultaneously reducing noise and boosting efficiency.
- Thermal Expansion: As temperatures fluctuate, the refrigerant pipes may expand and contract, sometimes causing rattles. While some noise is expected, excessive sound might indicate a need for additional cushioning or spacing to handle these thermal shifts.
Tackling issues with refrigerant piping and coil fins is a nuanced task. Overzealous tightening can lead to damage, while insufficient securing can result in persistent noise and reduced efficiency. If the damage appears severe or the repair process daunting, it’s wise to engage a professional HVAC technician to ensure these critical AC components are handled with care.
Securing Refrigerant Piping and Repairing Coil Fins
To mitigate the rattling of your air conditioner’s refrigerant piping and coil fins, a combination of securing and maintenance is essential. Implement these targeted steps to maintain their optimal condition:
- Reinforcing Piping: Ensure the refrigerant piping is supported by sturdy brackets and clamps to limit movement and noise. Replace or reinforce any inadequate or damaged supports to stabilize the piping.
- Insulation Integrity: Examine the insulation encasing the refrigerant lines for any deterioration. Sound insulation can muffle the vibrations of the lines. Should the insulation show signs of wear, fitting new insulation sleeves that match your lines’ specifications is recommended.
- Soft Clamps Usage: For pipes that tend to move with temperature changes, soft clamps with cushioned interiors can secure the pipework while allowing for necessary movement and reducing noise.
- Fin Alignment: Employ a fin comb to align any bent coil fins. Keeping fins straight ensures optimal airflow and minimizes rattling. Be gentle to prevent further damage.
- Coil Fin Cleanliness: Maintain clean coil fins to avoid airflow disruption and noise, as previously discussed in the debris section.
- Operational Testing: Once you’ve made repairs and adjustments, activate the air conditioner to test for any lingering rattles, paying close attention to the areas you’ve addressed.
- Preventative Maintenance: Set up a regular maintenance schedule to inspect the refrigerant piping and coil fins, preventing future issues.
Remember, while you can often secure refrigerant piping and repair coil fins yourself, dealing with refrigerant requires certified professionals due to environmental regulations. Should you suspect a refrigerant leak or feel the repairs are out of your depth, don’t hesitate to call an HVAC expert.
Correcting an Unbalanced Air Conditioning Unit
An air conditioner that’s off-kilter can cause persistent rattling, as the uneven weight distribution leads to vibrations. To mitigate this, consider the following steps:
- Inspect the Level: Using a spirit level, assess whether the indoor and outdoor units are perfectly horizontal. Any deviation might necessitate an adjustment.
- Adjust the Feet or Pad: Outdoor units typically sit on pads which, over time, can settle or shift. Level these bases by inserting shims for slight imbalances or by repositioning the entire pad for more pronounced issues.
- Secure Mounting Brackets: For wall-mounted units, check that the brackets are tightly affixed to the wall, and that the mount isn’t warped or impaired. Tighten any bolts that have loosened over time.
- Vibration Dampeners: Installation of vibration dampeners or isolation pads beneath the unit can absorb the excess movement and significantly quieten the noise.
- Load Distribution: Ensure the internal components, such as the compressor, are evenly balanced and firmly secured, as imbalances can affect the entire system.
- Isolate Movement: Verify that flexible duct connectors are present and in good condition to minimize vibration transmission.
- Professional Inspection: Should these measures not resolve the imbalance, it’s wise to seek a professional’s expertise. An HVAC technician can provide a comprehensive assessment and address any underlying issues.
Regular upkeep, including balance checks, can forestall noise issues and prolong the operational life of your air conditioner, ensuring it runs smoothly and quietly.
Levelling the Air Conditioner
A level air conditioner operates more efficiently and is less prone to noise disturbances. Here’s a guide to ensure your unit is level:
- Initial Assessment: Place a spirit level atop the unit in various directions to determine its current state of balance.
- Adjusting the Outdoor Unit: Should the outdoor unit’s pad be uneven, carefully lift the unit and place a stable material, such as gravel or pavers, underneath to achieve a level position.
- Using Shims for Minor Adjustments: Small discrepancies can be corrected by sliding weather-resistant shims beneath the unit’s base or feet.
- Correct Footings on Indoor Units: For indoor units with adjustable feet, tweak these accordingly to ensure the unit sits flat and even.
- Rechecking the Level: After adjustments, use the spirit level again to confirm the unit is uniformly level.
- Testing for Stability: Gently push against the unit to test its stability; it should remain firm without wobbling.
- Verifying Level Over Time: As environmental factors can cause shifts, periodically reassess the level of your air conditioner to maintain its balance.
While leveling is often within the homeowner’s ability, certain situations, like a damaged base or persistent instability, may call for professional intervention to ensure the unit’s longevity and efficiency.
When to Contact a Professional

Tackling air conditioner issues can often be a straightforward DIY project, but there are instances when enlisting the expertise of a professional is not only wise but necessary. Understanding the line between a quick fix and a complex repair can save you from unnecessary headaches and ensure your system’s longevity. Here are the critical moments when it’s prudent to call in the cavalry:
- Safety First: Whenever you’re faced with potential hazards, such as electrical risks or the need to work on a rooftop unit, it’s imperative to defer to the professionals to avoid accidents.
- Refrigerant Handling: Refrigerant management is not a DIY job. Due to its hazardous nature and strict environmental laws, only certified technicians should address leaks or recharge the system.
- Intricate Repairs: Encountering intricate mechanical issues, like compressor malfunctions or motor replacements, should prompt you to seek those with specialized tools and expertise.
- Unresolved Noises: If the mysterious rattling persists despite your best efforts, it could be indicative of a more serious problem that requires a technician’s advanced diagnostic skills.
- Inefficiency Issues: When your air conditioner isn’t cooling as it should, and you’ve ruled out simple fixes, it’s time for a professional to unearth and solve underlying problems.
- Warranty Preservation: To avoid inadvertently voiding your warranty, it’s essential to consult the terms and, if necessary, let a professional handle the repairs.
- Preventive Care: An annual inspection by a seasoned technician can help catch potential issues early, ensuring your system runs smoothly and efficiently.
By recognizing these situations, you can make informed decisions about managing your air conditioner’s maintenance and repairs, ensuring its optimal performance for years to come.
Recognizing the Need for Professional Help
Knowing when to call in a professional is crucial for the health of your air conditioning system. Here are the telltale signs that it’s time to seek expert assistance:
- Weak Airflow: If your air conditioner is struggling to maintain a steady flow of air, despite a clean bill of health for filters and ducts, it may be time for a technician to investigate potential compressor or ductwork issues.
- Persistent Odd Noises: When unusual sounds continue to emanate from your unit after you’ve done all you can, it’s likely a sign of internal complications that require a professional’s touch.
- Electrical Warning Signs: Frequent circuit breaker trips, a burning odor, or visible wiring concerns are serious electrical red flags that necessitate immediate professional attention.
- Humidity and Air Quality Control: An air conditioner should regulate humidity and purify the air. If you’re experiencing excessive moisture or strange smells, a technician’s intervention is needed.
- Surging Energy Costs: A spike in your energy bill can be a symptom of an inefficient air conditioner, possibly due to mechanical issues or suboptimal installation.
- Aging System or Frequent Breakdowns: If your system is getting on in years or seems to need constant fixes, a professional can help you weigh the benefits of repairs versus replacement.
- Insulation and Sealing Issues: Should you suspect that your home’s sealing or insulation is compromising your AC’s efficiency, a professional can conduct audits and suggest improvements.
Enlisting a professional technician ensures a comprehensive diagnosis and resolution for your air conditioning woes. Early recognition of these signs can prevent minor issues from ballooning into major expenses, prolong the lifespan of your unit, and maintain the comfort and safety of your living space.
Useful FAQs for Troubleshooting Air Conditioner Rattling
1. What are some common causes of air conditioner rattling?
Common causes of air conditioner rattling often include debris in the unit, loose screws or components, worn-out fan blades, or a failing compressor.
2. How can one identify the reason behind a rattling air conditioner?
Identifying the cause of a rattling air conditioner can require careful inspection. Listening to the type of noise and observing when the noise happens can help determine the source. Professional service is recommended.
3. Is debris a typical reason for air conditioner rattling?
Yes, debris like leaves, sticks, or other outdoor material can often get into the air conditioner unit causing a rattling sound. Regularly cleaning the unit can prevent this issue.
4. Why do loose components cause the air conditioner to rattle?
Loose components in the air conditioner cause vibrations resulting in a rattling noise. The screws or bolts holding parts together might be loose, which might require tightening.
5. Can a failing compressor result in a rattling air conditioner?
Yes, a failing compressor is a serious issue that might cause the air conditioner to produce a rattling sound. Replacing or repairing the compressor might be needed.
6. How does one address a rattling air conditioner?
Addressing a rattling air conditioner depends on the cause. Removal of debris, tightening loose components, replacing worn-out parts, or employing professional repair services could be solutions. Regular maintenance can prevent many issues.