
Believe it or not, removing limescale from your tankless water heater by yourself isn’t as difficult or complicated as you may think. In fact, just about every tankless water heater comes with a user manual with thorough directions on cleaning and maintenance.
Your user manual contains vital information on the best way to operate and maintain your water heater. With each cleaning, you’ll extend the life of your heater and save yourself a ton of money hiring professionals.
Tankless water heaters are energy-efficient and easy to maintain — if yours isn’t, you may just not have the right one! Be sure to check out these reviews of the best tankless water heaters to help you find the right model for your home.
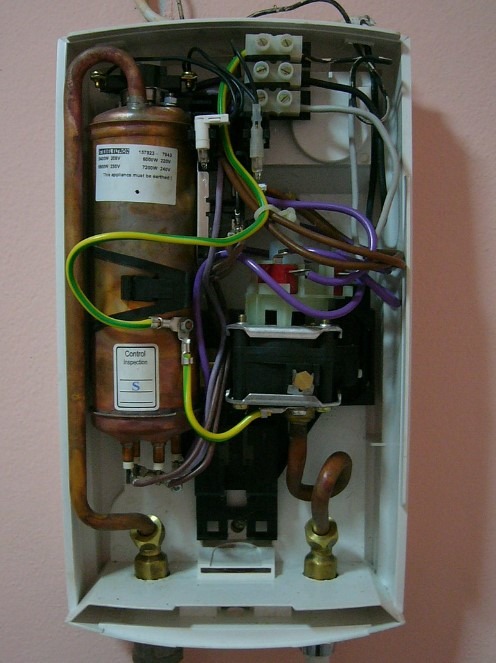
Removing Limescale From Your Tankless Water Heater
Limescale build-up is one of the most common threats to the efficiency of your tankless water heater. Over time, residue from traces of magnesium and calcium bicarbonate remain in your tank after the water has evaporated.
Easily recognized by its chalky, off-white colour, limescale is unavoidable and produces an undesirable odour in your water as well. This layer of residue forces the burner in your tankless water heater to work harder, and ultimately makes it less efficient at heating your water.
Depending on the ‘hardness’ of your water, limescale build-up can occur frequently and is difficult to remove thoroughly from your tank. Fortunately, there are descaling agents you can buy at a hardware store or department store. Don’t hesitate to learn more by checking out hiring a water heater pro.
DIY Steps To Remove Limescale From Your Tankless Water Heater
Follow these steps to get rid of limescale and keep your tankless water heater running at peak efficiency.
Part 1: Steps To Removing Limescale From The Tank
- Read the manufacturer’s instructions carefully to avoid damaging your water heater.
- Always remember to shut off the water heater at the power source. This means plugging the device out while you clean it to avoid a potential hazard.
- Shut off all the water valves supplying the water heater.
- Unscrew and remove the lid from your tankless water heater.
- Gently remove the purge port valve caps from the purge valves. You’ll find these located on each of the cold and hot water valves. The valves (T-shaped handles) relieve any pressure that might build up inside prevents excess hot water from escaping.
- Next, attach the hosing lines to each of the valves. The manufacturer typically supplies the hoses so don’t throw them out! Store them handily away for use when ready.
- Now you’ll need to open the purge port valves so you can flush the limescale residue in the tank out. Turn the valves perpendicularly to the hot and cold positions.
- Pour 2.5 gallons of undiluted white vinegar into the tank, flush and drain the tank.
- Once you completely flush the tank, close the purge port valves.
- Disconnect the hosing lines from each water valve.
- Reattach the purge port valve caps to each valve securely to avoid hot water escaping.
Part 2: Steps To Removing LimescaleThe Filter
- First, unscrew the filter and clean out any limescale from the housing as well as the inner filter screen. Refer to your user manual to find the filter housing unit.
- Next, you should be able to remove the filter screen and simply place it under running tap water.
- Replace the filter with a new one.
- Return the clean filter screen to its proper place in the filter housing.
- Screw the filter back in place securely, as per your user manual’s instructions.
- Review your water heater to ensure everything has been reassembled according to instructions and fitted securely.
Once you’ve reassembled your tankless water heater, you’ll want to run a test of course. You should notice a difference immediately. The water will appear clear and the heating element should heat rapidly (within seconds) when your tankless water heater is performing properly.