
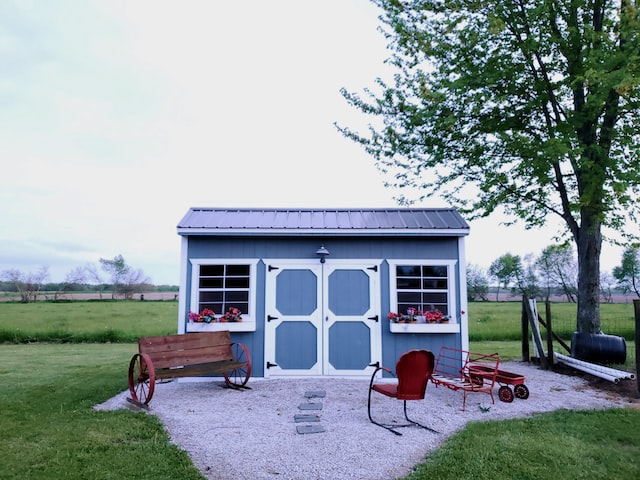
A shed in a garden or backyard is an excellent tool for organizing extra necessities. Placing all the garden stuff or kid’s bikes in a shed is ideal for utilizing the space.
However, a workable shed depends on a perfect shed base. If you are not putting importance on the base, the shed won’t stay strong. During heavy rain or thunderstorms, the shed may fall off.
That’s why you must know how to install a shed base and we are helping you with that. As a few other factors affect the process, you will also get their introduction.
So, let’s end the suspension and start your learning journey.
5 Facts You Should Consider Before Installing a Shed Base
Without a shed base, the shed won’t stay for longer and stronger. A well-made base will provide it with the strength to stand on and avoid moisture. No wonder, installing a shed base is immensely essential.
But, a few facts affect the installation process. You must know these before stepping in. Therefore, go through the facts that we clarified DIY details.
1. Suitable Location
A suitable location is needed to build and install the shed base. Look for a space a bit distant from trees as their roots may harm the base. Aren’t you already imagining the spot?
However, the spot must be leveled enough, otherwise, the base may not place strongly. In that case, even a space that can be leveled enough is suitable to start working.
2. Local Guidance
Authorities of many local areas set their preferred guidance for installing a shed base. The guidance may carry the measurement of the distance between your house and the shed.
Similarly, for building the shed, they might set the size of the hole you need to dig in the soil. It ensures the soil will be free from freezing during heavy falls. So, do not forget to check your local ordinance.
3. Base Material
Choosing the base material will decide how strong or durable the base will be. Also, how potentially it can hold the shed. You have already seen the differences between the most used base materials.
In our opinion, you should select a concrete base to have a secure base with a longer lifespan. In other words, a permanent base that avoids damages. The only drawback it has is the expensive cost.
However, if you are focusing only on quality and not on the cost, a concrete base is ideal for your shed. In case, your budget is a bit lower, wooden or gravel or pavers base can serve you well, too.
4. Easy Access
Ensuring easy access around the shed base is essential. It will assist you to check if the base is built or installed properly or not.
You may have to reach all sides of the base to paint it. Moreover, varnishing or staining will require easy access around it.
5. Electrical Units
Many homeowners want to add electrical units to their sheds. Having electrical support will let you work easily during dark nights or in the evening.
Therefore, secure the electrical units in their place before installing the shed base. Make sure to consider the facts very well to make the process smoother.
2 Efficient Methods of Installing the Shed Base
Anyone can install a shed base perfectly by carrying enough information, knowing the correct way, and collecting the required tools. We guess even you want to make it by yourself.
The Improve Warrior recommends to installing a shed base by using concrete materials for a leveled space and placing concrete blocks for an unleveled spot. None of them is difficult to install.
Therefore, we are presenting these 2 easiest methods of installing a shed base to assist you. Well, let’s clear the suspension and dive into the discussion.
Method 1: Concrete Shed Base
Concrete shed base is used widely as every homeowner wants to secure their shed. Without having a few cracks, this shed base won’t let you disappoint.
Moreover, it is regarded as a permanent solution for a shed. So, let us take you to the detailed steps.
Step 1: Level the Spot
We have already told you to select the place before starting. Now, you can level that ground if there are any small peaks of soil available. For cleaning the ground, you may need to work a bit.
Step 2: Measure It
Now, measure the spot according to your shed size. Remember to keep it a bit distant from any wall or trees. It lets you enjoy easy access. Use pegs and string to line up the border.
Step 3: Place a Timber Box
Then, place a timber box to keep the concrete and the base sturdy and in its place. Now, make a layer of full gravel or crushed gravel. Bring sand to cover up the gravel thoroughly.
Step 4: Concrete Layer
Make a mixture of water and concrete making sure it is not marshy. Now, provide the concrete mixture everywhere inside the timber box.
Try to shake the box lightly to let the concrete reach everywhere. Wait for 24 hours to see your shed base and till then, splash some water on it. Hopefully, it will be perfect.
Method 2: Concrete Blocks for Unleveled Spot
You may consider your excessive unleveled spot useless and it can not be used for building a shed base. However, your idea is wrong. Using concrete blocks will drive away the problem.
And to drive away your worries, keep reading its process.
Step 1: Clean the Surrounding
First, you have to clean the space as much as possible. Use a measuring tape to mark the shed’s size. Place pegs and string to remember the size.
Step 2: Level the Ground
Now, start digging the spot, and place a wooden plank to visualize how unleveled the ground is. You have two options – to level it by removing the additional soil and fill the blank area with extra soil.
Step 3: Set the Concrete Blocks
Then, take two weed membranes to place on the ground as it offers extra protection and strength to the shed. At this point, make three rows and set the concrete blocks. Collect rubber mallets to make them sturdy with the timber planks.
Step 4: Add Pea Gravel
In the end, add pea gravel to fill up the blank areas. Make sure to add them leveling with the timber planks. Finally, your unleveled ground has a better shed base.
Final Thoughts
In the end, we are delighted to have you till now with us. Thanks for spending your precious time, buddy. We hope you already have a vivid idea of how to install a shed base.
Moreover, make sure you are considering the facts to avoid any type of mistake. Thus, you will be successful in installing the shed base. Please, do inform us about your experience and the outcome.
See you, buddy.